Tools
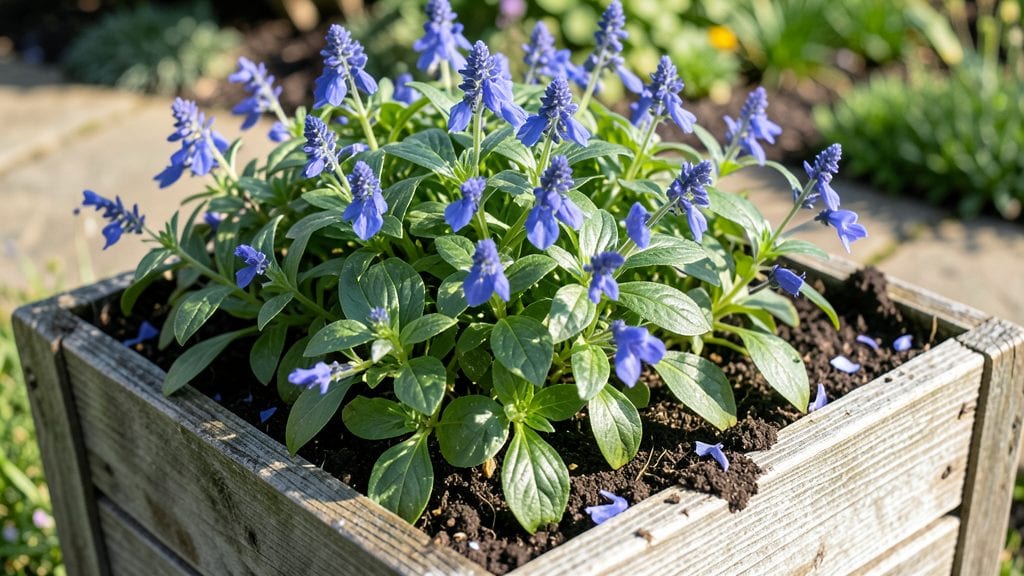
My first box garden plan started with a 2-foot-tall wooden crate and a stubborn basil plant that refused to thrive in the ground. That failure became the inspiration for this vertical edible oasis—where even a tiny balcony can grow enough herbs, greens, and flowers to feel like a real garden.
The key isn’t fancy materials; it’s smart layering of plants, drainage that actually works, and a layout that maximizes every inch without looking cluttered.
You’ll need just three core things: containers with drainage holes (wooden boxes, fabric grow bags, or even repurposed gutters), lightweight potting mix designed for containers, and plants that fit your space’s sunlight.
Herbs like thyme and oregano thrive in shallow boxes, while tomatoes and peppers need deeper pockets—think of it like apartment living, but for plants. Most setups take under an hour to assemble, and the results? Fresh cilantro in July, basil that never bolts, and flowers that attract pollinators like magnets.
The magic happens when you mix edibles with aesthetics—bright marigolds between your lettuce, nasturtiums trailing over the edges, or chives tucked between strawberries. By midsummer, you’ll have a harvestable vertical garden that smells like a farmer’s market and tastes like victory.
The best part? No bending over, no weeds, and no excuses for not growing what you love.
Works for city balconies, rural porches, or even indoors near sunny windows. Whether you’re starting with one box or planning a full wall of planters, the same principles apply—just scale the containers and adjust the plant spacing. Let’s build yours step by step.
📚 In This Guide
- What you need
- Instructions
- Tips and common mistakes
- Wrapping up and next steps
What you need
- ● Garden box or planter: 1–2 sturdy, weather-resistant containers (12"–18" deep, 12"–24" wide). Pro tip: Ensure they have drainage holes!
- ● High-quality potting soil: 5–10 gallons (depending on box size). Use a well-draining, organic blend.
- ● Compost or organic fertilizer: 1–2 cups per box to boost nutrients.
- ● Edible plants: Seedlings or seeds for herbs (basil, mint), greens (lettuce, spinach), or compact veggies (cherry tomatoes, peppers). Start with 3–5 plants per box.
- ● Gloves & trowel: 1 pair and 1 small trowel for planting.
- ● Watering can or hose with nozzle: 1 (gentle watering = happy plants!).
- ○ Mulch (optional): Straw or shredded leaves to retain moisture.
- ○ Trellis or stakes (optional): For climbing plants like cucumbers or beans.
- ○ Drip irrigation kit (optional): For hands-off watering.
- ● Sunlight spot: 6+ hours of direct sun daily (adjust plants for shade if needed).
- ● Access to water: Nearby hose or water source.
- ● Basic knowledge: Read plant tags for spacing/light needs (or ask a local nursery!).
Step-by-Step instructions for building your vertical edible box garden
Let’s turn that empty wall into a thriving vertical garden with fresh herbs and veggies.
Choose and Assemble Your Box Garden Structure
Start with a sturdy, weather-resistant box—either pre-made or built from cedar planks and corner brackets. The structure should be at least 12 inches deep to accommodate root growth, with multiple pockets or shelves spaced 6-8 inches apart. If using a tiered design, ensure each level has proper drainage holes to prevent waterlogging.
I like to line the bottom of each pocket with landscape fabric to hold soil while allowing excess water to drain freely. Secure the fabric with staples or small nails, then fill each pocket with 3-4 gallons of potting mix (never garden soil—it compacts too much). Leave about 1 inch of space at the top to avoid spillage when watering.
Select and Plant Your Edible Plants
For a 4-pocket box garden, choose a mix of herbs and shallow-rooted veggies like lettuce, spinach, or cherry tomatoes. Start with 4-6 seedlings (or seeds) per pocket, spacing them 4-6 inches apart depending on the plant’s mature size. Herbs like basil, thyme, and parsley thrive in tight spaces, while leafy greens grow well in deeper pockets.
Plant each seedling at the same depth it was in its nursery pot—burying too deep can suffocate roots, while planting too shallow leaves stems exposed. After placing each plant, firm the soil gently around the base to eliminate air pockets. Water lightly immediately to help roots settle into their new home.
☀️ Step 3: Position for Maximum Sunlight and Watering
Place your box garden in a location that receives at least 6 hours of direct sunlight daily. South-facing walls are ideal, but if that’s not possible, supplement with a grow light for 12-14 hours per day during shorter days. Without enough light, plants will grow leggy and produce fewer leaves or fruits.
Water deeply 2-3 times per week, ensuring the soil stays moist but not soggy. I like to use a watering can with a narrow spout to target each pocket without oversaturating the entire structure. Check soil moisture by sticking your finger 1 inch deep—if it feels dry, it’s time to water. Mulch the surface with 1 inch of straw to retain moisture and suppress weeds.
✂️ Step 4: Maintain and Harvest for Continuous Growth
Fertilize every 4-6 weeks with a balanced liquid fertilizer to keep plants thriving. Prune leggy stems and yellowing leaves regularly to encourage bushier growth and better air circulation. For herbs like basil, pinch off the top sets of leaves to promote fuller plants—this ensures you get more harvests over time.
Harvest leaves and herbs as needed, but never take more than one-third of the plant at once. For example, with basil, snip individual leaves rather than cutting entire stems. With leafy greens, harvest outer leaves first to allow the center to keep growing. You’ll see new growth within 7-10 days after a light harvest, signaling it’s time to pick again.
⏰ Step 5: Seasonal Adjustments for Year-Round Success
In spring and fall, when temperatures fluctuate, monitor plants closely for signs of stress like wilting or yellowing. If frost threatens, move the box garden indoors near a sunny window or under grow lights. During summer, increase watering frequency to every other day if temperatures exceed 85°F, as soil dries out faster in direct sun.
In winter, reduce watering to once a week unless you’re growing cold-hardy herbs like parsley or cilantro. If your box garden is outdoors, protect it with a frost cloth on chilly nights. With proper care, your vertical edible oasis will keep producing fresh, homegrown food for months—even in the smallest of spaces.
Tips & tricks for perfect vertical edible box gardens
A few simple strategies will help your vertical garden thrive year-round without taking over your space.
Depth and Drainage Matter: The 12-inch depth in Step 1 is crucial for root growth, especially for deeper-rooted plants like cherry tomatoes. If you're using a pre-made kit, verify the depth before filling with soil. For drainage, I recommend adding a layer of small pebbles or broken terracotta pots at the very bottom of each pocket before the landscape fabric. This creates a secondary drainage layer that prevents water from pooling at the roots.
Light is Everything: The 6 hours of direct sunlight mentioned in Step 3 is a minimum, not a maximum. If possible, aim for 8-10 hours, especially for leafy greens and tomatoes. For indoor setups, position your grow lights 6-12 inches above the plants and adjust the 12-14 hour light cycle to match your plants' needs—leafy greens often do well with 14-16 hours, while herbs like basil prefer 12 hours.
Soil Selection Strategy: While the instructions specify potting mix, I've found that adding a handful of compost or worm castings to each pocket creates a nutrient-rich environment that reduces the need for frequent fertilizing. This is particularly helpful in Step 4 when you're fertilizing every 4-6 weeks. Just mix it in thoroughly with the potting mix before planting to avoid creating hot spots that can burn roots.
Seasonal Transition Tips: When adjusting for summer heat at 85°F or higher, I move my watering schedule to early morning to prevent evaporation and fungal growth. For winter protection, a simple frost cloth draped over the entire structure works wonders—just make sure it's secured tightly to prevent wind damage. You can also add a small LED grow light on a timer for 4-6 hours during the shortest winter days to supplement natural light.
Pro Tips for Box Garden Plan
- A few simple strategies will help your vertical garden thrive year-round without taking over your space.
- Depth and Drainage Matter: The 12-inch depth in Step 1 is crucial for root growth, especially for deeper-rooted plants like cherry tomatoes.
- Light is Everything: The 6 hours of direct sunlight mentioned in Step 3 is a minimum, not a maximum.
Frequently asked questions
Got questions about creating your own box garden plan?
You’re not alone! Here are answers to the most common queries to help you grow confidently—whether you’re a beginner or a seasoned green thumb.
What’s the best time of year to start a box garden?
For most climates, spring (after the last frost) is ideal—soil warms up, and seedlings thrive. In warmer zones, fall works too! Check your local frost dates and plant cool-season crops (like lettuce) earlier if needed. Pro tip: Use season extenders (like row covers) to push boundaries!
How deep should my box garden be?
Aim for 10–12 inches deep—enough for root systems of most veggies, herbs, and shallow-rooted fruits (like strawberries). Deeper boxes (18+ inches) let you grow potatoes or carrots, but they’ll need sturdy frames. Lightweight tip: Use recycled materials (like pallets or cinder blocks) to save weight!
How often should I water a box garden?
Check soil moisture daily—top inch should feel dry before watering. Box gardens dry out faster than ground plots, so drip irrigation or self-watering systems are lifesavers. Water early morning to reduce evaporation. Overwatering alert: Yellow leaves? You might be drowning your plants!
Can I grow fruits or just veggies in a box garden?
Compact-friendly fruits
like dwarf citrus, blueberries, or strawberries thrive in boxes. Even cherry tomatoes or peppers (with trellises) work wonders. Just ensure your box has drainage holes and rich, well-draining soil. Bonus: Herbs (basil, thyme) add flavor and space efficiency!
How do I keep pests out of my box garden?
Prevention is key:
- Physical barriers: Row covers or chicken wire for critters.
- Natural deterrents: Plant marigolds or garlic nearby.
- Regular checks: Remove pests by hand (yes, it’s gross but effective!).
What if my box garden looks messy by the end of the season?
No worries! Winterize it:
- Pull out spent plants (compost them!).
- Add a thick layer of mulch or straw to protect roots.
- Store your box in a dry place if possible.
Wrapping up and next steps
Creating a box garden plan is your ticket to a thriving, space-saving edible oasis—no matter how small your yard or balcony! 🌱 With the right materials, a little creativity, and consistent care, you’ll harvest fresh herbs, veggies, or flowers in no time.
This project isn’t just practical; it’s a rewarding way to connect with nature and enjoy homegrown goodness.
Ready to turn your vision into reality? Start small—pick one or two plants to begin—and watch your confidence (and garden!) grow. Grab your tools, follow your plan, and enjoy the satisfaction of a flourishing vertical garden! 🌿