Landscaping
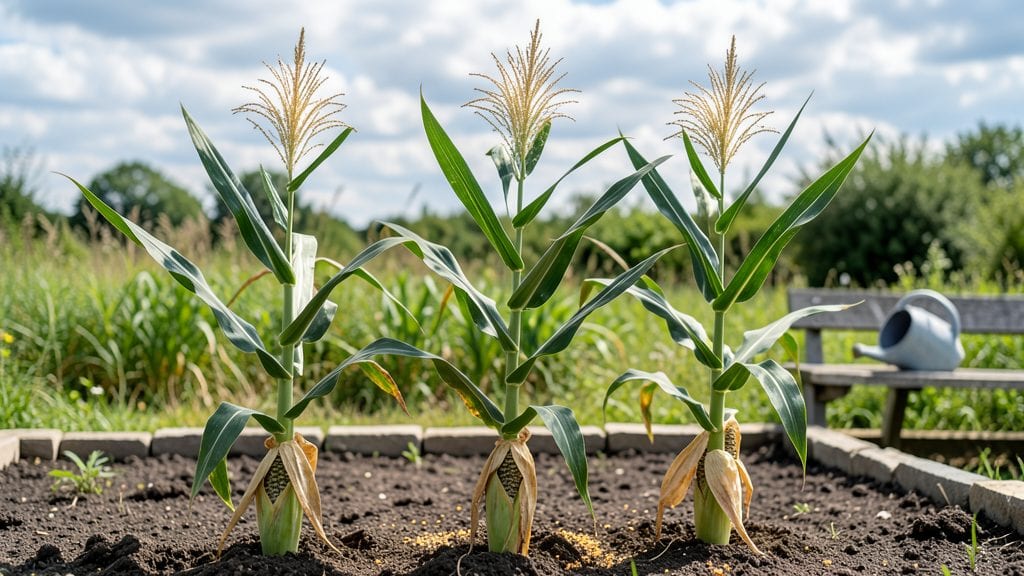
My corner fence garden began as an eyesore, but the right perennials turned it into a lush, private retreat that blooms from spring through frost—no matter how tight the space. 🌿 space or how much sun (or shade) it gets.
The secret lies in mixing fast-growing climbers like clematis with sturdy shrubs such as hydrangeas, all anchored by low-maintenance ground covers. You’ll need a sturdy trellis or lattice for vertical support, but the real game-changer is choosing plants that handle your corner’s quirks—whether it’s morning sun or afternoon shade.
Most people overlook drainage, but a slight slope or gravel base keeps roots happy year-round.
By mid-summer, you’ll have a wall of blooms that blocks nosy neighbors and attracts pollinators. The best part? These perennials come back bigger every year, turning a forgotten corner into your garden’s star feature. Let’s pick the perfect plants for your space.
Works for urban backyards, suburban side yards, or even tight patio corners—just adjust the plant mix to your light and soil. Here’s how to make it happen without the headaches.
📚 In This Guide
- What you need
- Instructions
- Tips and common mistakes
- Wrapping up and next steps
What you need
- ● Main Planting Materials: Perennial plants (e.g., Hydrangeas, Boxwoods, Azaleas, or Holly) – 6–12 plants, depending on fence length and desired density.
- ● Mulch (shredded bark, pine straw, or cypress) – 2–3 bags (2–3 cubic feet each) to retain moisture and suppress weeds.
- ● Slow-release fertilizer (10-10-10 or organic option) – 1 bag to nourish roots.
- ● Soil & Amendments: Topsoil (if needed) – 1–2 cubic yards for poor or rocky soil.
- ○ Compost or peat moss (optional) – 1–2 bags to improve drainage and fertility.
- ● Tools & Hardware: Garden shovel or spade – 1 for digging.
- ● Hand trowel – 1 for precision planting.
- ● Pruners (bypass or felco) – 1 pair for shaping.
- ● Measuring tape – 1 to plan spacing.
- ● Garden hose with nozzle – 1 for watering.
- ○ Wheelbarrow – 1 for hauling materials (optional but helpful!).
- ● Knee pads – 1 pair for comfort.
- ○ Optional Extras: Drip irrigation kit – For low-maintenance watering.
- ● Edging tools – To create clean borders.
- ● Decorative stakes or labels – For plant identification.
- ● Outdoor string lights – For ambiance (because why not?).
- ● ✅ Measure your fence – Note length and height to calculate plant quantities.
- ● ✅ Test your soil – A simple pH test (kit or local extension service) ensures your plants thrive.
- ● ✅ Check sunlight exposure – Most privacy perennials need 4–6 hours of sun daily.
- ● ✅ Plan your layout – Sketch a rough design for spacing (aim for 2–3 feet apart for full coverage).
- ● ✅ Clear the area – Remove weeds, rocks, or debris from the planting zone.
Step-by-Step instructions for creating a corner fence garden
Here's how to build a lush, year-round privacy screen that grows stronger every season.
🌱 Step 1: Test Soil and Prepare the Space
Dig a 12-inch deep trench along your fence line to assess drainage and soil quality. You want roots to spread freely without sitting in water. If your soil feels compacted or clay-heavy, mix in 2-3 inches of compost to improve aeration and nutrient retention. This is the foundation—skimp here, and your plants will struggle later.
Measure the space carefully. For a 4-foot tall screen, plan on plants spaced 18-24 inches apart to allow mature growth without overcrowding. Mark planting spots with small stakes to keep your layout straight. A slight curve along the fence looks natural, but keep the radius gentle—too tight, and the center plants will get shaded out.
🪴 Step 2: Plant Deep-Rooted Perennials for Structure
Start with 3-4 plants per 4-foot section of fence, choosing a mix of evergreens like boxwood (Buxus) or holly (Ilex) for year-round coverage. These act as your "backbone" plants—plant them first, then fill gaps with flowering perennials like hydrangeas or butterfly bush for seasonal color.
Dig holes twice as wide as the root ball but no deeper—this prevents burying the stem too deeply, which causes rot. Place each plant so the top of the root ball sits 1 inch above soil level. Water deeply to settle the soil, then add a 2-inch layer of mulch around (not touching) the stems to retain moisture and suppress weeds. Here's the thing—mulch now prevents you from having to water twice as much later.
☀️ Step 3: Layer for Season-Long Interest
Fill the gaps between your structural plants with 3-5 perennials per section, mixing heights and bloom times. For example, plant shorter varieties (18-24 inches) like coral bells (Heuchera) in front, then medium-height (3-4 feet) shrubs like dwarf ninebark (Physocarpus) behind them. This creates depth and ensures something's always blooming—spring bulbs, summer perennials, and fall asters.
Water each new layer immediately after planting. You'll see the soil settle around roots, filling gaps that would otherwise dry out. Avoid wetting the foliage—aim for the base. This prevents fungal diseases that thrive in damp leaves. After the first week, water deeply every 3-4 days until new growth appears, then taper to once a week once established.
✂️ Step 4: Prune for Shape and Health
Wait until late winter or early spring to prune back any dead or overgrown stems. Use clean, sharp shears to make cuts at a 45-degree angle just above a leaf node. This encourages bushier growth. For flowering shrubs, prune right after they bloom—waiting too long removes next year's flowers. You'll notice new shoots emerging within 3-4 weeks of pruning, signaling the plant is recovering.
Mulch again in early spring to protect roots from temperature swings. A 3-inch layer of organic mulch (like shredded bark) also feeds the soil as it breaks down. This is where many gardeners go wrong—they forget to refresh mulch annually, leaving roots exposed to heat or cold. Check mulch depth every spring before new growth starts.
💧 Step 5: Maintain Through the Seasons
After the first year, your garden will need minimal care. Water deeply once a week during dry spells, aiming for 1 inch of water per week. You'll know you're doing it right when the soil feels moist 2 inches down—not soggy, just damp. Fertilize lightly in early spring with a balanced 10-10-10 formula to encourage lush growth without overfeeding.
Watch for pests like aphids or spider mites, which love tender new growth. Spray affected areas with neem oil or insecticidal soap at the first sign of trouble. A healthy privacy screen should require no more than 2-3 treatments per year. If you see yellowing leaves, it's usually a sign of overwatering—let the soil dry out slightly before watering again. This is the moment that matters: correcting early prevents root rot.
Tips & tricks for perfect corner fence garden
A few simple strategies will help you create a thriving, year-round privacy screen that grows stronger every season.
The Foundation Matters: In Step 1, that 12-inch deep trench isn't just about drainage—it's about giving roots room to establish. I've seen too many gardens fail because people skipped this step. Use a shovel to loosen the soil all the way down, breaking up any compacted layers. If your soil feels like concrete, mix in that 2-3 inches of compost thoroughly—don't just sprinkle it on top. This creates the perfect environment for roots to spread.
Planting Depth is Critical: When you're placing those 3-4 structural plants in Step 2, remember the 1-inch rule above soil level. Too deep, and you'll suffocate the stems; too shallow, and they'll dry out. I always use my finger to check—if the top of the root ball sits at about knuckle level, you're golden. After planting, water deeply until you see water running out of the bottom of the hole. This settles the soil and eliminates air pockets around roots.
Watering Wisdom: The instructions mention watering every 3-4 days for the first week, but here's what nobody tells you—morning is the best time. Watering in the early morning gives plants time to absorb moisture before the heat of the day. I've noticed my plants establish faster when watered this way, and you'll see fewer fungal issues. After the first week, let the soil dry slightly between waterings—you should be able to push your finger 2 inches down and feel dampness, not wetness.
Pruning Pro Tip: That 45-degree angle cut in Step 4 isn't just for looks—it creates a larger surface area for water absorption and new growth. Use clean shears and make the cut just above a leaf node where you want new growth to emerge. I always prune on a dry day to prevent spreading diseases. And remember, flowering shrubs need that immediate post-bloom prune—waiting too long means you'll sacrifice next year's flowers. You'll see those new shoots within 3-4 weeks if you've done it right!
Pro Tips for Corner Fence Garden
- A few simple strategies will help you create a thriving, year-round privacy screen that grows stronger every season.
- The Foundation Matters: In Step 1, that 12-inch deep trench isn't just about drainage—it's about giving roots room to...
- Planting Depth is Critical: When you're placing those 3-4 structural plants in Step 2, remember the 1-inch rule above...
Frequently asked questions
Got questions about creating a lush, year-round corner fence garden? You’re not alone! Here are some of the most common queries—and their practical solutions—to help you design with confidence.
What’s the best time of year to plant a corner fence garden?
For perennial plants (the stars of your fence garden!), aim for early spring or fall when temperatures are mild. This gives roots time to establish before extreme heat or cold. If you’re planting shrubs or taller perennials, fall is ideal—they’ll settle in before winter. Pro tip: Avoid planting in summer heat or deep freeze!
How much does a corner fence garden cost to install?
Costs vary based on plant selection and size, but budget $20–$100 per linear foot for materials (plants, soil amendments, mulch). Budget-friendly tip: Start with smaller perennials like lavender or Russian sage ($5–$15 each) and expand over time. DIY installation saves labor costs, while professional planting runs $15–$30/hour.
Can I use annuals instead of perennials for a corner fence garden?
Yes! Annuals like cleome, sunflowers, or sweet peas add quick color but require yearly replanting. For a low-maintenance look, perennials (e.g., hydrangeas, butterfly bush) are winners—they return every year with minimal effort. Hybrid option: Plant perennials at the base and annuals along the top for seasonal variety!
How do I keep pests away from my corner fence garden?
Prevent pests with healthy soil, proper spacing, and mulch. Choose resistant varieties (e.g., ‘Annabelle’ hydrangeas for mildew resistance). Natural remedies: Neem oil for aphids, companion planting (e.g., marigolds deter pests), and regular pruning to improve airflow. Avoid overwatering—it invites slugs and fungus!
How long until my corner fence garden looks full and private?
Most perennials take 1–3 years to fill out, depending on the plant. Fast growers like bamboo or privet can create privacy in 1–2 seasons, while slower shrubs (e.g., boxwood) may need 3+ years. Speed hack: Layer plants with varying heights—tall back, medium middle, and low front—for instant visual density!
Wrapping up and next steps
A corner fence garden isn’t just about filling empty space—it’s about creating a lush, private retreat that blooms season after season. With the right perennials, you’ll enjoy low-maintenance beauty, year-round privacy, and a thriving outdoor oasis that feels like a natural extension of your home. 🌿
Ready to transform that overlooked corner? Start by sketching your design, gathering your plants, and diving in—your future self (and your neighbors!) will thank you. Happy gardening!