How To
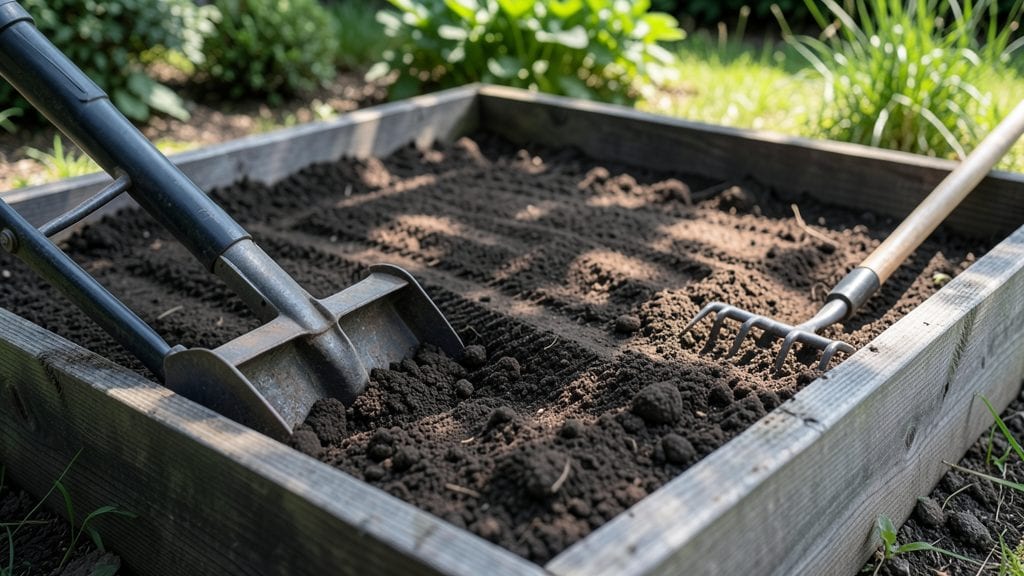
Tilling raised garden beds the right way transforms compacted soil into a lush, weed-free growing medium—without the damage of deep tilling. 🌱 I’ve learned that aggressive turning disrupts soil structure, but the no-dig method preserves earthworms and organic matter while breaking up weeds naturally.
The key is working just deep enough to loosen the top 6 inches without disturbing the lower layers where roots and microbes thrive.
You’ll need a broadfork or sturdy garden fork to aerate without inverting the soil, plus a tarp to smother weeds before tilling. For best results, start in early spring when the soil is damp but not soggy—this prevents clumping and makes the process cleaner.
The goal isn’t to create fluffy soil but to create pockets for roots and improve drainage while keeping the soil’s natural layers intact.
After tilling, top-dress with 1–2 inches of compost to feed soil life and lock in moisture. This method cuts down on weeds by 70% while improving drainage and root growth.
You’ll notice fewer annual weeds popping up and plants establishing faster because the soil stays loose at the surface without becoming compacted below.
For experienced gardeners, add a layer of cardboard or thick mulch before tilling to suppress perennial weeds. Beginners should focus on consistency—tilling once a year in early spring is enough to maintain structure without overworking the soil.
The payoff? A garden bed that stays weed-free with less effort and healthier plants year after year.
📚 In This Guide
- What you need
- Instructions
- Tips and common mistakes
- Wrapping up and next steps
What you need
- ● Cardboard or thick newspaper – 2–3 layers per bed (to smother weeds). Use uncoated, non-glossy paper only.
- ● Compost or well-aged manure – 2–4 inches per bed (depending on bed size). Aim for high-quality, weed-free compost.
- ● Mulch (straw, wood chips, or leaves) – 2–3 inches to top off the bed after tilling.
- ● Garden fork or broadfork – For aerating soil without turning it over (essential for no-dig!).
- ● Rake (bow rake or leaf rake) – To smooth out the bed and remove debris.
- ● Gloves – Heavy-duty work gloves to protect your hands from prickles and dirt.
- ● Water source (hose or watering can) – To dampen cardboard/newspaper before adding compost.
- ● Biochar or coconut coir – Mix into compost for extra nutrients and moisture retention.
- ● Compost tea or mycorrhizal fungi – Boosts soil microbes for healthier plants.
- ● Kneeling pad or small stool – Because gardening should be comfortable!
- ● Soil test kit – Check pH and nutrient levels before planting.
- ● Wheelbarrow or tarp – For hauling compost and mulch efficiently.
Step-by-Step instructions for preparing raised beds without tilling
Skip the backbreaking work—this no-dig method keeps soil fluffy and weed-free with minimal effort.
🌱 Step 1: Clear the Area and Remove Existing Vegetation
Start by pulling any weeds or grass from the bed area using a garden fork or your hands. I like to work in small sections to avoid missing anything. Lay down a thick layer of cardboard (no glossy paper—it won’t break down) over the entire bed area, overlapping edges by 2-3 inches. This smothers weeds while breaking down into the soil over time.
For stubborn weeds with deep roots, like dandelions, use a broadfork to loosen the soil first. This prevents regrowth and makes the cardboard job easier. Cover the cardboard with 2-3 inches of compost—this is where the magic happens. The cardboard blocks light, killing weeds, while the compost feeds soil life and improves structure.
💧 Step 2: Layer Compost and Organic Matter
Spread the 2-3 inches of compost evenly over the cardboard, smoothing it out with a rake. Add a thin layer of straw or leaves (about ½ inch thick) on top to help retain moisture and prevent crusting. This layering mimics natural decomposition and builds soil fertility without disturbing the underlying structure.
If your bed is new, you can skip the cardboard and start with 6-8 inches of compost and organic matter right away. For existing beds, just top-dress with 2-3 inches of fresh compost each season. The key is consistency—this method relies on gradual improvement over time, not one-time tilling.
☀️ Step 3: Water and Let the Soil Settle
Give the bed a deep watering right after layering to help the compost break down faster. You’ll want the top 4-6 inches of soil to feel evenly moist—like a damp sponge. This encourages microbial activity, which turns organic matter into rich, crumbly soil. Avoid walking on the bed until the surface feels firm, usually within 1-2 days.
Here’s the thing—don’t rush it. The first few weeks are about letting nature do the work. You’ll see worms and other beneficial creatures move in as the soil warms up. These guys are your allies, breaking down the compost and creating air pockets for roots. If you see a few weeds poking through, just pull them before they seed.
✂️ Step 4: Plant Directly Into the Prepared Soil
Once the layers have settled (usually 2-4 weeks), you’re ready to plant. The soil should look dark, crumbly, and full of life. Push seeds or transplants into the soil just deep enough to cover their roots—no need to dig holes. For seeds, aim for a depth of about twice their diameter.
Water gently after planting to settle the soil around roots. You’ll notice fewer weeds popping up because the cardboard layer blocks light, and the compost keeps the soil loose and inviting for your plants. This method works especially well for vegetables, herbs, and flowers that thrive in well-drained, nutrient-rich soil.
🪴 Step 5: Maintain with Mulch and Regular Top-Dressing
After planting, spread a 1-2 inch layer of mulch (like straw or wood chips) over the soil surface. This keeps moisture in, suppresses weeds, and adds more organic matter as it breaks down. Every 3-4 months, add another ½ inch layer of compost to the surface—this feeds your plants without disturbing their roots.
Real talk: You’ll save time and energy because you’re not fighting compacted soil or weeds. Over time, the bed will become lighter, fluffier, and more productive. Just keep adding compost, and your soil will keep improving year after year.
Tips & tricks for perfect no-dig raised beds
Here’s what I’ve learned after years of avoiding tilling—these tricks make the no-dig method even more effective (and easier).
Cardboard Selection Tip: For Step 1, use only plain, uncoated cardboard—no glossy paper or cardboard with plastic coatings. These won’t break down and can actually suffocate soil life. Remove any tape or staples first. I’ve found that phone books, cereal boxes, and plain cardboard boxes work best.
Compost Quality Matters: In Step 2, prioritize well-aged compost that’s broken down but still has texture. Fresh manure or overly wet compost can create heat pockets that burn plant roots. I like to mix my compost with a bit of finished compost tea to introduce beneficial microbes right away. For new beds, that 6-8 inch layer of compost is your foundation—don’t skimp!
Timing for Planting: The 2-4 week settling time in Step 4 is crucial. You’ll know it’s ready when the surface looks dark and crumbly (not like fresh compost) and worms are actively moving through it. If you’re impatient, you can plant after just 2 weeks, but the soil will be even better after 4 weeks. I’ve learned the hard way that rushing this step leads to poor root establishment.
Mulch Strategy: For Step 5, choose your mulch based on what you’re growing. Straw works well for most vegetables, while wood chips are better for perennials. I’ve found that adding a thin layer of leaf mold (shredded leaves that have decomposed) under the mulch helps retain moisture even better. Just remember—keep that mulch 1-2 inches thick to really suppress weeds.
Pro Tips for Till Raised Garden Beds
- Here’s what I’ve learned after years of avoiding tilling—these tricks make the no-dig method even more effective (and...
- Cardboard Selection Tip: For Step 1, use only plain, uncoated cardboard—no glossy paper or cardboard with plastic coa...
- Compost Quality Matters: In Step 2, prioritize well-aged compost that’s broken down but still has texture. Fresh manu...
Frequently asked questions
Got questions about tilling your raised garden beds the no-dig way? You’re not alone! Here are answers to the most common queries—so you can get back to growing with confidence.
Do I really need to till raised beds if I’m using the no-dig method?
The no-dig method skips traditional tilling to preserve soil structure and microbial life. Instead, you add compost on top and let worms do the work! Tilling can disrupt this ecosystem, so focus on layering organic matter (like straw or leaves) to enrich the soil naturally. Pro tip: If your bed feels compacted, a fork can gently loosen the top 2–3 inches without harming the soil.
When’s the best time to till (or prep) raised beds?
For no-dig beds, timing is flexible! Start in early spring (after the last frost) or late fall to layer compost and mulch. Avoid tilling when soil is soggy—wait until it’s damp but not muddy. If you’re troubleshooting weeds, tackle them in early spring before they spread seeds.
What if my raised bed has a lot of weeds? Can I still use the no-dig method?
No-dig thrives on smothering weeds. Lay down cardboard or thick newspaper (no glossy ink!), then top with 4–6 inches of compost or straw. Weeds will decompose over time, and your soil will stay weed-free with minimal effort. Bonus: This also suppresses future weed growth!
Can I till a raised bed by hand without a rototiller?
Yes! A broadfork or sturdy garden fork works great for no-dig prep—just stab it into the soil and wiggle to loosen it without flipping it over. For stubborn spots, a garden hoe can chop weeds at the surface. Pro tip: Work in small sections to avoid compacting the soil again.
Will tilling raised beds in hot weather harm my plants?
Tilling in extreme heat can dry out soil and stress plants, but no-dig minimizes this risk. If you must prep beds in summer, do it early in the morning or late evening to avoid heat stress. Water thoroughly before and after adding compost to keep the soil moist. Mulch heavily to retain moisture and cool the roots!
How often should I “till” (or refresh) a no-dig raised bed?
No-dig beds need refreshing once a year—top with 1–2 inches of compost or aged manure in spring or fall. Unlike traditional tilling, you’re not disturbing the soil, just replenishing nutrients. Watch for: Signs of depletion (pale plants, slow growth) or visible weed resurgence.
Wrapping up and next steps
Tilling raised garden beds the no-dig way is all about preserving soil health while keeping weeds at bay—no heavy machinery needed! 🌱 By layering organic matter and using simple tools like a broadfork or hands-on aeration, you’re setting your garden up for long-term success with minimal effort.
The key? Patience and consistency—your soil will thank you with rich, fertile beds year after year.
Ready to transform your garden? Start small with one bed, document your progress, and soon you’ll be reaping the rewards of lush, weed-free harvests. Happy gardening! 🌿