Light Requirements
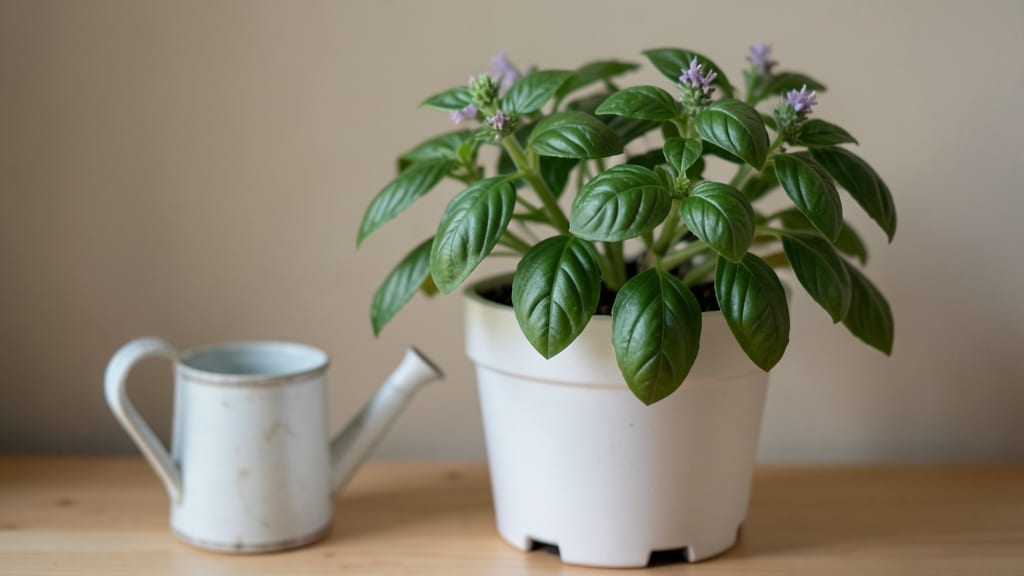
My indoor kitchen gardens thrive year-round because I stopped fighting the light and started working with it—turning even dim corners into productive growing spaces, and I’ll show you exactly how to maximize every inch. a sunny window or just a countertop to work with.
Start with the plants that fit your space: dwarf varieties of basil and thyme take up almost no room, while microgreens and leafy greens like kale grow fast in shallow trays. For lighting, a basic LED grow bulb on a timer can replace sunlight completely—no fancy setup required.
The key is keeping everything within arm’s reach so you actually use what you grow.
By the end of the season, you’ll be harvesting fresh herbs for cooking, crisp microgreens for salads, and even compact veggies like bush beans—all without stepping outside. The best part? Your garden will look as intentional as it is functional, blending seamlessly into your kitchen decor.
Works for apartments, tiny kitchens, or even a single windowsill. Let’s get those greens growing where you cook!
📚 In This Guide
- What you need
- Instructions
- Tips and common mistakes
- Wrapping up and next steps
What you need
- ● Containers: 4–6 shallow pots (6–8" diameter) with drainage holes (or a single large tray with dividers)
- ● Growing Medium: 2–3 bags of high-quality potting mix (sterilized, seed-starting blend preferred)
- ● Seeds or Seedlings: Herbs: 3–5 basil, parsley, or mint seeds (or 1–2 starter plants)
- ● Greens: 1 pack of microgreen seeds (e.g., arugula, kale) (or 2–3 lettuce seedlings)
- ● Grow Lights: 1 full-spectrum LED grow light (12–15W, adjustable height) (or a sunny south-facing windowsill)
- ● Watering Can: 1 small spray nozzle can (or a watering bottle with a fine mist)
- ● Fertilizer: 1 bottle of liquid organic fertilizer (balanced 10-10-10 or fish emulsion)
- ● Self-watering planters (for hands-off care)
- ● Humidity dome or plastic wrap (to retain moisture for seedlings)
- ● Soil moisture meter (to avoid over/under-watering)
- ● Small fan (for better air circulation)
- ● Decorative trays or labels (to organize and style your setup!)
Step-by-step instructions for designing your indoor kitchen garden
Here's how to create a thriving indoor kitchen garden that maximizes sunlight and space for fresh greens year-round.
Assess Your Kitchen's Natural Light
Start by evaluating your kitchen's light sources. South-facing windows receive the most light, while north-facing windows offer the least. I like to use a light meter app to measure intensity—aim for 1,000-2,000 foot-candles during daylight hours. Place a notebook near the window for a week to track how many hours of direct sunlight your space gets.
If you have only 2-4 hours of direct light, focus on shade-tolerant greens like spinach or lettuce. For 4-6 hours, you can grow more light-demanding plants like basil or parsley. Mark the sunniest spots with removable tape—these will be your prime planting zones. This ensures you're using the best possible locations for your greens.
Organize Your Space Vertically and Horizontally
Use vertical space to maximize sunlight exposure. Install shelving units near windows to create tiers for different plant heights. Place taller plants like herbs on the bottom shelf and shorter greens like lettuce on higher shelves. This arrangement prevents shading and allows all plants to access light.
For horizontal space, use rolling plant stands that you can move throughout the day to follow the sun's path. I place mine on casters so I can adjust their position every few hours. Keep a small notebook handy to track which plants thrive in each location—this helps you refine your layout over time.
Choose the Right Containers and Layout
Select containers with drainage holes to prevent root rot, and opt for sizes that match your greens' growth habits. Shallow trays work well for leafy greens, while deeper pots suit herbs with longer roots. Arrange containers in a way that allows airflow between plants—this reduces humidity-related diseases.
Group plants with similar light and water needs together. For example, place basil and parsley near the window, while spinach and kale can be slightly farther back. Leave 6-8 inches of space between containers to accommodate growth and easy maintenance. This organized approach keeps your garden healthy and manageable.
Implement Supplemental Lighting Strategically
If your kitchen lacks sufficient natural light, supplement with LED grow lights positioned 6-12 inches above plants. Use a timer to ensure 12-14 hours of light daily, mimicking natural daylight cycles. Place the light closer to plants in winter when daylight is shorter, and raise it slightly in summer.
Monitor plant response closely—if leaves turn pale or stretch toward the light, adjust the height or duration. I like to rotate containers weekly so all sides receive even exposure. This prevents lopsided growth and ensures your greens stay robust and productive.
Maintain Consistent Care for Year-Round Success
Water your greens when the top inch of soil feels dry, using room-temperature water to avoid shocking the roots. Mist leaves occasionally to increase humidity, especially in dry indoor environments. Fertilize every 4-6 weeks with a balanced, water-soluble fertilizer to support steady growth.
Rotate your containers quarter-turn weekly to ensure even sunlight exposure. Prune regularly to encourage bushier growth—pinch back leggy stems and harvest outer leaves first. This keeps your garden compact and productive. With consistent care, you'll enjoy fresh greens straight from your kitchen all year long.
Tips & tricks for perfect indoor kitchen gardens
Creating an indoor kitchen garden that thrives year-round takes a little strategy—here are the key insights I’ve learned to maximize sunlight and space for your greens.
Light Measurement is Everything: Don’t rely on guesswork when assessing your kitchen’s light. A light meter app is your best friend—aim for that 1,000-2,000 foot-candles range during daylight hours. If your space falls short, consider supplementing with LED grow lights positioned 6-12 inches above plants to mimic natural daylight cycles. I’ve found that plants exposed to 12-14 hours of light daily grow significantly faster and stay healthier.
Vertical Space is Your Ally: When organizing your shelves, think about plant heights and sunlight access. Place taller herbs like basil or parsley on the bottom shelf, where they won’t block shorter greens like lettuce or spinach on the upper tiers. This arrangement ensures every plant gets its fair share of light without competing for space. Trust me, a little vertical planning makes all the difference in keeping your garden thriving.
Container Spacing Matters: Leaving 6-8 inches of space between containers isn’t just about aesthetics—it’s about airflow and disease prevention. Crowded plants trap humidity, which can lead to mold or fungal issues. I also recommend rotating your containers a quarter-turn weekly to ensure even sunlight exposure on all sides. This small habit keeps your greens growing uniformly and prevents leggy, stretched-out plants.
Supplemental Lighting Hacks: If you’re using LED grow lights, don’t forget to adjust their height based on the season. Closer in winter and slightly higher in summer ensures consistent light exposure. I also like to use a timer to automate the lighting schedule—this ensures your plants get that critical 12-14 hours of light without you having to remember to turn them on and off every day.
Pro Tips for Indoor Kitchen Gardens
- Creating an indoor kitchen garden that thrives year-round takes a little strategy—here are the key insights I’ve lear...
- Light Measurement is Everything: Don’t rely on guesswork when assessing your kitchen’s light. A light meter app is yo...
- Vertical Space is Your Ally: When organizing your shelves, think about plant heights and sunlight access. Place talle...
Frequently asked questions
Got questions about indoor kitchen gardens? You’re not alone!
Here are answers to the most common queries to help you grow fresh greens with confidence—no green thumb required.
How much sunlight do indoor kitchen gardens really need?
Most leafy greens thrive with 4–6 hours of bright, indirect light daily. If natural light is limited, supplement with full-spectrum LED grow lights (6–8 inches above plants) for 12–14 hours/day. South-facing windows or a sunny kitchen counter work best for sun-loving herbs like basil or cilantro.
How quickly can I expect to harvest greens from an indoor garden?
Fast-growing options like microgreens (e.g., radish or broccoli) sprout in 7–14 days, while leafy greens (spinach, kale) take 3–6 weeks. Herbs like parsley or chives mature in 4–8 weeks. Patience pays off—consistent light and water keep growth steady!
What’s the best way to water an indoor kitchen garden without overdoing it?
Use the “finger test”: Stick your finger 1–2 inches into the soil—if it’s dry, water until moisture drains from the bottom (empty excess after 10 minutes). Avoid soggy soil (root rot risk!) and opt for self-watering planters or misting for delicate greens like arugula.
Can I use regular kitchen containers, or do I need special pots?
You can repurpose clean, food-safe containers (mason jars, colanders, or even egg cartons for microgreens), but ensure they have drainage holes. For long-term growing, choose 5–8 inch pots with breathable fabric liners to prevent overwatering. Avoid metal or treated wood.
What should I do if my indoor greens get pests or mold?
Start with prevention: Keep humidity low (40–60%) and avoid overcrowding. If pests appear, wipe leaves with soapy water (1 tsp mild soap per quart) or spray with neem oil. For mold (fuzzy spots), trim affected leaves, improve airflow, and reduce watering. Act fast—indoor gardens recover quickly!
Do indoor kitchen gardens need fertilizer, or is soil enough?
Most greens grow well in light, well-draining potting mix (like a 50/50 blend of peat and perlite). For nutrient boosts, use organic liquid fertilizer (diluted fish emulsion or seaweed extract) every 4–6 weeks. Over-fertilizing burns roots—go easy!
Wrapping up and next steps
Creating an indoor kitchen garden is a rewarding way to enjoy fresh greens year-round—no matter your space or sunlight! By optimizing light with reflective surfaces, grow lights, or sunlit spots, you’ve unlocked the potential for thriving herbs, microgreens, and veggies right in your kitchen. 🌱
Ready to take the next step? Start small with a single shelf or container, experiment with your favorite greens, and watch your confidence (and harvest!) grow. Happy gardening—your future meals (and taste buds) will thank you!