Tools
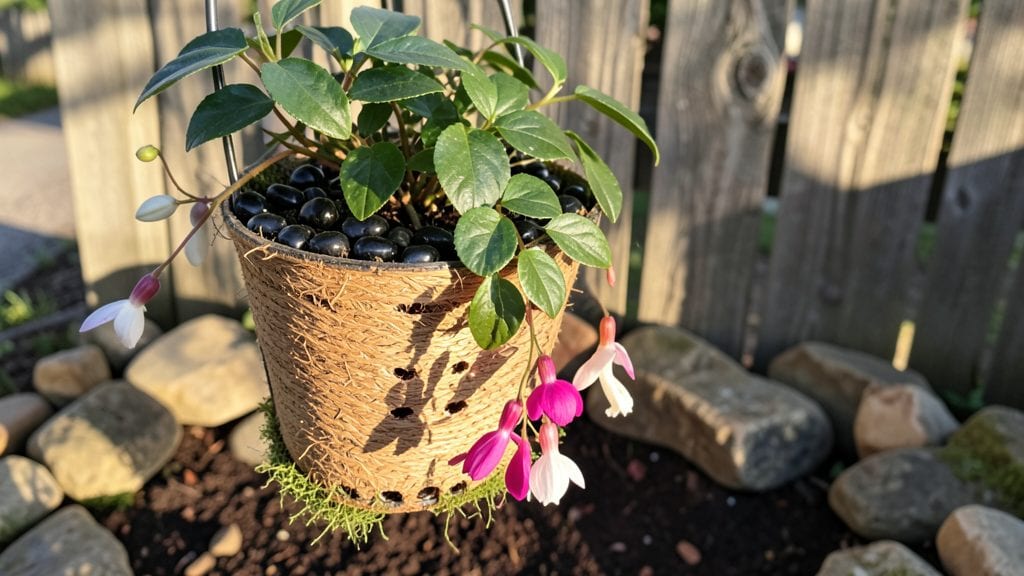
A hanging garden bed turns dead wall space into a thriving oasis where herbs cascade like green curtains and flowers spill over like confetti. 🌿 I built mine after realizing my tiny patio couldn’t handle another in-ground plot, and now it’s the most productive—and eye-catching—part of my garden.
The right setup lets you grow everything from basil to petunias without sacrificing square footage, and the vertical display adds drama any yard needs.
The beauty of hanging beds is how customizable they are: lightweight fabric pockets for delicate herbs, sturdy wooden troughs for heavy veggies, or macramé-style planters for boho-chic vibes.
You’ll need basic supplies—drainage holes, quality potting mix, and plants suited for vertical living (think trailing nasturtiums or compact thyme)—but the payoff is immediate. Within weeks, your balcony or fence becomes a living tapestry instead of wasted space.
Imagine snipping fresh cilantro for tacos or plucking marigolds for bouquets without stepping outside your door. The best part? These beds work anywhere—urban fire escapes, rustic farmhouse porches, or even indoors near bright windows.
With the right placement and plant choices, you’ll have a year-round display that’s both functional and stunning, proving small spaces can grow big rewards.
Ready to transform blank walls into lush vertical gardens? We’ll cover everything from DIY materials to pro-level placement tricks so your hanging bed becomes the centerpiece of your outdoor (or indoor) world. Let’s get those roots dangling!
📚 In This Guide
- What you need
- Instructions
- Tips and common mistakes
- Wrapping up and next steps
What you need
- ● Hanging planter or garden bed: 1–2 pre-made fabric, plastic, or wooden hanging beds (size depends on space; 12"–24" deep is ideal for herbs and shallow-rooted flowers).
- ● OR DIY materials: cedar planks (1x12", 4–6 ft long), waterproof liner (e.g., pond liner or heavy-duty plastic), and sturdy rope or chains (3/8"–1/2" diameter, 6–8 ft long).
- ● Growing medium: 2–4 cu. ft. of high-quality potting mix (lightweight, well-draining blend with perlite or compost). Avoid garden soil—it’s too heavy!
- ○ Optional add-ons: slow-release fertilizer (5–10 lbs) or worm castings (1–2 lbs) for nutrient boost.
- ● Drainage system: 1–2" layer of gravel or landscape fabric (to prevent soil from clogging drainage holes).
- ● Plants: 6–12 herbs or flowers suited for containers (e.g., basil, thyme, petunias, or succulents). Check spacing needs—some plants thrive in clusters!
- ● Hardware & fasteners: Screws or brackets (if mounting to a wall or railing; use stainless steel or galvanized for durability).
- ● Drill + bits (for mounting) or heavy-duty hooks (for hanging).
- ● Self-watering kit: Add a wicking system or drip irrigation tube to keep plants hydrated with minimal effort.
- ● Decorative touches: Paint or stain (for wooden beds), LED grow lights (for low-light areas), or hanging planter labels.
- ● Portable watering can: A small, narrow-spout can (1–2 gallons) for precise watering.
- ● Weatherproof sealant: Spray-on waterproofing for wooden beds to extend lifespan.
Step-by-Step instructions for building a hanging garden bed
Transforming vertical space into a thriving garden is easier than you think. Here’s how to create a sturdy, functional hanging bed that brings herbs and flowers within arm’s reach.
🪴 Step 1: Select and Prepare the Hanging Planter
Choose a hanging planter with built-in drainage holes—I recommend a 12-18 inch deep fabric grow bag or a plastic container with sturdy handles to support the weight of soil and plants. Fabric pots allow roots to breathe and reduce waterlogging, but plastic holds moisture better for thirsty herbs like basil. If using a new planter, soak it in a 10% bleach solution for 10 minutes to sterilize before rinsing thoroughly.
Measure the hanging hardware to ensure it can support at least 30-40 pounds of saturated soil and plants. Most metal brackets or chains are rated for 50+ pounds, but double-check. If your balcony or porch railing isn’t load-bearing, opt for a wall-mounted planter system with anchors screwed into studs for extra security. This is the moment that matters: a flimsy setup will fail when the bed is full.
🌱 Step 2: Layer Soil and Add Organic Matter
Fill the planter ¾ full with a lightweight potting mix—avoid garden soil, which compacts and suffocates roots. I blend 50% premium potting mix with 30% perlite (for drainage) and 20% coconut coir or compost (for moisture retention and nutrients). This combination stays aerated while holding enough water for herbs and flowers without drowning roots.
Add a 1-inch layer of orchid bark or hydroponic clay pebbles at the bottom if your planter lacks drainage holes. This prevents soil from washing out while allowing excess water to escape. Gently fluff the mix with your hands—don’t compact it. The goal is a light, crumbly texture that roots can easily penetrate.
☀️ Step 3: Plant Herbs and Flowers Strategically
Arrange plants based on their light and water needs. Place thirsty herbs like basil, mint, or parsley near the edges where they’ll get the most moisture, while drought-tolerant flowers like geraniums or petunias can go toward the center. For a 4-plant hanging bed, space each plant 6-8 inches apart—crowding leads to competition for nutrients and increases disease risk.
Dig holes twice as wide as the root ball and just as deep as the container the plant came in. Gently remove each plant from its nursery pot, loosen the roots if they’re circling, and place it in the hole. Fill around the roots with soil, pressing lightly to eliminate air pockets. Water immediately after planting to settle the soil and reduce transplant shock.
💧 Step 4: Water and Establish a Care Routine
Water the hanging bed thoroughly until water runs out the drainage holes, then let it drain completely. Hanging planters dry out faster than ground beds, so check the soil daily during hot weather—stick your finger 1 inch deep. If it feels dry, water again. Overwatering is just as harmful as underwatering; fabric pots may need watering every 1-2 days, while plastic ones can go 2-3 days between waterings.
After the first week, fertilize with a balanced liquid fertilizer (10-10-10) diluted to half-strength to avoid burning tender new growth. Feed herbs every 2 weeks and flowers every 4 weeks during the growing season. Here’s the thing—hanging gardens need consistent nutrients because roots have less soil to forage in. A slow-release granular fertilizer mixed into the soil at planting also helps.
✂️ Step 5: Prune and Maintain for Long-Term Growth
Pinch back new growth on herbs (like basil or thyme) to encourage bushier, more productive plants. For flowers, deadhead spent blooms regularly—this redirects energy to new flowers instead of seed production. I snip with clean bypass pruners and dispose of diseased leaves immediately to prevent fungal spread. If you notice yellowing leaves, it’s usually a sign of overwatering or nutrient deficiency—adjust your care routine accordingly.
Every 3-4 months, refresh the soil by removing the top 2 inches of depleted mix and replacing it with new potting soil and compost. This prevents nutrient exhaustion and keeps roots healthy. In fall, reduce watering as temperatures drop, and remove annual plants (like petunias) to make room for next season’s greens or overwintering herbs like rosemary or oregano.
Tips & tricks for perfect hanging garden beds
Creating a thriving hanging garden isn't just about following steps—it's about understanding the subtle details that make all the difference. Here are the insights I've gathered after years of experimenting with vertical gardening.
Planter Selection: When choosing between fabric and plastic grow bags, consider your plants' needs. Fabric pots breathe better but dry out faster, making them ideal for drought-tolerant flowers like geraniums. Plastic containers retain moisture longer, perfect for water-loving herbs such as basil. I've found that fabric pots work best for a mix of both—place thirsty plants at the edges where they'll get more water runoff from the center.
Soil Preparation: The 10-minute bleach soak for new planters is non-negotiable—it eliminates pathogens that could devastate your plants. For the soil mix, I've discovered that adding worm castings to the 20% coconut coir/compost blend gives an extra nutrient boost without altering the drainage properties. This upgrade has cut my fertilization needs by nearly half. The key is maintaining that light, crumbly texture—think of it as giving your roots a fluffy pillow rather than a compacted mattress.
Plant Spacing: Those 6-8 inch spacing guidelines in Step 3 are crucial, but here's what nobody tells you: the center of your hanging bed gets less light and airflow. Place your most vigorous growers—like mint or parsley—toward the edges where they'll get maximum exposure. I've seen crowded centers lead to fungal issues because of poor air circulation, so don't be afraid to adjust spacing based on plant size rather than sticking rigidly to the guidelines.
Watering Wisdom: The daily soil check during hot weather is your best friend, but timing matters too. Water in the early morning to allow foliage to dry before evening—this prevents fungal growth. For fabric pots, I've found that a morning watering followed by a light misting in the late afternoon during extreme heat keeps roots happy without waterlogging. The goal is consistent moisture without soggy soil, which can suffocate roots in the confined space of a hanging bed.
Pro Tips for Hanging Garden Bed
- Creating a thriving hanging garden isn't just about following steps—it's about understanding the subtle details that ...
- Planter Selection: When choosing between fabric and plastic grow bags, consider your plants' needs. Fabric pots breat...
- Soil Preparation: The 10-minute bleach soak for new planters is non-negotiable—it eliminates pathogens that could dev...
Frequently asked questions
Got questions about creating your own hanging garden bed? You’re not alone! Here are some of the most common queries—and their easy answers—to help you get started with confidence.
What’s the best material for a hanging garden bed?
A hanging garden bed can be made from fabric grow bags, wooden crates, plastic containers, or even repurposed buckets. Fabric is lightweight and breathable, while wood adds rustic charm. Choose based on durability, weight, and your plants’ needs—herbs thrive in fabric, while heavier flowers may need sturdier materials like plastic.
How often should I water a hanging garden bed?
Hanging gardens dry out faster than ground-level beds, so check moisture daily in hot weather. Water deeply 2–3 times a week, adjusting for climate. Pro tip: Use self-watering systems or drip irrigation to keep roots happy without overwatering. Morning watering prevents evaporation and fungal issues.
Can I use a hanging garden bed for vegetables?
Lightweight veggies like lettuce, strawberries, cherry tomatoes, and herbs grow beautifully in hanging beds. Avoid heavy rooters like carrots or potatoes—they’ll outgrow the space. Opt for shallow-rooted plants and ensure your bed has drainage holes to prevent soggy soil.
Why are my plants wilting in a hanging garden bed?
Wilting often signals overwatering, underwatering, or poor drainage. Check the soil moisture with your finger—it should feel damp but not soggy. Ensure your bed has drainage holes and isn’t exposed to harsh afternoon sun without shade. Fix it: Adjust watering, trim yellow leaves, and consider relocating if sunlight is inconsistent.
Are hanging garden beds worth the investment?
Yes! They’re perfect for small spaces, urban balconies, or maximizing vertical gardening. Beyond aesthetics, they improve air quality, reduce pests naturally, and boost mental well-being. Start with a budget-friendly fabric grow bag (under $20) or repurpose old containers—your wallet (and plants) will thank you!
Wrapping up and next steps
A hanging garden bed is more than just a stylish addition to your space—it’s a practical, space-saving solution that brings greenery and freshness to any corner. Whether you’re growing fragrant herbs, vibrant flowers, or both, these vertical gardens are perfect for small balconies, patios, or even indoor setups.
With the right materials and a little creativity, you can transform unused space into a thriving oasis.
Ready to get started? Pick your favorite plants, gather your supplies, and let your green thumb shine! 🌱🌸 Start small, experiment, and enjoy the rewarding process of watching your hanging garden flourish.