Propagation
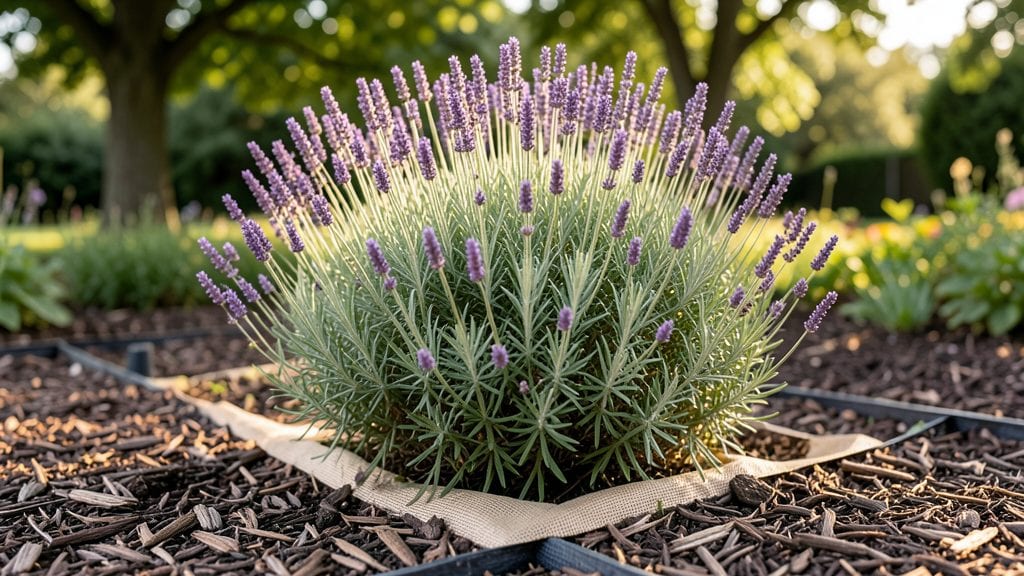
Keeping weeds from growing in your garden isn't about brute force—it's about outsmarting them with the right barriers and habits. I've spent years experimenting with everything from thick mulch to strategic planting, and the best solutions don't just suppress weeds temporarily.
They starve them out over time while improving your soil. The key is combining physical blocks with natural competition from your plants.
Start with a 3-4 inch layer of organic mulch—straw, wood chips, or even shredded leaves—around your plants. This smothers weed seeds before they sprout while keeping moisture in the soil. For stubborn patches, try cardboard or newspaper under the mulch to block light completely.
My vegetable beds stay weed-free for months this way, and the mulch breaks down to feed the soil instead of becoming trash.
You'll notice fewer weeds popping up within 2-3 weeks of consistent mulching, and the soil stays looser and more fertile. The best part? This method works for flower beds, vegetable patches, and even around shrubs. Once you establish the routine, maintenance becomes quick—just refresh the mulch layer every few months.
For problem areas like sidewalks or driveways, consider dense ground covers like clover or creeping thyme. They crowd out weeds naturally while adding greenery. And if you're dealing with deep-rooted weeds like dandelions, a shallow till in early spring disrupts their growth cycle.
The goal isn't perfection—it's making weeds work harder than your plants.
📚 In This Guide
- What you need
- Instructions
- Tips and common mistakes
- Wrapping up and next steps
What you need
- ● Cardboard or newspaper – 4-6 sheets per section (thick, non-glossy preferred)
- ● Compost or mulch – 2-3 inches thick (shredded leaves, straw, or wood chips work great)
- ● Landscape fabric – 1-2 rolls (3-4 feet wide, breathable mesh)
- ● Gravel or pebbles – 1-2 bags (small, uniform stones for pathways or borders)
- ○ Edging material – Metal, plastic, or stone (optional but helpful for clean lines)
- ● Garden shears or scissors – For trimming fabric or cardboard
- ● Rake or hoe – To level soil and smooth barriers
- ● Watering can or hose – For dampening layers (prevents shifting)
- ● Vinegar (5-10% acetic acid) – For spot-treating stubborn weeds (dilute if needed)
- ● Boiling water – Quick weed killer for small patches
- ● Corn gluten meal – Natural pre-emergent herbicide (apply in early spring)
- ● Living mulch (clover or creeping thyme) – For long-term weed suppression
- ● Black plastic sheeting – Solarizes soil to kill weeds before planting
Step-by-Step guide to natural weed prevention in your garden
Weeds don’t stand a chance with these strategic, organic approaches.
Create a Physical Barrier with Cardboard or Newspaper
Lay down two layers of flattened cardboard or 4-6 sheets of newspaper directly on garden beds before planting. This blocks sunlight, which weeds need to germinate and grow. I always use unwaxed cardboard—waxed versions can trap moisture and create anaerobic conditions that harm soil health. Overlap edges by at least 2 inches to eliminate gaps where weeds might sneak through.
Moisten the barrier lightly before adding mulch or soil on top. This helps it settle and decompose gradually without blowing away. The key is to keep it completely covered with 2-3 inches of mulch—this prevents light from reaching the cardboard while still allowing air and water to penetrate the soil below.
Apply a Thick Layer of Organic Mulch
Spread 3-4 inches of organic mulch—such as straw, wood chips, or shredded leaves—over the entire garden bed. Mulch suffocates existing weeds by blocking sunlight and prevents new seeds from reaching the soil. I prefer wood chips for their long-lasting effects, but straw works best for vegetable gardens because it breaks down faster, enriching the soil as it decomposes.
Keep mulch at least 2 inches away from plant stems to avoid trapping moisture against the bark, which can cause rot. Refresh the mulch layer every 3-6 months as it decomposes. If you notice mulch thinning, add a top-up before weeds start poking through.
Use Landscape Fabric Strategically
Install landscape fabric under mulch in high-weed areas, such as pathways or around perennial plants. Secure it with landscape staples or rocks to prevent shifting. Unlike cardboard, fabric allows water and air to reach the soil while still blocking weed seeds. I cut holes in the fabric for existing plants before laying it down—this ensures roots aren’t strangled by the material.
Leave 1-2 inches of fabric exposed around the edges to allow for future plantings. Over time, fabric breaks down, so replace it every 2-3 years for maximum effectiveness. For vegetable gardens, I avoid fabric entirely—it can trap heat and deter beneficial soil organisms.
Plant Dense, Competitive Ground Covers
Fill empty spaces with low-growing, fast-spreading plants like creeping thyme, clover, or vinca. These plants form a living barrier that outcompetes weeds for sunlight, water, and nutrients. I’ve found clover to be especially effective—it fixes nitrogen in the soil while smothering weeds naturally. Space plants 6-12 inches apart to ensure they fill in quickly without leaving gaps.
Choose ground covers that thrive in your climate and light conditions. For shady areas, hostas or ajuga work well, while sedum or ice plant are ideal for sunny spots. Once established, these plants require minimal maintenance and create a weed-resistant mat that lasts for years.
Maintain with Regular Inspections and Hand-Pulling
Inspect garden beds weekly for any weeds that slip through barriers. Remove them immediately—even small weeds can produce thousands of seeds if left unchecked. I pull weeds early in the morning when the soil is damp, making it easier to extract the entire root. Avoid pulling weeds by hand if they’ve gone to seed—this spreads them across your garden.
For stubborn weeds like dandelions or bindweed, use a hula hoe or weeding knife to cut roots below the soil surface. Mulch heavily after weeding to prevent regrowth. Consistency is key—10 minutes of weeding weekly beats hours of battling established weeds later.
Tips & tricks for effective garden weed prevention
Mastering natural weed control takes more than just following steps—it’s about understanding the subtle details that make all the difference. These insights will help you create an impenetrable barrier against weeds without harming your garden’s health.
Barrier Layering Strategy: When using two layers of flattened cardboard or 4-6 sheets of newspaper in Step 1, focus on complete coverage without overlaps smaller than 2 inches. I’ve found that leaving even a tiny gap can become a weed highway. For extra protection, especially in windy areas, secure the edges with small rocks or bricks until you add mulch. This prevents the barrier from shifting and exposing soil to sunlight.
Mulch Depth and Placement: The 3-4 inches of organic mulch in Step 2 isn’t just about thickness—it’s about strategic placement. Keep that mulch at least 2 inches away from plant stems to prevent moisture buildup that can cause rot. I’ve noticed that wood chips work best for perennial beds because they last longer, while straw breaks down faster in vegetable gardens, enriching the soil naturally. Refreshing every 3-6 months keeps the weed-blocking power strong.
Landscape Fabric Nuances: In Step 3, when using landscape fabric, cut those holes for existing plants with precision—roots need room to breathe. I’ve learned the hard way that fabric left exposed around edges can degrade quickly, so leaving 1-2 inches uncovered allows for future plantings while maintaining effectiveness. Remember, fabric breaks down over 2-3 years, so plan for replacement before it loses its weed-blocking capabilities.
Weekly Maintenance Mindset: The 10 minutes of weekly weeding in Step 5 might seem like a small investment, but it’s the key to long-term success. I’ve found that early morning weeding, when soil is damp, makes pulling weeds effortless. For stubborn weeds like dandelions or bindweed, a hula hoe or weeding knife is your best tool—cutting roots below the surface prevents regrowth. Consistency truly is the secret weapon against weeds.
Pro Tips for Keep Weeds From Growing In Garden
- Mastering natural weed control takes more than just following steps—it’s about understanding the subtle details that make all the difference.
- Barrier Layering Strategy: When using two layers of flattened cardboard or 4-6 sheets of newspaper in Step 1, focus on complete coverage without overlaps smaller than 2 inches.
- Mulch Depth and Placement: The 3-4 inches of organic mulch in Step 2 isn’t just about thickness—it’s about strategic placement.
Frequently asked questions
What’s the best time of year to apply natural weed barriers?
Spring and early fall are ideal! Apply barriers like cardboard or mulch before weeds sprout (late winter/early spring) or after summer heat when weeds are dormant. For pre-emergent options like corn gluten, wait until soil temps hit 50°F+—just check your local frost dates to time it right.
Can I reuse old mulch or landscape fabric from last year?
Mulch? Yes! Break it down and reapply (add fresh compost to replenish nutrients). Landscape fabric? Use with caution. Old fabric can degrade, letting weeds slip through. If reused, check for holes and pair it with a thick layer of mulch or straw for extra defense.
Will natural barriers harm my plants or soil?
Not if done correctly! Cardboard and newspaper break down safely (just remove tape/staples). Mulch feeds soil over time. Avoid plastic sheets—they suffocate soil and trap heat. Always add a 2–3 inch layer of compost under barriers to keep roots happy.
Are DIY weed barriers cheaper than store-bought solutions?
Absolutely!
Cardboard, pine cones, or grass clippings cost pennies compared to pre-made fabric or commercial sprays. Even “free” options like fallen leaves or straw work—just ensure they’re weed-seed free. Pro tip: Check local bulk stores or farm supply shops for discounted mulch bags.
How do I handle weeds that keep growing through my barrier?
First, inspect your barrier—gaps or thin spots let weeds through. For stubborn spots, add a top layer of coarse mulch (like wood chips) or hand-pull weeds while young. If using fabric, consider a double layer with 1–2 inches of mulch on top. Persistent weeds? Try a vinegar spray (1:1 ratio with water) for spot treatment.
Do natural barriers work in hot/dry climates?
Yes, but choose wisely! In dry areas, opt for organic mulches like straw or gravel to retain moisture. Avoid cardboard—it can dry out and blow away. Pair barriers with drip irrigation near plants to keep soil moist (weeds hate competition!). For extreme heat, use light-colored mulch to reflect sunlight.
Wrapping up and next steps
Keeping weeds at bay doesn’t have to be a battle—just a smart strategy! 🌱 From mulching and landscape fabric to natural barriers like cardboard or gravel, you now have effective, eco-friendly tools to reclaim your garden.
Remember, consistency is key, so stay proactive and enjoy the peace of mind that comes with a weed-free space.
Ready to transform your garden? Pick one method from this guide and start implementing it today—your future self (and your plants!) will thank you. Happy gardening! 🌿