Pests and Diseases
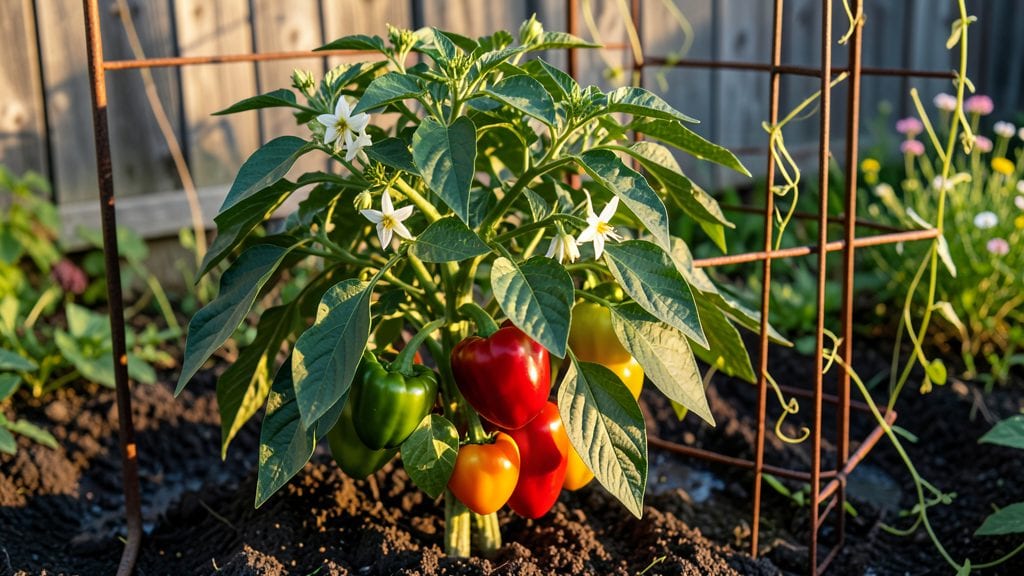
Master these pepper gardening tips—and watch your plants go from a handful to a bushel of peppers, pest-free and thriving. 🌱 I’ve grown over 200 plants in my lifetime, and the difference comes down to just... a few key moves.
Most gardeners overlook the basics that make the biggest impact, like soil warmth and consistent moisture, which can turn a struggling plant into a high-yield machine.
The secret isn’t fancy equipment—just the right soil temperature (above 65°F), a 5-gallon container for each plant, and a morning watering routine that keeps roots damp but not soggy.
I’ve seen plants double their yield just by adjusting when and how they’re watered, and the same goes for fertilization: a balanced 10-10-10 feed every 4-6 weeks keeps them fruiting like clockwork. Pruning isn’t just for looks—it’s how you redirect energy to more peppers, not just leaves.
By mid-summer, you’ll be harvesting bright, glossy peppers that taste fresher than anything store-bought. The plants stay vigorous, pests like aphids barely get a foothold, and you’ll avoid the heartbreak of blossom end rot by mastering just one simple trick.
This isn’t about guesswork—it’s about the foolproof steps that actually work, no matter your experience level.
Whether you’re growing in a raised bed, containers, or straight in the ground, these tricks adapt easily. Let’s get those plants producing like they’re in a greenhouse—without the hassle.
📚 In This Guide
- What you need
- Instructions
- Tips and common mistakes
- Wrapping up and next steps
What you need
- ● Seeds or seedlings: Choose disease-resistant varieties (e.g., 'Carolina Wonder' for bells or 'Jalapeño M' for heat lovers). Start with 4-6 plants for a small harvest or 10+ for a full garden.
- ● Containers or garden beds: Containers: 5-gallon pots or larger (peppers need 12-18 inches of depth per plant). Use drainage holes to prevent root rot!
- ● Garden beds: Full sun (6+ hours/day) and well-draining soil (amend with compost if needed). Raised beds are ideal for pest control.
- ● High-quality potting mix: A peat-free, organic blend (e.g., 60% compost, 30% coconut coir, 10% perlite) for aeration and moisture retention.
- ● Fertilizer: Balanced starter: 10-10-10 or fish emulsion (follow label rates).
- ● Bloom booster: Low-nitrogen, high-phosphorus (e.g., 5-10-10) once flowers appear.
- ● Pest/disease prevention: Neem oil or insecticidal soap (for aphids, spider mites).
- ● Row covers (lightweight fabric to deter pests early on).
- ● Copper fungicide (prevents blight; apply at first signs of spots).
- ● Basic tools: Hand trowel, pruning shears, and gloves (pepper plants can be prickly!).
- ● Watering can with a rose attachment (gentle watering at the base).
- ● Mulch: Straw or black plastic to retain moisture and suppress weeds.
- ● Trellis or cages: For bushier varieties (e.g., 'Shishito' peppers).
- ● pH test kit: Aim for 6.0–6.8 (peppers thrive in slightly acidic soil).
- ● Grow lights: If starting indoors (12–16 hours of light/day).
- ● Companion plants: Basil, marigolds, or onions to repel pests naturally.
Step-by-Step instructions for cultivating thriving pepper plants
Here’s the method I’ve refined over years to grow peppers that resist pests and produce heavy yields—no shortcuts, just reliable results.
🌱 Step 1: Start Seeds Indoors for Early, Strong Plants
Begin seeds 8-10 weeks before your last frost date using the seed-starting mix. Fill seed trays or small pots to 1 inch below the rim and press the mix down gently—just firm enough to hold seed shape but not compacted. Pepper seeds germinate best at 75-85°F, so place trays on a heat mat or in a warm spot.
Plant seeds ¼ inch deep—any deeper delays germination because seedlings struggle to reach light. Cover lightly with additional mix and mist gently until the surface looks evenly damp. Seal the tray with plastic wrap or a humidity dome to retain warmth and moisture. Check daily for condensation; if the wrap fogs up, remove it for 30 minutes to prevent mold.
☀️ Step 2: Provide Light and Prevent Leggy Growth
As soon as seedlings emerge, move them under grow lights or to a south-facing window. Peppers need 14-16 hours of light daily—without it, they stretch toward the light (leggy growth) and become weak. Position lights 2-3 inches above the seedlings and raise them as plants grow to maintain that distance.
You’ll know light is sufficient when seedlings have dark green, compact leaves spaced 1 inch apart. If stems grow thin and leaves pale, your light is too far away. Rotate trays quarter-turn daily so plants grow straight instead of leaning.
🪴 Step 3: Harden Off and Transplant After Warmth Arrives
Two weeks before transplanting, start hardening off seedlings by placing them outside in partial shade for 1 hour the first day. Gradually increase time and sun exposure over 10-14 days, ending with a full day outdoors. This prepares them for garden conditions and prevents transplant shock.
Choose a site with full sun (6+ hours daily) and well-draining soil. Pepper roots hate soggy conditions, so amend the soil with compost if it’s heavy clay. Transplant seedlings 12-18 inches apart in rows 18-24 inches apart, burying them slightly deeper than their original pots to encourage strong root growth.
💧 Step 4: Water Deeply and Maintain Consistent Moisture
Water deeply once a week (or more in extreme heat) to encourage deep root systems. Peppers are drought-tolerant but produce better with steady moisture—aim for 1-1.5 inches of water weekly. Water at the base in the morning to prevent fungal diseases from overnight dampness.
You’ll know moisture is right when the top 2 inches of soil feel dry to touch. Mulch with straw or grass clippings to retain soil moisture and suppress weeds. Avoid wetting leaves, which invites pests like aphids and powdery mildew.
✂️ Step 5: Prune and Support for Maximum Yield
When plants reach 12-18 inches tall, pinch off the first flowers to encourage bushier growth. This redirects energy to the plant’s structure, leading to more robust yields later. Remove any suckers (side shoots in the leaf axils) to focus energy on fruit production.
Stake or cage plants early—peppers get top-heavy with fruit. Use 5-foot stakes or cages and tie stems loosely with soft fabric strips. Prune any yellow or diseased leaves immediately to improve airflow and prevent spread.
Tips & tricks for perfect pepper plant cultivation
These battle-tested strategies will help you grow peppers that resist pests and produce abundant harvests—no matter your experience level.
Germination Temperature: The 75-85°F range in Step 1 is non-negotiable for consistent germination. I use a heat mat set to 80°F and place a thermometer directly on the seed tray to monitor—pepper seeds won't sprout reliably below 70°F. If your home stays cool, consider using a seedling heat mat or placing trays on top of your fridge (not inside) for that gentle warmth boost.
Lighting Strategy: Those critical 14-16 hours of light in Step 2 can be tricky without grow lights. I've found that positioning seedlings on a windowsill facing south works best, but supplement with a simple LED desk lamp on a timer if natural light falls short. The key visual cue is when seedlings develop leaves spaced about 1 inch apart—if they're stretching toward light with pale stems, they're begging for more illumination.
Transplanting Technique: Burying seedlings slightly deeper than their original pots in Step 3 triggers stronger root growth. Here's the trick: make a small trench in the planting hole, place the seedling at a 45-degree angle, then cover the stem up to the first set of true leaves. This creates a natural root system that can support heavier fruit loads later in the season.
Watering Wisdom: The 1-1.5 inches of water weekly guideline in Step 4 needs adjustment for clay soils—peppers in heavy clay require less frequent but deeper watering. I test moisture by sticking my finger 2 inches into the soil; if it feels dry, water until it runs out the bottom of the pot. For container growers, use pots with drainage holes and water until liquid appears in the saucer below.
Pro Tips for Pepper Gardening Tips
- These battle-tested strategies will help you grow peppers that resist pests and produce abundant harvests—no matter your experience level.
- Germination Temperature: The 75-85°F range in Step 1 is non-negotiable for consistent germination.
- Lighting Strategy: Those critical 14-16 hours of light in Step 2 can be tricky without grow lights.
Frequently asked questions
Got questions about growing peppers like a pro? You’re not alone! Here are some of the most common concerns—plus quick, actionable answers to keep your plants thriving and pest-free.
How often should I water my pepper plants?
Water peppers deeply 1–2 times per week, letting the soil dry slightly between waterings. Overwatering invites fungal diseases, while underwatering stresses plants. Use a moisture meter or stick your finger 1–2 inches into the soil—if it’s dry, it’s time to water! Pro tip: Mulch around plants to retain moisture and deter weeds.
What are the most common pepper pests, and how do I stop them?
The biggest culprits are aphids, spider mites, and hornworms. Prevent them with neem oil sprays or companion planting (basil and marigolds repel pests). For hornworms, handpick them early—they’re fast! If mites strike, blast plants with water to knock them off. Quick fix: Introduce ladybugs or lacewings for natural pest control.
When is the best time to harvest peppers?
Harvest when peppers reach full size but before they fully ripen (for green peppers) or at peak color (red, yellow, etc.). Use clean scissors or pruners to avoid damaging the plant. Why? Overripe peppers lose flavor and may split. Pro tip: Pick consistently to encourage more production!
Why are my pepper leaves turning yellow?
Yellow leaves usually mean overwatering, nutrient deficiency, or fungal issues. Check the roots—if they’re mushy, cut back on water. For nutrients, feed with a balanced fertilizer (like 10-10-10) every 4–6 weeks. Watch for: Powdery mildew (white dust) or bacterial spot (dark spots). Prune affected leaves and improve airflow.
Can I grow peppers in containers? What’s the best setup?
Use a 5-gallon pot minimum (bigger = better) with well-draining soil. Choose compact varieties like ‘Jalapeño M’ or ‘Shishito.’ Place pots in full sun (6+ hours daily) and fertilize regularly. Bonus: Containers warm up faster in spring, giving peppers a head start!
What if my peppers stop producing?
Peppers often slow down in hot weather (above 90°F) or due to lack of pollination. Hand-pollinate by gently shaking plants or using a paintbrush. Also, check for pests or disease. Fix it: Prune leggy growth to focus energy on fruiting, and ensure consistent watering.
Wrapping up and next steps
Growing a thriving, pest-free pepper garden is totally within your reach—just remember: healthy soil, smart spacing, and proactive care are your best allies! 🌱 With the right tricks, like companion planting, organic sprays, and diligent monitoring, you’ll be harvesting bountiful, flavorful peppers in no time.
Ready to put these tips into action? Start small—plant a few peppers this season, keep a gardening journal, and refine your approach as you go. Soon, you’ll be the proud pepper guru in your neighborhood! 🎉