Planting
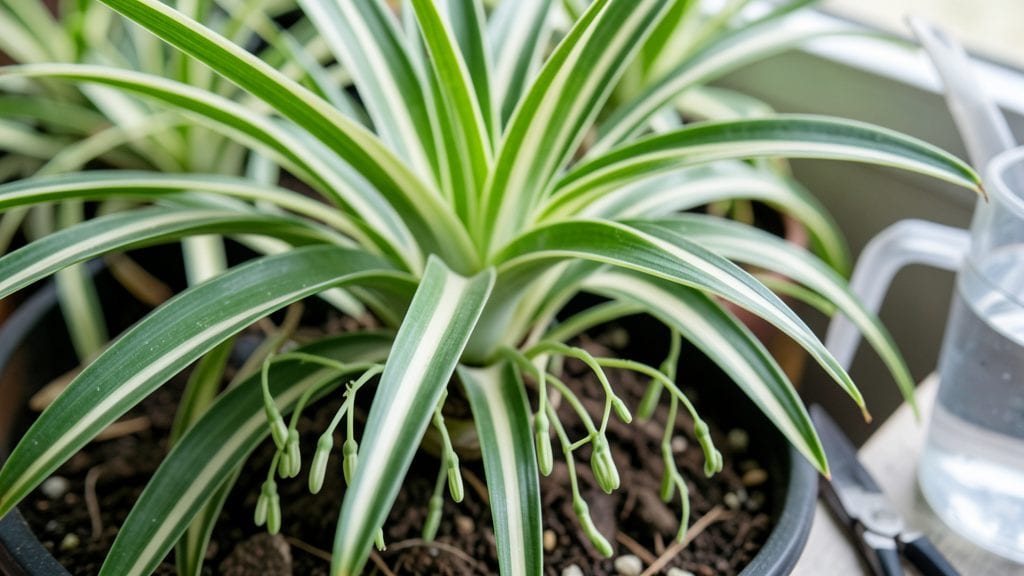
Creating a spider plant garden starts with those iconic arching leaves that seem to dance in the light—my first one took over my kitchen windowsill in under a year. 🌿 The real magic happens when you let them trail, turning any space into a living waterfall of green.
These plants aren’t just survivors; they’re showstoppers that adapt to indoor light like no other.
You don’t need fancy setups—just a sturdy hanging planter or macramé holder, well-draining soil, and a spot with bright, indirect light. Pair them with trailing pothos or ferns for a jungle vibe, or contrast their arching habit with bold-leaved calatheas.
In warmer climates, they even thrive outdoors in shaded spots, adding texture without fuss.
The payoff? A lush, low-maintenance display that grows faster than weeds. Those little "spiderettes" (the baby plants) dangle like nature’s chandelier, and the movement of the leaves creates a dynamic, alive look. Plus, they clean the air—because why not make your space both beautiful and functional?
Works in apartments, sunrooms, or even as a porch centerpiece. Let’s make yours the envy of the neighborhood—without the upkeep of high-maintenance plants.
📚 In This Guide
- What you need
- Instructions
- Tips and common mistakes
- Wrapping up and next steps
What you need
- ● Spider plants (Chlorophytum comosum) – 3–5 mature plants (or 1–2 larger plants for a fuller look). Choose healthy ones with vibrant green or variegated leaves.
- ● Hanging planters or baskets – 2–4 medium-sized pots (6–8 inches in diameter) with drainage holes. Opt for lightweight materials like woven coconut fiber or terracotta.
- ● Well-draining potting mix – 2–3 gallons of a lightweight, airy blend (e.g., 50% peat moss, 30% perlite, 20% compost). Avoid heavy garden soil!
- ○ Drainage trays or saucers – 1–2 shallow trays to catch excess water (optional but recommended for aesthetics and hygiene).
- ● Trowel or small shovel – For gentle repotting or soil adjustments.
- ● Misting bottle – To keep humidity levels ideal (especially in dry climates).
- ● Fertilizer (balanced liquid or slow-release) – A 10-10-10 or 20-20-20 formula (diluted to half-strength).
- ● Supportive hooks or macramé hangers – To secure planters at eye level (24–36 inches from the floor).
- ● Pruning shears – For trimming long stems or reviving leggy plants.
- ● Self-watering planters for low-maintenance care.
- ● Decorative moss or sphagnum to line baskets for a natural, rustic look.
- ● Grow lights (LED or fluorescent) if placing in low-light areas.
- ● Peat pellets or hydroponic medium for a soil-free setup.
Step-by-Step instructions for creating a thriving spider plant garden
Here's how to cultivate a vibrant display of spider plants that cascade beautifully from shelves or hangers.
🪴 Step 1: Select and Prepare Containers for Your Spider Plants
Spider plants love to spread their roots, so choose 6-8 inch hanging baskets or ceramic pots with drainage holes for each plant. I like to use the 4 hanging baskets from your list because they give those long, graceful leaves room to trail. Fill each basket halfway with the 2 gallons of potting mix—just enough to support the roots without overwhelming the plant.
Add a 1-inch layer of perlite to the bottom of each basket before the potting mix. This improves drainage and prevents root rot, which is a common issue when spider plants sit in soggy soil. Press the perlite down gently so it stays in place while still allowing water to flow through.
🌱 Step 2: Plant the Spider Plants and Encourage Root Spread
Remove each spider plant from its nursery pot and gently loosen the roots if they're tightly bound. Place the plant into the basket and spread the roots outward—this encourages the lush, trailing growth you want. Cover the roots with the remaining 2 gallons of potting mix, leaving about 1 inch of space between the soil surface and the basket's rim.
Water each plant thoroughly until water drains freely from the bottom. Spider plants are drought-tolerant but appreciate consistent moisture, so aim for watering every 7-10 days once established. You'll know it's time when the top 1-2 inches of soil feel dry to the touch.
☀️ Step 3: Position for Bright, Indirect Light
Spider plants thrive in bright, indirect light, making them perfect for east or west-facing windows. If your space only offers low light, don’t worry—these plants tolerate medium to low light too, though growth may slow. Avoid direct sunlight, which can scorch the leaves and turn them yellow.
Place your hanging baskets where they’ll receive 4-6 hours of indirect light daily. You’ll notice the leaves stay vibrant green and develop those signature striped patterns. If you see the leaves turning dark green or losing their stripes, it’s a sign they need more light. Rotate the baskets every few weeks to ensure even growth.
💧 Step 4: Maintain with Water and Occasional Fertilizer
Water your spider plants when the top 1-2 inches of soil feel dry, but avoid letting them sit in standing water. Overwatering is the fastest way to kill these hardy plants. I like to water mine in the morning so any excess moisture evaporates by evening. Mist the leaves occasionally to boost humidity, especially if your home has dry air.
Feed your spider plants with the balanced liquid fertilizer every 4-6 weeks during the growing season (spring and summer). Dilute the fertilizer to half-strength to avoid burning the roots. You’ll see healthier, more vibrant foliage and even more of those adorable "spiderettes" (the baby plants that dangle from the ends of the leaves).
✂️ Step 5: Prune and Propagate for a Full, Lush Display
Trim any yellow or brown leaves with clean, sharp scissors to keep your spider plants looking their best. You can also propagate the spiderettes by placing them in a small container with water or moist potting mix. These baby plants root quickly and make great gifts—or additions to your own garden!
Every few months, check the roots and repot if they’ve filled the basket. Spider plants are fast growers, and their roots will eventually need more space. Use the same potting mix and perlite ratio to refresh their growing environment. With a little care, your spider plant garden will become a stunning, low-maintenance centerpiece.
Tips & tricks for perfect spider plant garden setups
These simple tricks will help your spider plants thrive and create stunning hanging displays that last for years.
Container Selection: The 6-8 inch hanging baskets work perfectly, but if you want extra drainage, consider adding a small rock layer below the perlite. I've found that using baskets with built-in saucers prevents water from dripping onto surfaces below—just remember to empty the saucers after watering. The key is ensuring water flows freely through the bottom, which these baskets are designed to do.
Root Spread Technique: In Step 2, when you spread the roots outward, don't be afraid to tease them apart gently. This encourages those beautiful cascading trails we all love. I like to use my fingers to create space between the roots—think of it like giving your plant room to breathe and grow outward. This single step makes the difference between a compact plant and one with those lush, trailing leaves.
Light Placement Strategy: For the 4-6 hours of indirect light mentioned in Step 3, I recommend placing your baskets near an east-facing window first. East light is gentler than west, giving you time to monitor how your plants respond. If you notice the leaves losing their stripes after a few weeks, gradually move them closer to the light source. The goal is to find that sweet spot where the leaves stay vibrant without getting sunburned.
Watering Wisdom: The 7-10 day watering schedule works well, but here's a trick: stick your finger 1-2 inches into the soil. If it feels dry at that depth, it's time to water. I've learned this the hard way—overwatering is the number one killer of spider plants. Also, always water in the morning so any excess moisture has time to evaporate before nightfall, which helps prevent root rot.
Pro Tips for Spider Plant Garden
- These simple tricks will help your spider plants thrive and create stunning hanging displays that last for years.
- Container Selection: The 6-8 inch hanging baskets work perfectly, but if you want extra drainage, consider adding a small rock layer below the perlite.
- Root Spread Technique: In Step 2, when you spread the roots outward, don't be afraid to tease them apart gently.
Frequently asked questions
How often should I water my spider plant?
Water your spider plant when the top 1-2 inches of soil feel dry—usually every 1-2 weeks, depending on humidity and light. Overwatering is the #1 killer, so let excess water drain completely. Pro tip: Yellow leaves? You’re likely overdoing it!
Why are my spider plant’s leaves turning brown?
Brown tips often mean fluoride buildup (from tap water) or low humidity. Switch to filtered or rainwater, and mist leaves occasionally. Too much sun can also scorch edges—rotate your plant for even light exposure. Fix it fast: Trim brown bits with clean scissors!
When is the best time to repot my spider plant?
Repot in spring or early summer when roots outgrow the pot (check by gently removing it). Use a container 1-2 inches larger with drainage holes and fresh, well-draining soil. Bonus: Divide offsets (baby plants) during repotting to propagate!
Can spider plants grow in low-light conditions?
Yes! While they thrive in bright, indirect light, spider plants tolerate low light but may grow slower and produce fewer "spiderettes" (baby plants). Place near a north-facing window or under fluorescent lights if natural light is limited. Watch for: Leggy stems = time for a brighter spot!
Are spider plants toxic to pets?
Unfortunately, yes—spider plants contain saponins, which can irritate pets’ mouths or cause mild vomiting if ingested. Keep them out of reach of cats/dogs, or opt for pet-safe alternatives like parlor palms or Boston ferns. Safety first!
How do I encourage more spiderettes (pups)?
Boost pup production by giving your plant bright, indirect light and balanced fertilizer (diluted liquid feed every 4-6 weeks in spring/summer). Healthy, mature plants with long stems produce the most spiderettes. Patience pays off: Pups may take 3-6 months to form!
Wrapping up and next steps
Your spider plant garden isn’t just a decor piece—it’s a thriving, low-maintenance green sanctuary that purifies the air and brightens your space! 🌿 With the right light, soil, and care, these trailing beauties will reward you with lush foliage and those iconic "spiderettes" in no time.
Whether you’re a beginner or a plant enthusiast, this easygoing plant is your perfect companion.
Ready to watch your garden grow? Start by selecting your spot—hang those pots, trim as needed, and enjoy the journey. Happy planting! 🌱