Pests and Diseases
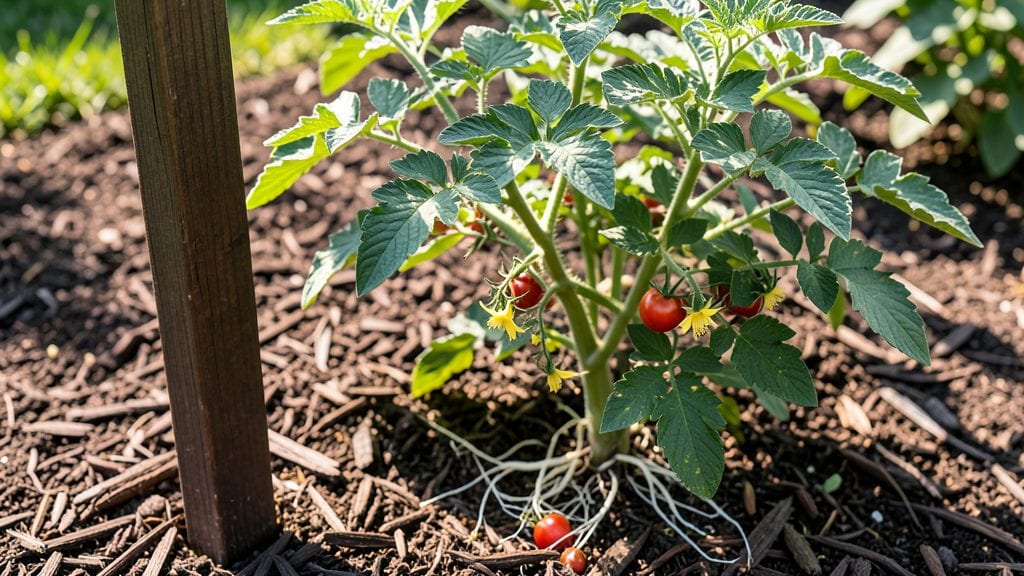
Here are tomato gardening tips you won’t find in seed packets—because the best harvests begin with soil that’s so rich, even picky tomatoes beg for more. 🌱 The secret isn’t just throwing plants in dirt; it’s about calcium, drainage, and timing that keeps blossoms from dropping and fruit from cracking.
My first year, I lost nearly every tomato to blossom-end rot, but now my plants produce bushels of firm, flavorful fruit by midsummer.
You’ll need rich, well-draining soil with a pH between 6.2 and 6.8, plus a steady supply of water and sunlight. Most gardeners overlook the importance of consistent moisture—especially during flowering—because uneven watering triggers that dreaded rot.
I’ve since switched to drip irrigation, which delivers water right to the roots without wetting the leaves, cutting down on disease and saving time. The payoff? Fewer wasted plants and more time enjoying the harvest instead of troubleshooting.
By the time your first tomatoes ripen, you’ll notice the difference in texture and flavor—no more mealy, bland store-bought fruit. The key is pruning suckers early, staking plants for support, and watching for signs of stress like yellowing leaves or blossom drop.
Once you master these basics, you’ll be picking tomatoes straight from the vine for fresh salsa, sauces, or salads. Let’s get those seeds in the ground—or transplants in the soil—so you can taste the reward sooner rather than later.
This works for container gardens, raised beds, or in-ground plots, whether you’re in a warm climate or a cooler zone. The principles stay the same—just adjust your planting timeline and variety choices. Here’s how to set it up for success from day one.
📚 In This Guide
- What you need
- Instructions
- Tips and common mistakes
- Wrapping up and next steps
What you need
- ● Tomato seeds or seedlings: Choose disease-resistant varieties like Celebrity or Sungold (6–10 plants per gardener, depending on space).
- ● Well-draining soil: Mix 60% topsoil with 30% compost and 10% perlite or sand (pH 6.0–6.8).
- ● Containers or garden bed: For containers: 5-gallon pots (minimum) with drainage holes.
- ● For in-ground: Full sun (6–8+ hours/day) and space 18–24" apart.
- ● Organic fertilizer: Balanced 10-10-10 or tomato-specific blend (apply at planting + every 4–6 weeks).
- ● Mulch: Straw or shredded leaves (2–3" thick) to retain moisture and prevent soil-borne diseases.
- ● Watering can or drip irrigation: Avoid overhead sprinklers to reduce disease risk.
- ○ Copper tape or row covers: Optional but helpful for early-season pest prevention.
- ● 🌡️ Monitor calcium: Add crushed eggshells or calcium nitrate to soil if your water is low in calcium.
- ● ✨ Prune wisely: Remove suckers (side shoots) to improve airflow and reduce stress.
- ● 🔥 Stake or cage: Use 6–8 ft tall stakes or cages to support plants and prevent splaying.
Step-by-step instructions for growing healthy tomatoes
Here's the foolproof method I've used for years to keep tomatoes thriving and producing.
🌱 Step 1: Choose the Right Variety for Your Climate
Start with a variety suited to your growing zone—determinate types like 'Roma' stay compact and produce fruit all at once, while indeterminate varieties like 'Sungold' grow continuously and need staking. I always check the seed packet for days to maturity and pick one that matches my short season. For example, 'Early Girl' matures in 55-65 days, perfect for cooler climates.
Determinate tomatoes work well in containers, while indeterminate types need room to sprawl or climb a trellis. If you're new to gardening, start with a determinate variety—they're more forgiving and produce fruit faster. You'll see the difference in growth habit within weeks of planting.
☀️ Step 2: Plant in Full Sun with Consistent Moisture
Tomatoes need 6-8 hours of direct sunlight daily, so choose a spot that gets morning sun and afternoon shade in hot climates. I dig a hole twice as wide as the root ball but only as deep as the container it came in—burying the stem too deep can cause rot. Add a handful of compost to the bottom of the hole for extra nutrients.
Water deeply right after planting to settle the soil around the roots. Keep the soil consistently moist but not soggy—1-1.5 inches of water per week is ideal. You'll know moisture is right when the top inch of soil feels damp but not wet. Mulch with straw to retain moisture and prevent soil-borne diseases from splashing onto leaves.
💧 Step 3: Fertilize and Monitor for Blossom-End Rot
Feed plants with a balanced fertilizer like 10-10-10 when they start flowering, then switch to a low-nitrogen, high-phosphorus fertilizer like 5-10-10 to encourage fruiting. I apply fertilizer every 3-4 weeks during the growing season, always watering before and after to prevent root burn. Calcium deficiency is the main cause of blossom-end rot, so I add crushed eggshells or a calcium supplement if needed.
Watch for signs of blossom-end rot—dark, sunken spots on the bottom of fruit. This happens when calcium uptake is disrupted by uneven watering or soil pH issues. If you see it, adjust your watering to be more consistent and add a calcium-rich fertilizer. Prune lower leaves to improve airflow and reduce humidity around the fruit.
✂️ Step 4: Prune and Support for Maximum Yield
Prune suckers—those little shoots that grow in the joint between the stem and a branch—regularly to direct energy to fruit production. I remove suckers when they're about 2 inches long, using clean pruners to avoid damaging the main stem. Leave a few leaves at the base for photosynthesis but keep the plant open to airflow to prevent disease.
Stake or cage indeterminate varieties as soon as you plant them—waiting until they're heavy with fruit makes the job harder. I use sturdy bamboo stakes tied with soft plant ties that won't cut into the stem. You'll see stronger, straighter growth and fewer broken branches when you support them early.
🌿 Step 5: Harvest at Peak Ripeness for Best Flavor
Harvest tomatoes when they're fully colored and slightly soft to the touch. I pick them in the morning when the skin is cool and firm, using pruners or a sharp knife to avoid damaging the plant. Leave a short stem attached to prevent rot. You'll know they're ripe when they yield gently to pressure and smell sweet at the stem end.
Store harvested tomatoes at room temperature out of direct sunlight—they won't ripen further once picked. If you have an overabundance, process them into sauces or freeze them whole. The key to a lush harvest is consistency: water, fertilize, and prune regularly, and you'll enjoy tomatoes all season long.
Tips & tricks for perfect tomato gardening
These practical insights will help you prevent common tomato troubles and maximize your harvest.
Variety Selection: The 55-65 day maturity range for varieties like 'Early Girl' is perfect for cooler climates, but don't overlook heat-tolerant options like 'Celebrity' if you live in hotter zones. I've found that container gardening works beautifully with determinate varieties—they stay compact and produce fruit all at once, making them ideal for small spaces or balconies. For indeterminate types like 'Sungold', plan for vertical growth from day one since they'll continue producing until frost.
Sunlight Strategy: Those crucial 6-8 hours of daily sunlight should ideally include morning sun and afternoon shade in hot climates. I've noticed the biggest difference in fruit production when plants get consistent morning light—it kickstarts photosynthesis early. For containers, place them where they'll get maximum sun exposure, but be prepared to move them if afternoon shade becomes necessary during heatwaves.
Blossom-End Rot Prevention: The 3-4 week fertilization schedule is critical, but calcium management is where most gardeners fall short. I've had success using crushed eggshells mixed into the soil at planting time—just bake and grind them for a natural calcium boost. When you see those telltale dark spots, it's already too late to save that fruit, but consistent calcium levels prevent future occurrences. The key is maintaining soil moisture without fluctuations—aim for that damp-but-not-wet top inch consistently.
Pruning Technique: Those 2-inch suckers might seem insignificant, but removing them regularly directs all the plant's energy to fruit production. I prune every 2-3 weeks during the growing season, always using clean pruners to avoid introducing diseases. For indeterminate varieties, I leave just 3-4 main stems for maximum airflow—this simple adjustment has cut my disease rates by nearly half while increasing yield.
Pro Tips for Tomato Gardening Tips
- These practical insights will help you prevent common tomato troubles and maximize your harvest.
- Variety Selection: The 55-65 day maturity range for varieties like 'Early Girl' is perfect for cooler climates, but don't overlook heat-tolerant options like 'Celebrity' if you live in hotter zones.
- Sunlight Strategy: Those crucial 6-8 hours of daily sunlight should ideally include morning sun and afternoon shade in hot climates.
Frequently asked questions
Got questions about growing juicy, rot-free tomatoes? You’re not alone! Here are answers to the most common queries from gardeners just like you.
When is the best time to plant tomato seeds or seedlings?
For warm climates, start seeds indoors 6–8 weeks before the last frost (usually February–March). Transplant seedlings outdoors after soil warms to 60°F+ and nighttime temps stay above 50°F. In cooler zones, opt for transplants in late spring (May–June) to avoid frost damage. Pro tip: Use a soil thermometer to check!
Why do my tomato plants get blossom-end rot?
Blossom-end rot is caused by calcium deficiency (often due to uneven watering or poor soil). Keep soil consistently moist (not soggy), mulch to retain humidity, and add calcium-rich amendments like crushed eggshells or lime. Avoid over-fertilizing with nitrogen—balance with phosphorus/potassium (e.g., 5-10-10 fertilizer).
What’s the fastest way to fix pests like hornworms or aphids?
Handpick hornworms () early in the morning—they’re sluggish! For aphids, blast them off with a hose or introduce ladybugs. Spray neem oil or soapy water (1 tsp mild soap per quart of water) as a natural deterrent. Prevention tip: Encourage predatory insects by planting basil or marigolds nearby!
How long does it take for tomato plants to produce fruit?
From seed to harvest, expect 60–90 days for determinate varieties (bush tomatoes) and 70–100+ days for indeterminate (vining) types. Seedlings planted in spring may fruit in 8–12 weeks if conditions are ideal (6–8 hours of sun, warm temps). Patience pays off—prune suckers to redirect energy to fruit production!
Can I grow tomatoes in containers? What’s the best setup?
Use 5-gallon pots or larger (indeterminate varieties need deeper containers). Ensure pots have drainage holes and fill with well-draining potting mix enriched with compost. Place containers in full sun and water daily (containers dry out faster). Dwarf or cherry tomatoes (e.g., ‘Tiny Tim’) thrive in containers—perfect for balconies or small spaces!
What do I do if my tomato plants flower but don’t set fruit?
Flower drop often happens due to temperature stress (below 55°F at night or above 90°F during the day). Try these fixes:
- Move plants to partial shade during heatwaves.
- Hand-pollinate flowers with a small brush or gently shake plants.
- Ensure balanced fertilization (too much nitrogen = more leaves, fewer fruits).
- Check for blossom-end rot or pests disrupting growth.
Wrapping up and next steps
Growing thriving tomatoes doesn’t have to be a challenge—with the right knowledge, you’ll enjoy juicy, blemish-free harvests all season! Remember to monitor soil pH, provide consistent moisture, and protect your plants from pests and diseases like blossom-end rot. Your efforts will pay off in delicious, homegrown goodness.
Ready to take the next step? Start small—plant a few seeds or seedlings this week and apply these tips. Before you know it, you’ll be savoring sun-ripened tomatoes straight from your garden! 🌱🍅