Tools
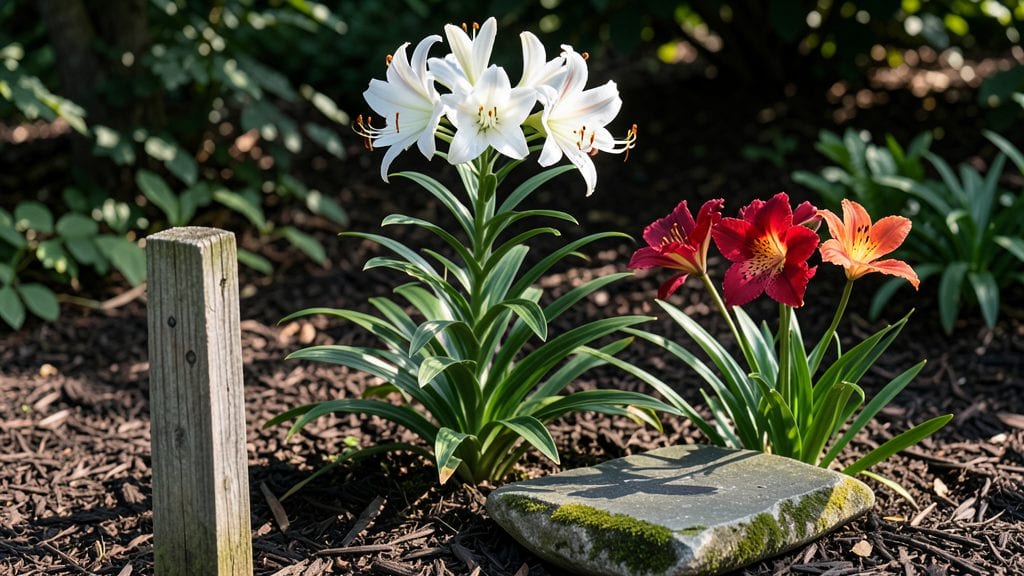
A backyard lily garden transforms any space into a fragrant, sunlit sanctuary where every summer evening feels like a celebration. 🌸 I designed mine after realizing how much I missed the bold, velvety blooms and intoxicating scent of lilies—until I created a dedicated spot where they could truly shine.
The key isn’t just planting them; it’s layering them with foliage that complements their height and color, so the garden feels lush year-round, not just during their bloom season.
Start with a sunny spot that gets at least 6 hours of light daily—most lilies crave full sun to put on their best show. Pair your lilies with ferns or hostas for texture contrast, or add salvias or lavender for fragrance that lingers when the lilies fade.
My favorite trick? Planting daylilies in front—they bloom earlier and hide the bare stems of the true lilies until they’re ready to take center stage. The result is a garden that feels intentional, not just decorative.
By late summer, you’ll have a garden that smells like a meadow at dusk, with blooms in every shade from buttery yellow to deep magenta.
The secret to keeping them thriving? Well-draining soil and minimal fuss—lilies reward patience with months of blooms and foliage that stays striking even after the flowers fade. I’ve had the same clumps multiply for years with just occasional division.
Works for any yard size—whether you’re tucking them into a corner or creating a full border. The best part? They come back bigger every year, turning your garden into a self-sustaining display that gets better with time. Ready to make your backyard the talk of the neighborhood?
📚 In This Guide
- What you need
- Instructions
- Tips and common mistakes
- Wrapping up and next steps
What you need
- ● Lily bulbs: Choose Asiatic, Oriental, Trumpet, or Daylily varieties (5–10 bulbs per variety for a balanced look). Opt for disease-resistant types like 'Stargazer' or 'Casa Blanca'.
- ● Well-draining soil: Mix 1 part garden soil with 1 part compost and 1 part perlite or coarse sand (5–10 cubic feet, depending on garden size).
- ● Organic fertilizer: A balanced 10-10-10 or bulb-specific fertilizer (1–2 lbs per 10 sq ft).
- ● Mulch: 2–3 inches of shredded bark, straw, or pine needles to retain moisture and regulate temperature.
- ● Watering can or hose: With a gentle spray nozzle to avoid displacing bulbs.
- ● Garden gloves: Heavy-duty to protect hands while handling soil and bulbs.
- ● Trowel or bulb planter: For digging holes 6–8 inches deep and 6–12 inches apart (depending on bulb size).
- ● Garden fork: To loosen compacted soil before planting.
- ● Measuring tape: For marking spacing and ensuring symmetry.
- ● Pruners or shears: For trimming spent blooms and foliage.
- ● Decorative stones or pebbles: For a polished look around plant bases (e.g., river rocks or slate tiles).
- ● Trellis or obelisk: For climbing lilies like 'Madam Butterfly' (install before planting).
- ● Drip irrigation system: For automated watering (especially in hot climates).
- ● Scented companion plants: Lavender, roses, or jasmine to enhance fragrance.
- ● Garden stakes or labels: To track varieties and support tall stems.
Step-by-Step instructions for designing a backyard lily garden
Here’s how to create a stunning, low-maintenance lily garden that blooms reliably year after year.
🌱 Step 1: Choose the Right Location and Soil
Lilies thrive in full sun—select a spot that gets at least 6 hours of direct sunlight daily. Avoid areas with harsh afternoon shade or constant wind, which can stress the plants. I like to test the soil first by digging a 6-inch hole—if the soil drains poorly (water pools after 30 minutes), mix in 2-3 inches of compost to improve drainage.
Lilies prefer slightly acidic to neutral soil with a pH between 6.1 and 7.5. You can test your soil with a simple kit from the garden center. If your soil is too alkaline, add sulfur or peat moss to adjust the pH before planting. The key here is well-draining soil—waterlogged roots will rot, and lilies won’t survive.
🪴 Step 2: Plant Lily Bulbs at the Right Depth and Spacing
Plant lily bulbs in early spring or fall, about 4-6 weeks before the first frost. Dig holes 3 times deeper than the bulb’s height—this gives the roots room to establish before winter. For example, a 6-inch bulb needs a 12-inch-deep hole. Space bulbs 12-24 inches apart, depending on the variety (taller lilies need more room).
Place the bulb in the hole with the pointy end facing up—this is where the shoot will emerge. Cover it with soil and water deeply to settle everything. Mulch with 2-3 inches of organic mulch (like shredded bark) to retain moisture and protect the bulbs from temperature swings. This step ensures your lilies establish strong roots before blooming.
☀️ Step 3: Water and Fertilize for Strong Growth
After planting, water the area 1 inch per week, keeping the soil evenly moist but not soggy. Lilies are drought-tolerant once established, but young plants need consistent moisture. I use a soaker hose to water at the base—this prevents fungal diseases that splash up from wet foliage.
Fertilize in early spring with a balanced, slow-release fertilizer (like 10-10-10) mixed into the soil. Avoid high-nitrogen fertilizers—they encourage leafy growth at the expense of blooms. Instead, focus on phosphorus and potassium to promote flowering. Reapply fertilizer in early summer if your lilies look less vigorous.
✂️ Step 4: Prune and Maintain for Year-Round Beauty
Deadhead spent blooms by snipping the flower stalk at the base—this redirects energy to next year’s blooms. Wait until the foliage turns yellow before cutting it back, as the leaves feed the bulb for the following season. I like to leave the foliage until late fall to ensure the bulb stores enough nutrients.
Divide and replant bulbs every 3-4 years to prevent overcrowding. Dig up bulbs in early fall, separate the offsets, and replant them in fresh soil. This keeps your garden looking full and prevents disease buildup. Mulch again after replanting to protect the bulbs through winter.
⏰ Step 5: Protect and Prepare for Winter
In USDA Zones 5-7, mulch heavily with 4-6 inches of straw or leaves before the first frost to insulate the bulbs. In colder zones, consider covering the bed with burlap for extra protection. Lilies are hardy, but young plants or newly planted bulbs benefit from this extra care.
In spring, remove the mulch once the soil warms up (when you can dig a 6-inch hole and feel warmth at the bottom). Water lightly to encourage new growth. With proper winter care, your lilies will return stronger and more vibrant every year.
Tips & tricks for perfect backyard lily gardens
Creating a thriving lily garden takes more than just planting bulbs—these are the little details that make all the difference between a garden that merely survives and one that truly flourishes.
Soil Test First: Before you plant, grab that soil test kit and check your pH. I learned this the hard way after planting lilies in my slightly alkaline soil—my first batch barely survived. Aim for that 6.1-7.5 range, and if you need to adjust, sulfur or peat moss works wonders. The 30-minute water test in Step 1 is your best friend for drainage—if water pools after 30 minutes, you definitely need that compost.
Planting Depth Secret: That 3 times deeper rule in Step 2 isn't just a suggestion—it's crucial. I used to plant mine at regular bulb depth, and they always struggled through winter. For a 6-inch bulb, that 12-inch hole gives roots the room they need to establish before cold sets in. Pro tip: Use a long stick or ruler to verify depth before planting each bulb.
Watering Wisdom: Those 6 hours of sun mean your lilies will thirst quickly. The 1 inch per week guideline works, but I've found morning watering prevents fungal issues better than evening watering. And that soaker hose? It's a game-changer—it delivers water right at the base where lilies need it most, without wetting the leaves where diseases lurk.
Winter Protection Hack: In Zones 5-7, I double up on that 4-6 inches of mulch—first with straw, then top with a layer of leaves. For newly planted bulbs, I go the extra mile and cover with burlap too. The key is keeping that soil temperature stable—lilies hate temperature swings more than they hate cold itself.
Pro Tips for Backyard Lily Garden
- Creating a thriving lily garden takes more than just planting bulbs—these are the little details that make all the difference between a garden that merely survives and one that truly flourishes.
- Soil Test First: Before you plant, grab that soil test kit and check your pH.
- Planting Depth Secret: That 3 times deeper rule in Step 2 isn't just a suggestion—it's crucial.
Frequently asked questions
Got questions about creating your dream backyard lily garden?
Here are some of the most common ones—plus expert tips to keep your blooms happy and thriving!
What’s the best time of year to plant lilies in my backyard garden?
For most lilies, spring or early fall (after the last frost or before the first hard freeze) is ideal. This gives roots time to establish before extreme temperatures. Asiatic and Oriental lilies (hardy types) can even handle fall planting in mild climates. Avoid planting in summer heat—roots stress easily!
Do lilies need full sun, or can they grow in partial shade?
Most lilies love full sun (6+ hours/day) for vibrant blooms, but Oriental and Stargazer lilies tolerate partial shade (4–6 hours), especially in hot climates. Daylilies (Hemerocallis) are more flexible—thrive in morning sun + afternoon shade. Watch for leggy stems or fewer flowers if light is insufficient.
Are lilies toxic to pets or children? Should I avoid them?
Yes! Lilies are highly toxic to cats—even pollen or water from vases can cause kidney failure. Dogs and kids may experience stomach upset if ingested. Opt for pet-safe alternatives like daylilies, cannas, or spider lilies (Lycoris) if safety is a concern. When planting, choose low-traffic areas or add fencing.
How often should I water my lilies, and do they need fertilizer?
Water deeply 1–2 times per week (more in extreme heat), ensuring soil stays moist but not soggy. Fertilize lightly in spring with a balanced 10-10-10 or bulb-specific food. Avoid over-fertilizing—it can burn roots or reduce blooms. Compost or well-rotted manure works too!
What pests or diseases should I watch for in my lily garden?
Common issues include:
- Aphids/slugs: Use neem oil or beer traps for slugs.
- Lily beetles: Handpick adults or use pyrethrin spray.
- Fungal diseases (botrytis): Improve airflow, avoid overhead watering.
- Viral streaks: Remove infected plants immediately to prevent spread.
Pro tip: Rotate lilies annually to prevent soil-borne diseases!
Can I grow lilies in containers? What’s the best setup?
Asiatic and Martagon lilies thrive in 12"+ pots with well-draining soil (mix potting soil with perlite). Use terracotta containers for heat retention. Avoid Oriental lilies in pots—they’re heavy and need deep roots. Fertilize monthly in growing season and winterize pots in cold climates.
Wrapping up and next steps
Creating a backyard lily garden is a rewarding way to bring timeless beauty and fragrance to your outdoor space—no green thumb required! 🌸 Whether you’re drawn to the bold elegance of Asiatic lilies, the delicate charm of Candidum lilies, or the hardy resilience of Daylilies, these plants promise year-round interest with minimal fuss.
Start small, experiment with colors, and let your garden evolve into a fragrant sanctuary that reflects your unique style.
Ready to dive in? Pick a sunny spot, gather your supplies, and plant your first bulbs this weekend! Your future self—and pollinators everywhere—will thank you. 🌿✨