Tools
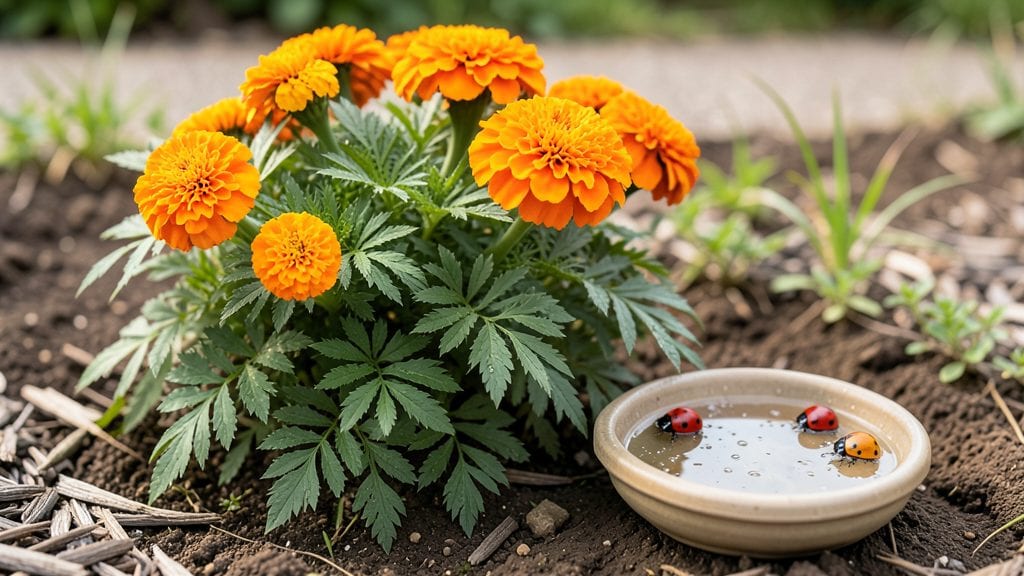
The beneficial ladybugs in your garden are the ultimate pest patrol—no chemicals needed. 🌿 I learned the hard way that these tiny red-and-black dots aren’t just cute; they’re the secret weapon against aphids, mites, and soft-bodied insects that plague plants.
One adult ladybug can eat up to 5,000 pests in its lifetime, and their larvae are even hungrier.
The key is creating an environment they’ll stick around for: plant nectar-rich flowers like dill, fennel, or marigolds, and avoid pesticides that would kill them. Release them in the evening when they’re less likely to fly away, and provide water sources like shallow dishes with pebbles.
Within weeks, you’ll notice fewer pests and more balanced plant growth—nature’s way of keeping your garden thriving.
You’ll see results faster than you think—ladybugs start hunting immediately, and their presence deters other pests from moving in. The best part? They’re harmless to your plants, pets, and even kids. This isn’t just about controlling pests; it’s about building a garden ecosystem that works with you, not against you.
Works in vegetable gardens, flower beds, and even houseplants if you bring them indoors temporarily. The only catch? They’ll leave if conditions aren’t right—so keep those flowers blooming and the water available. Let’s get your garden’s natural defense team in place!
📚 In This Guide
- What you need
- Instructions
- Tips and common mistakes
- Wrapping up and next steps
What you need
- ● Ladybugs (live, beneficial species): 100–500 adults or larvae (depending on garden size; more for larger plots). Species: Hippodamia convergens or Adalia bipunctata (avoid Asian lady beetles—they’re invasive!).
- ○ Release containers: 1–2 breathable mesh bags or small cardboard boxes (with ventilation holes). Optional: A spray bottle with water (for gentle misting if ladybugs are dehydrated).
- ● Garden habitat enhancers: Native nectar-rich flowers (e.g., dill, fennel, marigolds, or cosmos—plant 3–5 per 100 sq. ft.). Diverse foliage (e.g., aster, yarrow, or milkweed for shelter). Water source: A shallow dish with pebbles (to prevent drowning) or a drip irrigation spot.
- ○ Safety gear (for handling): Lightweight gloves (optional—ladybugs are harmless but can pinch if stressed!). Soft brush or spoon (for gentle transfers).
Instructions for creating a ladybug-friendly garden
Here’s how to turn your garden into an inviting home for ladybugs—nature’s tiny pest controllers.
🌿 Step 1: Plant Ladybug-Favorite Flowers
Choose flowers that attract ladybugs with nectar and pollen. Plant dill, marigolds, yarrow, and cosmos—these are top picks. Ladybugs love bright colors, so place them near problem areas like veggie patches or roses. I always scatter a few dill plants near my tomato garden; they’re a magnet for ladybugs and deter pests like aphids.
Space plants 12-18 inches apart so ladybugs can move freely between blooms. Avoid pesticides here—even organic sprays can harm these beneficial insects. If you see ladybugs lingering, they’re happy and doing their job.
☀️ Step 2: Provide Shelter and Water
Ladybugs need safe spots to hide from predators like birds and spiders. Add small rocks, dense mulch, or a shallow water dish with pebbles (so they can drink without drowning). I place a 1-inch-deep saucer filled with water and pebbles near my flower beds—ladybugs will gather around it daily.
They also love leaf litter or a small brush pile in a shady corner. These spots mimic their natural habitat and encourage them to stay. Check the water dish weekly—stagnant water breeds mosquitoes, and you’ll want to keep your garden pest-free.
💧 Step 3: Avoid Chemical Interference
Skip synthetic pesticides entirely—even "organic" sprays like neem oil can harm ladybugs if overused. Instead, rely on soapy water sprays (1 tsp mild dish soap per quart of water) for occasional aphid outbreaks. Ladybugs are sensitive, so I only spray at night when they’re less active.
If you must use a broad-spectrum pesticide, apply it after dark and avoid treating plants ladybugs visit. A quick check for ladybugs before spraying saves them—and your garden’s pest control—from disaster.
⏰ Step 4: Monitor and Encourage Year-Round
Ladybugs thrive in warm, sunny spots but need protection in winter. Leave some leaf litter or mulch undisturbed until spring—they’ll overwinter there. In colder climates, consider buying ladybug pupae from garden centers in early spring to jumpstart your population.
Watch for signs of success: fewer aphids, more ladybug eggs (tiny yellow dots on leaves), and adult ladybugs patrolling your plants. If you see them, you’re doing it right! A healthy garden becomes self-sustaining with these tiny allies.
Tips & tricks for perfect ladybug-friendly gardens
A few simple tricks will help you create the perfect ladybug haven—and keep those pesky aphids away for good.
Plant Placement Matters: In Step 1, when planting your dill, marigolds, yarrow, and cosmos, place them strategically near your veggie patches and roses. I've found that ladybugs are more likely to stay and patrol when their food sources (nectar and aphids) are close together. For maximum effect, create a small "ladybug zone" with these flowers surrounding your most pest-prone plants. This creates a natural pest control loop that works year after year.
Water Station Design: For Step 2's water dish, I've learned that ladybugs prefer shallow dishes with pebbles—not just for safety, but because they can easily climb out if needed. Use a 1-inch-deep saucer with pebbles covering about 75% of the surface. This design prevents drowning while creating perfect landing spots. Place it in partial shade to keep the water cooler and more inviting for these tiny visitors.
Seasonal Strategy: In Step 4, don't forget that ladybugs need different care in winter. While they'll overwinter naturally in leaf litter, you can give them extra protection by placing a small mesh cage over their shelter. This keeps out predators while allowing airflow. In colder climates, consider planting extra flowers in late summer to provide food as their natural sources fade.
Pest Monitoring: The key to success is watching for ladybug activity. After implementing all steps, check your plants regularly for tiny yellow eggs on the undersides of leaves—this means your ladybugs are breeding successfully. If you notice fewer eggs after a few weeks, add more flowers or consider purchasing additional ladybug pupae from garden centers. Their presence is the best indicator that your garden is truly working as a pest control system.
Pro Tips for Ladybugs Beneficial Garden
- A few simple tricks will help you create the perfect ladybug haven—and keep those pesky aphids away for good.
- Plant Placement Matters: In Step 1, when planting your dill, marigolds, yarrow, and cosmos, place them strategically near your veggie patches and roses.
- Water Station Design: For Step 2's water dish, I've learned that ladybugs prefer shallow dishes with pebbles—not just for safety, but because they can easily climb out if needed.
Frequently asked questions
Got questions about using ladybugs to protect your garden?
Here are some of the most common ones—and their answers—to help you get started with confidence!
How do I know if my garden needs ladybugs?
Ladybugs are especially helpful if you’re battling aphids, mites, whiteflies, or soft-bodied pests. Look for clusters of tiny, sticky insects on leaves or webbing in plants—these are classic signs! If you spot them, ladybugs can be a natural, chemical-free solution. Pro tip: Check undersides of leaves first, where pests often hide!
When is the best time to introduce ladybugs to my garden?
The ideal time is early morning or late afternoon when temperatures are below 85°F (29°C) to avoid stressing them. Spring and early summer are perfect, but avoid releasing them during extreme heat, cold snaps, or rainy weather. Timing matters: Release them when pest populations are just starting to grow for maximum effectiveness.
Can I buy ladybugs online, or should I find them locally?
Both options work! Online suppliers (like Beneficial Insectary) sell lab-raised ladybugs, which are safe and guaranteed pest-free. Locally, check native plant nurseries or garden centers for wild-caught varieties—but avoid hitchhiking them from other gardens (they might carry diseases). Local tip: If buying online, order in advance and store them in a cool, dark place until release day.
What should I do if my ladybugs disappear after release?
Don’t worry—ladybugs are skilled fliers and may leave if your garden lacks food or shelter. To keep them around:
- Plant nectar-rich flowers (like dill, fennel, or marigolds) for adult food.
- Leave some leaf litter or mulch for overwintering.
- Avoid pesticides (even organic ones) for 24–48 hours post-release.
Are there any pests ladybugs won’t eat?
Ladybugs have a limited menu! They primarily target soft-bodied insects like aphids but ignore:
- Hard-shelled pests (e.g., beetles, caterpillars).
- Fungal diseases or weeds.
- Vegetables/fruits (they’re not plant-eaters!).
Wrapping up and next steps
Incorporating ladybugs into your garden is a game-changer for natural pest control—no harsh chemicals required! 🌱 These tiny allies feast on aphids, mites, and other pests while boosting biodiversity. Start small, observe their impact, and watch your garden thrive with effortless harmony.
Ready to take action? Set up a ladybug habitat today—your plants (and future harvests) will thank you! Need help? Check out our step-by-step guide or explore more eco-friendly gardening tips.