
Tools
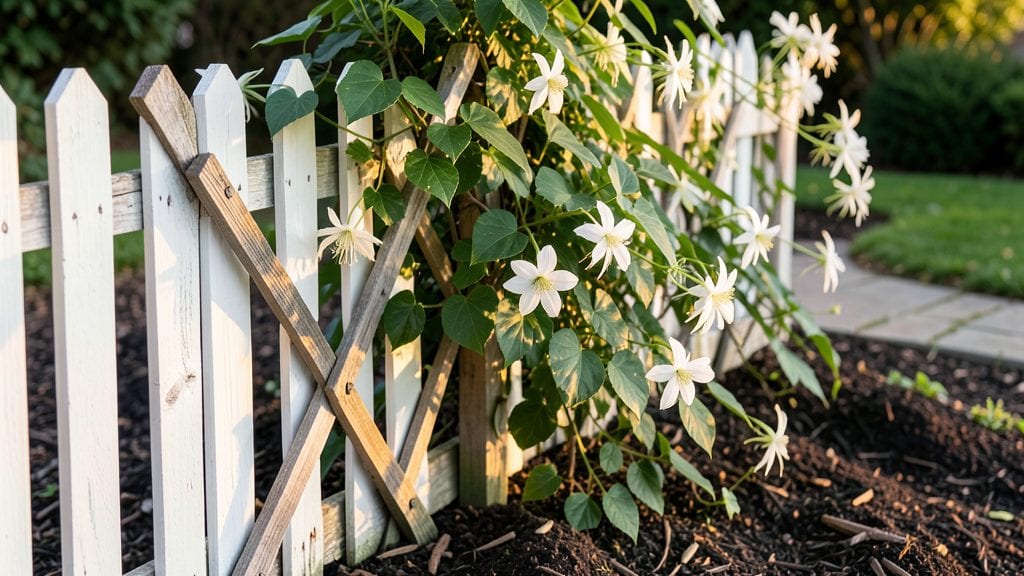
A beautiful garden fence can turn your yard into a private sanctuary where nature and design harmonize flawlessly. I learned this the hard way—my first fence was purely functional, but after adding lattice panels and climbing roses, my garden became a lush, living retreat.
The best fences do more than block views; they frame your plants, create vertical gardens, and even support vines that soften their lines over time.
You don’t need expensive materials to make this work. Simple cedar planks, rustic bamboo rolls, or even repurposed metal panels can create stunning privacy when arranged thoughtfully.
Add a few trellises for climbing plants like jasmine or clematis, and suddenly your fence becomes part of the garden’s beauty—not just a barrier. The key is balancing structure with organic elements, like weaving branches through slats or letting ivy cascade over the top.
Imagine stepping into a space where fragrant roses climb your fence in summer, where morning sunlight filters through lattice panels, and where the hum of bees feels like a private concert. A well-designed fence doesn’t just hide your neighbors—it turns your garden into a curated escape.
We’ll explore materials, styles, and plant pairings that turn any fence into a feature, not just a function.
Whether you’re starting from scratch or refreshing an old fence, small changes make a big difference. Think about how your fence can grow with your garden—like adding hooks for string lights or leaving gaps for bird feeders.
The goal? A space that feels like an extension of your home, not just a yard. Let’s get started on making that vision real.
📚 In This Guide
- What you need
- Instructions
- Tips and common mistakes
- Wrapping up and next steps
What you need
- ● Fence Panels or Pickets: Pre-made panels (4–6 ft tall, 4–8 ft long) or individual pickets (2x4 or 2x6 lumber, 6–8 ft tall). Choose cedar, redwood, or pressure-treated pine for durability.
- ● Posts: 4x4 pressure-treated lumber (6–8 ft long) or concrete footings (for metal fences). Spacing: 6–8 ft apart for panels, 2–3 ft for pickets.
- ● Hardware: Galvanized or stainless steel screws (2.5–3.5 inches, 100+ pieces).
- ● Post anchors or concrete (for securing posts).
- ● Hinges and latches (if adding gates).
- ● Fasteners for Gates: Heavy-duty hinges (2–4 per gate), latch bolts, and a strike plate.
- ● Measuring & Marking: Tape measure, chalk line, and carpenter’s pencil.
- ● Cutting: Circular saw or miter saw (for precise cuts), handsaw (backup).
- ● Driving & Securing: Drill/driver, impact driver, post hole digger (or auger), and level.
- ● Safety Gear: Work gloves, safety glasses, ear protection, and a dust mask.
- ● Decorative Touches: Stain/sealant (for wood), decorative post caps, or lattice panels for texture.
- ● Lighting: Solar-powered post lights or string lights for ambiance.
- ● Privacy Boosters: Climbing plants (e.g., ivy, roses) or bamboo screens.
- ● Gate Enhancements: Custom knobs, glass inserts, or wrought-iron designs.
Step-by-Step guide to building beautiful garden fences
Transform your outdoor space with a fence that adds both privacy and charm—here’s how to create one that blends function with natural beauty.
Plan Your Fence Layout and Design
Start by sketching your fence’s route on paper, marking any obstacles like trees, utility lines, or uneven terrain. Measure the perimeter carefully, accounting for gates and corners—most fences require 4-foot sections for stability. I always check local building codes first; some areas mandate setback distances from property lines or height restrictions.
Choose a design that matches your garden’s style. Classic picket fences offer a light, airy look, while solid panels provide full privacy. For a rustic touch, consider cedar or redwood slats spaced 2-3 inches apart—they let sunlight filter through while still blocking views. Mark the layout with stakes and string lines to visualize the final shape before digging.
Dig Post Holes and Set Corner Anchors
Use a post hole digger or auger to create holes 6-8 inches wider than the post diameter and 12-18 inches deep, depending on your climate. Soil with high moisture content (like clay) needs deeper holes for stability. I like to dig in 2-foot increments, checking depth frequently—too shallow, and the fence sways in wind; too deep, and the post becomes difficult to level.
Place corner posts first, securing them with concrete mix poured into the holes. Use a level to ensure they’re perfectly vertical before the concrete sets. For straight sections, drive temporary stakes at 8-foot intervals to guide the rest of the posts. Let the concrete cure for at least 24 hours before proceeding—rushing this step leads to wobbly posts down the road.
Install Posts and Attach Horizontal Rails
Set each post in its hole, using a level to keep it plumb while securing it with 2x4 braces on either side. Pour concrete around the base, tamping it down to remove air pockets. For extra strength in windy areas, I add galvanized metal brackets to the posts before the concrete hardens. Wait 48 hours for full curing before attaching rails.
Measure the distance between posts and cut 2x4 horizontal rails to fit, leaving a 1/8-inch gap for expansion. Attach the top and bottom rails first, then add 2-3 intermediate rails depending on your design. Pre-drill holes to prevent wood splitting, and use deck screws for a clean, hidden finish. Check diagonally across the fence to ensure everything stays square.
Add Panels, Slats, or Picket Sections
For privacy fences, attach pre-made panels or slats to the rails using exterior-grade screws or hidden hinges. If building from scratch, cut 1x6 cedar boards to your desired height (typically 4-6 feet) and space them 1/4-inch apart for drainage. Stagger the seams between rows to create a stronger, more uniform look. For picket fences, space the pickets 2-4 inches apart at the base, tapering to 1 inch apart at the top.
Secure each section tightly, but leave a 1/8-inch gap at the top for airflow. Test the fence’s stability by gently pushing on it—if it wobbles, reinforce the posts or add diagonal braces. Paint or stain the wood immediately after assembly to protect it from weathering. I always use a waterproof sealant on the underside of rails to prevent rot from moisture seeping up.
Add Finishing Touches and Maintenance Tips
Install gates last, hinging them to the nearest post and adding a self-closing mechanism for convenience. Use heavy-duty hardware to support the gate’s weight, and consider adding a latch or padlock for security. Fill any gaps between the gate and frame with weatherstripping to keep pests out. For a polished look, add decorative post caps or lattice accents along the top.
Schedule annual maintenance to keep your fence looking its best. Inspect posts for rot or termite damage, and reapply stain or paint every 2-3 years, or as needed. Trim back any overgrown vegetation touching the fence to prevent moisture buildup. With proper care, a well-built fence can last 20+ years, offering both privacy and curb appeal.
Tips & tricks for perfect garden fences
Building a beautiful garden fence is all about the details—these are the tricks I wish I'd known before starting my first project. The difference between a fence that lasts decades and one that sags within a year often comes down to these small but critical steps.
Precision in Post Placement: In Step 2, when digging post holes, I can't stress enough how important it is to check depth at every 2-foot increment. Use a tape measure to verify the 12-18 inch depth—especially in clay soil where you might need that extra depth for stability. I learned this the hard way when my first fence posts started leaning after just one winter. For extra security in windy areas, consider adding galvanized metal brackets to the posts before pouring concrete—this creates a hidden reinforcement that makes all the difference.
Curing Time is Non-Negotiable: The 24-hour concrete curing time in Step 2 might seem like an eternity, but rushing it leads to posts that don't set properly. I've seen people skip this and end up with posts that tilt over time. For maximum strength, especially in windy climates, let the concrete cure for the full 48 hours before attaching rails. This extra day ensures your fence will stand firm for years to come. Pro tip: Keep the posts moist during curing by lightly spraying water over the concrete every few hours—this prevents cracking.
Wood Selection Matters: While the instructions mention cedar or redwood slats, I recommend choosing pressure-treated lumber if you're building in a humid climate. Cedar and redwood are beautiful but can warp if not properly sealed. For picket fences, pre-drill holes in the pickets before attaching them to the rails—this prevents splitting when you drive in the screws. And here's something nobody tells you: always stain or paint the underside of rails with a waterproof sealant to prevent rot from moisture seeping up from the ground.
Diagonal Check for Square Alignment: In Step 3, when attaching your horizontal rails, don't just check vertically—measure diagonally from corner to corner. This ensures your fence stays perfectly square even if individual posts aren't perfectly aligned. I've seen fences that looked straight from the front but had a noticeable lean when viewed from the side. This simple check takes just a minute but saves hours of frustration later. For gates, use heavy-duty hardware rated for at least 200 pounds—it's worth the investment to prevent sagging over time.
Pro Tips for Beautiful Garden Fences
- Building a beautiful garden fence is all about the details—these are the tricks I wish I'd known before starting my first project.
- Precision in Post Placement: In Step 2, when digging post holes, I can't stress enough how important it is to check depth at every 2-foot increment.
- Curing Time is Non-Negotiable: The 24-hour concrete curing time in Step 2 might seem like an eternity, but rushing it leads to posts that don't set properly.
Frequently asked questions
Got questions about choosing, installing, or maintaining beautiful garden fences?
Here are some of the most common concerns—plus expert tips to help you make the best decisions for your outdoor space!
What’s the best material for a beautiful yet durable garden fence?
It depends on your priorities! Wood (like cedar or redwood) offers classic charm and natural beauty but requires maintenance. Vinyl is low-maintenance and stylish, while wrought iron adds elegance but can be pricier. For a budget-friendly option, composite materials blend durability with aesthetics. Consider climate, budget, and upkeep before deciding!
How long does it take to install a garden fence?
Installation time varies by fence type, size, and complexity. A simple 6-foot wood fence for a 50-foot yard typically takes 1–3 days for a DIYer or 1 day with pros. Larger projects, custom designs, or materials like stone may extend timelines. Pro tip: Schedule during dry weather to avoid delays!
Are there affordable alternatives to traditional fencing?
Consider bamboo screens (economical and eco-friendly), lattice panels (adds texture without full height), or living hedges (privacy with greenery). For temporary solutions, portable fabric fences or trellises with climbing plants work wonders. DIY kits (like cedar picket sets) also cut costs while keeping a polished look.
How do I maintain my garden fence to keep it looking beautiful?
Regular care extends your fence’s lifespan! Wood fences: Seal or stain every 2–3 years and inspect for rot or pests. Vinyl: Clean with mild soap and water; avoid pressure washing. Metal: Rust-proof with paint or powder coating. For all types, trim nearby plants to prevent moisture buildup. Pro tip: Address small issues (like loose posts) early to avoid costly repairs!
Do I need a permit to install a garden fence?
Permit rules vary by location—check local building codes! Many areas require permits for fences over 6 feet tall or near property lines. Front-yard fences often have stricter regulations. Always verify before digging or installing. Pro tip: Call 811 to check for underground utilities before starting!
Can I install a garden fence myself, or should I hire a pro?
DIY is doable for simple, straight fences (like wood or vinyl panels) if you have basic tools and patience. Complex designs (e.g., curved, multi-level, or stone) or uneven terrain may need a pro. Pro tip: If unsure, hire a contractor for the layout and post-setting—the trickiest parts!
Wrapping up and next steps
A beautiful garden fence isn’t just about privacy—it’s a statement of style, functionality, and timeless charm. Whether you opt for rustic wood, sleek metal, or lush living screens, the right choice enhances your outdoor space while reflecting your personality. 🌿✨
Ready to transform your garden? Start by sketching your vision, gathering materials, and taking it step by step. With patience and creativity, your dream fence—and the serene retreat it creates—will become a reality!