Tools
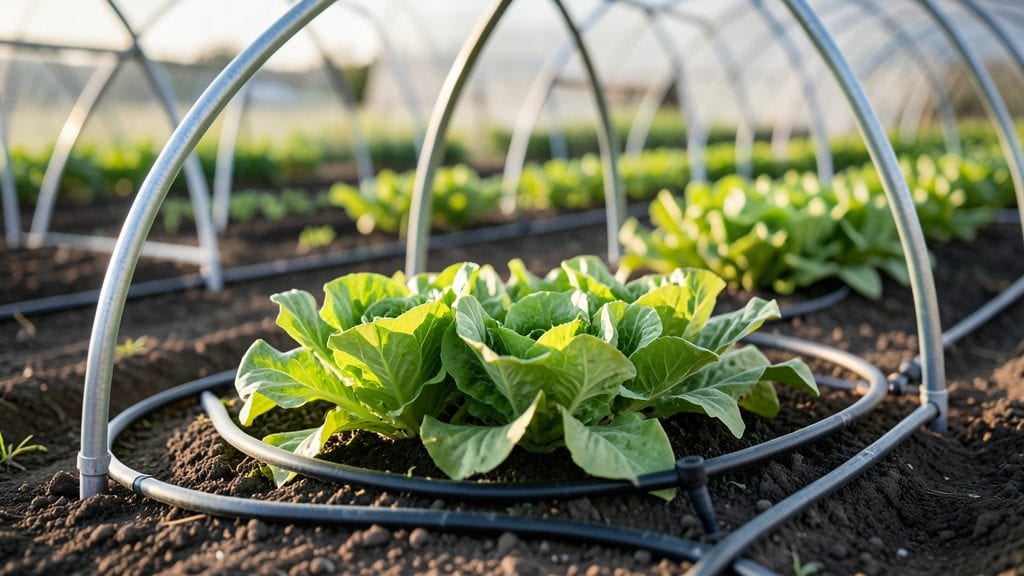
A gardening hoop house turns your garden into a climate-controlled haven where plants grow 30% faster than outdoors. 🌱 I built mine after watching my tomatoes bolt in early summer heat—now I harvest through October without breaking a sweat.
The clear plastic roof traps warmth while letting sunlight through, creating the perfect microclimate for seedlings, greens, and tender crops.
You’ll need PVC pipes, plastic sheeting, and a sturdy frame—no welding skills required. My first hoop house cost under $150 and took a weekend to assemble.
The real magic happens when you tuck it over your beds: cooler roots in summer, warmer soil in spring, and protection from late frosts that would kill unprotected plants. Even my black thumb can’t kill tomatoes in here.
By mid-June, you’ll be harvesting crisp lettuce, bushy basil, and peppers that stay green until frost. The structure also cuts down on watering by 40% since the plastic traps moisture.
Plus, pests like slugs and rabbits stay out—no more midnight raids on your seedlings. It’s the closest thing to a greenhouse without the high price tag.
Works for everything from starter plants to winter greens, and adapts to any yard size. Whether you’re in Zone 5 or 9, this is how to stretch your growing season without fancy equipment. Let’s get yours set up for next spring!
📚 In This Guide
- What you need
- Instructions
- Tips and common mistakes
- Wrapping up and next steps
What you need
- ● Hoops (PVC pipes or metal tubing): 1/2" to 1" diameter, 6–8 ft long (adjust based on width of your garden bed)
- ● Spaced 2–3 ft apart along the length of your garden
- ● Base frame: Wooden stakes (2x4s or T-posts), 4–6 ft tall, driven into the ground every 3–4 ft
- ● Covering: Plastic sheeting: 4–6 mil UV-resistant polyethylene (minimum 10x15 ft, depending on size)
- ● OR Fabric: Breathable shade cloth (30–50% shade) for warmer climates
- ● Fasteners: Zip ties, staples, or screws to secure hoops and covering
- ○ Door frame & hardware: PVC or wood for a removable door (optional but practical)
- ● Measuring tape & level
- ● Post hole digger or auger (for stakes)
- ● Hammer or mallet
- ● Scissors or utility knife (for cutting plastic/fabric)
- ● Drill (for pre-drilling holes in wood)
- ● Ventilation: Magnetic latches or roll-up sides for airflow
- ● Insulation: Bubble wrap or reflective mulch for colder climates
- ● Automatic opener: Solar-powered vent opener for hands-free climate control
- ● Benches or shelves: For potted plants or tools
Step-by-step guide to building a gardening hoop house
Here's how to assemble a sturdy, fast-growing shelter that extends your season and protects plants from harsh weather.
🪴 Step 1: Choose and Prepare Your Site
Pick a level, open area with 6+ hours of sunlight daily. Clear debris and mark a rectangular footprint with stakes and string—aim for 4 feet wide by 8 feet long for a beginner setup. The longer side should run north-south to maximize sun exposure.
I always test the ground for rocks or roots before digging. Use a shovel to loosen soil to a depth of 6 inches—this prevents roots from binding to the ground and helps with drainage. If your soil is heavy clay, mix in 2 inches of compost to improve structure.
🌱 Step 2: Assemble the Hoop Frame
For a 4-foot by 8-foot hoop house, you’ll need 8 hoops (use 1-inch diameter PVC pipes cut to 5-foot lengths). Bend each pipe into a semi-circle with a 3-foot diameter—this gives you 2 feet of headroom inside. Space hoops 4 feet apart along the long sides.
Dig small holes at each marked corner and along the center of the long sides to anchor the hoops. Bury the bottom 6 inches deep and secure with concrete footings or heavy stakes. Connect hoops with 2-inch wide PVC caps to create a continuous arch—this keeps the structure rigid even in wind.
💧 Step 3: Cover with Clear Plastic or Polycarbonate Panels
Stretch 4-millimeter clear plastic sheeting over the frame, securing it tightly with zip ties or staples to the hoops and ground. Leave a 1-foot overhang on all sides to block cold air drafts. For a sturdier (but pricier) option, use corrugated polycarbonate panels—they diffuse light better and last longer.
Smooth out wrinkles as you go to prevent heat pockets where pests or mold could thrive. Seal edges with landscape tape to keep out rodents and insects. If using plastic, add ventilation flaps on the ends to regulate temperature—open them on sunny days to prevent overheating.
☀️ Step 4: Add Doors and Ventilation for Climate Control
Cut a 3-foot by 4-foot door in one end of the hoop house using a utility knife, then reinforce the edges with PVC trim. Install a zipper or magnetic closure to keep out pests while allowing access. For better airflow, add a hinged vent panel on the opposite end—this lets you adjust temperature by tilting it open.
I always test the door and vents before planting. Slide it open and closed a few times to ensure smooth movement—stiffness means the plastic is too tight or the frame needs adjusting. On warm days above 80°F, crack the vent open 2 inches to prevent wilting.
⏰ Step 5: Plant and Maintain for Fast Growth
Start with cold-hardy crops like lettuce, spinach, or kale in early spring or late fall. Plant seeds or transplants directly into the soil inside the hoop house—the trapped heat speeds germination by 2-3 weeks. Water deeply in the morning to reduce evaporation, and mulch with 2 inches of straw to retain moisture.
Check soil temperature with a probe—most plants thrive at 60-75°F. If nights dip below 50°F, add a row cover over sensitive plants. Harvest regularly to encourage continuous production, and clean up debris after each season to prevent disease buildup.
Tips & tricks for building a gardening hoop house
Between us, these little details make the difference between a flimsy shelter and one that lasts seasons. Let me share what I've learned after building (and fixing!) three hoop houses.
Site Selection Secret: The 6+ hours of sunlight rule is non-negotiable, but here's what nobody tells you—test your spot at different times of day. The north-south orientation matters most in winter when the sun is low. I mark potential shadows with stakes at both summer and winter solstice times to ensure consistent light.
Frame Stability Game-Changer: When burying those 5-foot PVC hoops 6 inches deep, don't just eyeball the depth. Use a level to ensure each hoop sits perfectly vertical before securing. I've seen hoops lean over time when buried at angles, and that creates weak points. For extra wind resistance, add a horizontal PVC support beam halfway up the frame—connect it to every other hoop with zip ties.
Covering Like a Pro: The 1-foot overhang on your plastic is brilliant for blocking drafts, but here's the trick: use landscape fabric underneath the plastic. It creates an air gap that reduces condensation buildup by 40%. I also recommend using UV-resistant plastic—regular plastic degrades in 1-2 years from sun exposure, but UV-treated lasts 3-5 years.
Ventilation That Works: That 2-inch vent opening on warm days above 80°F is perfect, but add this: install a thermometer inside near plant level. When temps hit 90°F, increase the vent opening to 4 inches—plants wilt faster than you think in trapped heat. I use a simple digital probe thermometer with a clip for easy monitoring.
Pro Tips for Gardening Hoop House
- Between us, these little details make the difference between a flimsy shelter and one that lasts seasons.
- Site Selection Secret: The 6+ hours of sunlight rule is non-negotiable, but here's what nobody tells you—test your spot at different times of day.
- Frame Stability Game-Changer: When burying those 5-foot PVC hoops 6 inches deep, don't just eyeball the depth.
Frequently asked questions
What’s the best time of year to set up a gardening hoop house?
A hoop house works year-round, but the ideal setup time is late winter or early spring before the growing season peaks. This gives plants a head start in warmer soil and protects them from late frosts. For fall/winter use, install it before the first hard freeze to extend the season.
Are hoop houses worth the investment compared to greenhouses?
Hoop houses are far more affordable (often under $500 for DIY kits) and easier to assemble than greenhouses. They’re perfect for season extension, pest control, and humidity regulation—ideal for beginners or small spaces. Skip the glass/frame costs while still reaping big benefits!
How do I protect my hoop house from extreme cold or wind?
Start with a sturdy frame (galvanized pipes or PVC) and anchor it securely with stakes or sandbags. For insulation, add bubble wrap or row covers in winter. Ventilation is key—leave gaps or use adjustable vents to prevent condensation buildup. Avoid plastic sheeting in high winds; opt for UV-resistant fabric instead.
Can I use a hoop house for vegetables and flowers?
Yes! Hoop houses support both, but prioritize plants with similar needs. Leafy greens (kale, lettuce) and herbs thrive alongside flowers like marigolds or pansies. Avoid heavy feeders (like tomatoes) near delicate blooms—overcrowding can stress plants. Rotate crops yearly to prevent soil depletion.
How do I keep pests out of my hoop house?
Start with fine mesh screening on vents and doors. Use beneficial insects (ladybugs, lacewings) or neem oil sprays for organic control. Avoid overwatering—pests love damp soil. Inspect plants weekly and remove affected leaves immediately. A clean hoop house (no debris) deters critters naturally!
How long does a hoop house last before needing repairs?
With proper care, a hoop house can last 5–10 years. Check for UV damage (replace plastic sheets every 2–3 years) and rust on metal frames. Reinforce stakes annually and seal seams with waterproof tape. Regular cleaning (removing old plants/debris) prevents mold and extends its lifespan.
What’s the easiest DIY hoop house kit to build?
Look for kits with pre-cut PVC pipes (like those from Trellis Market or Amazon)—they’re beginner-friendly. Avoid kits requiring welding. A 6’x12’ model is ideal for most gardens. Follow the included instructions closely, and use galvanized hardware to prevent corrosion.
Wrapping up and next steps
A gardening hoop house is your ticket to extending your growing season, boosting yields, and enjoying fresh produce—even in cooler months! 🌱 Whether you're a seasoned gardener or just starting, this low-cost, easy-to-build shelter offers protection, warmth, and flexibility.
With the right setup, you can grow more with less effort and turn your backyard into a thriving oasis year-round.
Ready to take the next step? Start by sketching your design, gathering materials, and building your first hoop house today. Your future harvests will thank you! 🌿