
Vegetables
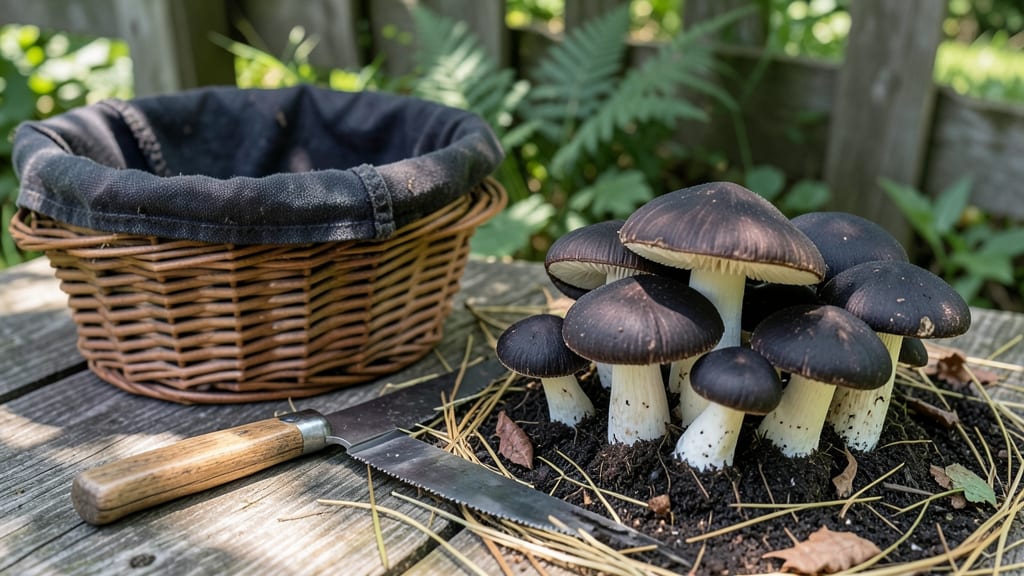
Growing black garden mushrooms like shaggy ink caps transforms your shady backyard into a year-round harvest zone. 🌿 I’ve turned my dampest corner into a mushroom patch that produces dark, velvety caps from spring through fall—no greenhouse needed.
The key is mimicking their natural woodland habitat, where moisture, shade, and decaying wood create the perfect conditions.
Start by selecting a spot with 60-80% shade and well-draining soil—think dappled sunlight under trees or a north-facing corner. You’ll need a substrate mix of hardwood sawdust, straw, and compost (no nitrogen-heavy amendments), then inoculate it with mushroom spawn.
Keep the bed consistently moist, like a wrung-out sponge, and protect it from direct rain with a simple tarp or shade cloth.
Within 4-6 weeks, you’ll see clusters of dark, shaggy caps pushing through the substrate. Harvest them by twisting gently at the base when they’re fully mature but before the spores release.
One bed can yield 2-3 pounds of mushrooms per season, and the soil stays fertile for years—just replenish the substrate as needed.
Watch for slugs (they love these mushrooms too) and avoid overwatering, which causes mold. In colder climates, a thick mulch layer keeps production going through light frosts. The secret? Patience and shade—your garden’s quietest corner becomes its most productive.
Root Causes of Dark Spots
When your prized garden mushrooms start developing unsightly black patches or spots, it’s usually a sign that something’s gone awry in their growing environment.
These dark discolorations can appear on the caps, stems, or even the substrate itself—and understanding the root causes is key to fixing the problem before it spreads. Let’s break down the most common culprits, backed by science and practical insights.
Mushrooms thrive in a narrow temperature range (typically 55–75°F for most varieties), and straying outside this zone can trigger stress responses, including blackening. Here’s why:
- Heat Shock: If temperatures spike above 80°F, enzymes in the mushroom’s cells break down, leading to oxidative stress. This causes melanin (the pigment responsible for darkening) to overproduce, turning caps or stems black. Pro tip: Use a thermometer to monitor your grow space—ventilation fans can help regulate heat.
- Cold Stress: Below 50°F, fungal metabolism slows, and mycelium weakens. Cold damage can manifest as black, water-soaked spots, especially on younger mushrooms. Solution: Insulate your grow area or use a heat mat for consistency.
- Rapid Changes: Sudden swings (e.g., moving trays from a cool basement to a warm kitchen) confuse the fungi, triggering abscission (premature darkening). Fix: Acclimate mushrooms gradually over 24–48 hours.
Water is essential for mushrooms, but too much (or the wrong kind) can drown their delicate structures, leading to anaerobic conditions and blackening. Here’s the science:
- Oxygen Deprivation: Waterlogged substrates starve mycelium of oxygen, causing hypoxic stress. Without O₂, fungi produce melanoids (dark compounds) as a survival mechanism. Watch for: Black, slimy patches on the substrate surface.
- Bacterial Blooms: Stagnant water breeds Pseudomonas or Bacillus bacteria, which compete with mushrooms and release toxins. These infections appear as black, mushy lesions. Prevent: Use sterilized water and avoid overhead watering.
- Salt Buildup: Tap water with high mineral content (e.g., chlorine, calcium) can accumulate in the substrate, creating hypertonic stress. This draws moisture out of mushroom cells, causing them to darken. Fix: Use filtered or distilled water.
| Symptom | Likely Cause | Action |
|---|---|---|
| Black, spongy caps | Bacterial infection from overwatering | Remove affected mushrooms; increase airflow |
| Black substrate with foul odor | Anaerobic conditions | Repot in fresh, well-aerated substrate |
| Black stems at the base | Root rot from poor drainage | Improve drainage; reduce watering frequency |
Black spots aren’t always environmental—they can signal unwelcome guests hitching a ride on your mushrooms. Here’s how to spot and stop them:
- Mold Infestations: Fungi like Aspergillus or Trichoderma outcompete your mushrooms, forming black, fuzzy colonies. These thrive in high-humidity, low-light conditions. Stop it: Increase airflow to 70–80% humidity and use UV sterilization for tools.
- Insect Damage: Crawling pests (e.g., fruit flies, springtails) leave behind black frass (feces) or introduce pathogens. Traps: Use apple cider vinegar traps or diatomaceous earth.
- Cross-Contamination: Reusing non-sterile containers or tools can transfer black mold spores from other plants. Prevent: Sterilize all equipment with 70% isopropyl alcohol.
💡 Pro Tip: If black spots appear only on older mushrooms, it’s often natural aging—but if they spread rapidly or smell off, act fast to quarantine the batch.
Mushrooms need a precise mix of nitrogen, phosphorus, and potassium to grow properly. Too much or too little of any nutrient can trigger darkening:
- Excess Nitrogen: A high-protein substrate (e.g., too much coffee grounds or manure) can cause mushrooms to grow too fast, leading to weak cell walls and blackening. Balance: Aim for a 1:1 carbon-to-nitrogen ratio (e.g., 50% hardwood sawdust + 50% straw).
- Phosphorus Deficiency: Without enough phosphorus, mushrooms can’t synthesize energy efficiently, causing black, brittle stems. Boost: Add bone meal (5–10% of substrate) or use gypsum.
- Micronutrient Toxicity: Over-fertilizing with copper or zinc can cause oxidative damage, leading to black spots. Avoid: Synthetic fertilizers; stick to organic amendments like kelp meal.
📊 Quick Test: If your substrate smells sour or ammonia-like, it’s likely nitrogen-rich. If it smells musty or stale, phosphorus may be lacking.
Fixing Common Black Mushroom Growing Mistakes
Growing black garden mushrooms (or Coprinus comatus and similar varieties) can be incredibly rewarding, but even the most experienced gardeners encounter issues like slow growth, mold, or poor yield. The good news? Most problems have simple, practical fixes—plus a few proactive steps to keep your fungal friends thriving.
Below, we’ve mapped out the most common challenges and their solutions, so you can troubleshoot like a pro.
Problem: Too much moisture can drown your mushrooms, leading to mold (like Trichoderma or Mucor) or stunted growth. If your substrate feels soggy or smells musty, it’s a red flag.
How to Fix It:
- 🔥 Adjust Your Watering Routine
- Water only when the top 1–2 inches of substrate feel dry (stick your finger in to test).
- Use a spray bottle or misting nozzle for even distribution—avoid drowning the bed.
- If your mushrooms are already waterlogged, stop watering for 2–3 days to let excess moisture evaporate.
- 🍳 Improve Drainage
- Mix in coarse materials like perlite, vermiculite, or chopped straw (20–30% by volume) to aerate the substrate.
- If growing in containers, ensure they have drainage holes. For outdoor beds, raise them slightly with bricks or a wooden frame.
- 👨🍳 Refresh the Substrate
- If mold has taken over, remove the contaminated layer (top 1–2 inches) and replace it with fresh, sterilized substrate.
- For severe cases, pasteurize the entire bed by covering it with a tarp for 24–48 hours to heat up naturally (sun + trapped moisture).
💡 Prevention Tips: ✔ Monitor humidity—aim for 85–95% during colonization, then drop to 70–80% during fruiting. ✔ Ventilate daily—open containers or lift tarps for 10–15 minutes to prevent stagnant air. ✔ Use a fan (on low) near your grow area to circulate air without disturbing spores.
Problem: Black mushrooms need high humidity (70%+) to form pins and grow properly. Low humidity leads to dry, brittle caps or failed fruiting.
How to Fix It:
- 🥘 Increase Humidity Quickly
- Place a shallow tray of water near your grow area (but not directly under mushrooms).
- Use a humidifier set to 80–90% for indoor grows.
- Mist the air (not the mushrooms) 2–3 times daily with a spray bottle.
- 🔪 Create a Mini Greenhouse
- Cover your outdoor bed with breathable fabric (like a mushroom grow kit’s lid or a humidity tent).
- For indoor grows, use a clear plastic dome (like a cloche) over containers until pins form.
- 🌡️ Hydrate the Substrate Gently
- Lightly mist the substrate (not the mushrooms) to maintain moisture without oversaturating.
💡 Prevention Tips: ✔ Group containers closely—they create a microclimate that retains humidity. ✔ Avoid drafts—keep grows away from AC vents, open windows, or fans blowing directly on them. ✔ Use a hygrometer to track humidity levels accurately.
Problem: Your substrate is fully white (colonized by mycelium), but no mushroom pins emerge. This often happens due to light, temperature, or nutrient imbalances.
How to Fix It:
- 🔥 Trigger Fruiting with Light & Temperature Shifts
- Expose to indirect light (12 hours/day) by moving containers to a bright, shaded spot (no direct sun).
- Drop temperatures slightly—ideal fruiting range is 60–70°F (15–21°C). If your grow area is too warm, move it to a cooler spot or use a fan to cool slightly.
- 🍳 Add a "Fruiting Shock"
- Fresh air exchange (FAE): Move containers outdoors (under shade) for 4–6 hours daily.
- Humidity spike: Increase humidity to 90%+ for 24 hours, then reduce to 80%.
- 👨🍳 Boost Nutrients (If Needed)
- Sprinkle a thin layer of gypsum or calcium carbonate over the substrate to encourage pinning.
- For outdoor beds, top-dress with chopped hardwood sawdust (sterilized) for extra nutrients.
💡 Prevention Tips: ✔ Maintain consistency—avoid sudden temperature or humidity swings during colonization. ✔ Use a timer for light exposure if growing indoors. ✔ Patience is key—some varieties take 2–4 weeks to fruit after colonization.
Problem: Tiny insects (fruit flies, mites) or fuzzy mold (like Rhizopus) can ruin a harvest. Early detection is key!
How to Fix It:
- 🔪 Remove Affected Areas Immediately
- Pests: Wipe down containers with a 50/50 water-vinegar solution or use diatomaceous earth around the base.
- Mold: Scrape off moldy spots and sterilize the area with a 10% hydrogen peroxide spray (let dry completely).
- 🥘 Prevent Future Infestations
- For pests: Place apple cider vinegar traps (1 tbsp vinegar + 1 cup water in a small dish) near grows.
- For mold: Reduce humidity temporarily to 60–70% for 24 hours to starve mold spores.
- 🌡️ Quarantine New Substrate
- If using outdoor materials (like straw or wood chips), pasteurize them first by soaking in hot water (160°F/71°C for 1 hour).
💡 Prevention Tips: ✔ Keep grows clean—remove old mushroom debris promptly. ✔ Use sterilized tools when handling substrate. ✔ Inspect new materials before adding them to your grow area.
Problem: Black mushrooms dissolve into "inky gills" when overripe, losing texture and flavor. Timing is everything!
How to Fix It:
- 🔥 Harvest at the Right Stage
- Pick when caps are fully elongated but still firm (before the tips start curling).
- Twist gently at the base—caps should detach cleanly. If they resist, they’re not ready.
- 🍳 Store Properly to Extend Freshness
- Refrigerate unwashed in a paper bag with a damp towel (lasts 5–7 days).
- Freeze for long-term storage: Slice and blanch in boiling water for 2 minutes, then freeze.
- 👨🍳 Use Overripe Mushrooms Creatively
- Strain the "ink" (dissolved cap liquid) for sauces or broths—it’s packed with umami!
- Dry slices for later use in soups or stews.
💡 Prevention Tips: ✔ Harvest frequently—check daily once fruiting begins. ✔ Avoid washing before storage—moisture speeds up spoilage. ✔ Label containers with harvest dates to track freshness.
- Rotate your grows—if one batch fails, try a new substrate mix or location.
- Keep a grow journal to track conditions (temperature, humidity, watering) and adjust next time.
- Start small—master a single container before scaling up to outdoor beds.
With these fixes, your black garden mushrooms should go from struggling to flourishing in no time! 🍄✨ Whether you’re battling mold, pests, or just slow growth, small adjustments can make a big difference. Happy growing!
Frequently asked questions
What’s the best outdoor location for growing black garden mushrooms?
Choose a spot with 60-80% shade and dappled sunlight—think under fruit trees, shrubs, or a north-facing corner. Avoid open sun or windy areas. The ground should stay consistently moist but well-draining, like a natural woodland floor. A mulched bed or raised container works well for better control.
How long does it take for black garden mushrooms to fruit after planting?
Most varieties like shaggy ink caps take 4-6 weeks to fruit after inoculation, but this depends on temperature and humidity. If your substrate is fully colonized (white) but no pins appear, try exposing it to 12 hours of indirect light daily and dropping temps to 60-70°F to trigger fruiting.
Can I grow black garden mushrooms in containers?
Yes! Use sterilized hardwood sawdust or straw mixed with 20% compost in containers with drainage holes. Keep them in a shaded spot, mist daily, and maintain 85-95% humidity during colonization. Containers let you control conditions better than outdoor beds.
Why are my black garden mushrooms turning black prematurely?
Premature blackening often signals overwatering, bacterial rot, or heat stress. Check your substrate—if it’s soggy or smells musty, reduce watering and improve airflow. If temps exceed 80°F, move your grow area to a cooler spot or use shade cloth.
What’s the best way to store freshly harvested black garden mushrooms?
Store them unwashed in a paper bag with a damp towel in the fridge for 5-7 days. For long-term storage, slice and blanch in boiling water for 2 minutes, then freeze. Avoid plastic bags—they trap moisture and speed up spoilage.