
Tools
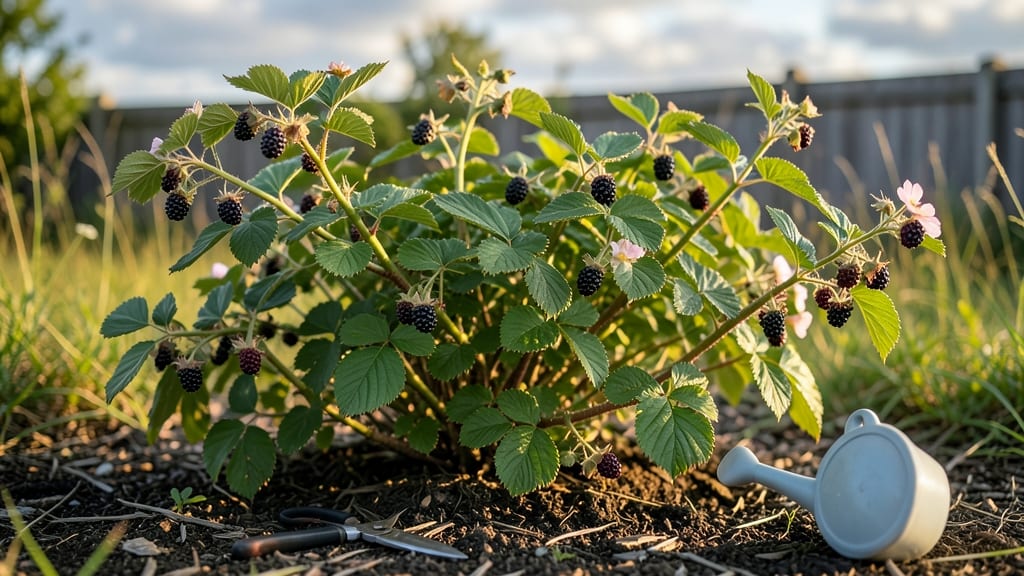
Growing blackberry bushes in your garden delivers juicy, homegrown berries that taste nothing like store-bought—plus, they produce fruit from early summer through fall with the right care. 🌿 I planted my first patch three years ago after watching my neighbor’s thornless variety yield pounds of berries on a tiny city lot, and now I’m hooked on how these hardy shrubs turn even small spaces into productive goldmines.
The secret starts with well-draining soil mixed with compost and a sunny spot getting 6-8 hours of light daily. Thornless varieties like ‘Cheyenne’ or ‘Natchez’ save your hands while still packing bold flavor, but even thorny types like ‘Triple Crown’ reward patience with heavier yields.
Space plants 4-6 feet apart in rows, and install trellises or wires early—they’ll need support as canes grow 10+ feet tall.
By late winter, you’ll prune out last year’s canes (they won’t fruit again) and shape new growth into a manageable framework. Birds? Cover new berries with netting once they swell—trust me, they’ll strip a bush in hours.
With consistent watering and annual soil top-dressing, you’ll harvest two crops per season: primocanes (first-year growth) in fall and floricanes (second-year) in summer.
This works for containers, fences, or backyard corners—just scale the trellis. The first year’s small harvest pays off in years two and three, when bushes hit their stride. Ready to turn that corner into a berry bonanza?
📚 In This Guide
- What you need
- Instructions
- Tips and common mistakes
- Wrapping up and next steps
What you need
- ● Blackberry plants: Choose disease-resistant varieties like Thornless Blackberry or Triple Crown. Buy 1-3 bare-root plants or potted seedlings (depending on your garden size).
- ● Well-draining soil: Aim for a mix of loamy soil with a pH of 5.5–6.5. Amend clay or sandy soil with 2–3 inches of compost or aged manure.
- ● Fertilizer: A balanced 10-10-10 or 5-10-10 fertilizer (1–2 cups per plant) at planting time. Organic options like fish emulsion or bone meal work too!
- ● Mulch: 3–4 inches of straw, pine needles, or wood chips to retain moisture and suppress weeds.
- ● Support system: A T-post trellis, wire fence, or sturdy stakes (at least 6–8 feet tall) to train vines and improve air circulation.
- ● Garden trowel or shovel for digging planting holes (12–18 inches deep).
- ● Pruning shears (sterilized with rubbing alcohol) for trimming canes.
- ● Gloves (thorn-resistant if your variety has spines!).
- ● Watering can or hose with a gentle spray nozzle (blackberries need 1–2 inches of water per week).
- ● Measuring tape to space plants 4–6 feet apart (or 6–8 feet for larger varieties).
- ● Drip irrigation kit for consistent moisture without overhead watering.
- ● Bird netting to protect ripe berries from hungry birds.
- ● Epsom salt (1 tablespoon per foot of plant height) for magnesium boosts during fruiting.
- ● Blackberry-specific fungicide (like copper spray) to prevent rust or mold.
Step-by-step guide for planting and maintaining blackberry bushes
Here’s how to establish thriving blackberry bushes that reward you with bountiful harvests across seasons—without needing acres of space.
🌱 Step 1: Choose the Right Location and Prepare the Soil
Blackberries thrive in full sun—select a spot that receives at least 6-8 hours of direct sunlight daily. Avoid low-lying areas where cold air settles, as blackberries are sensitive to frost damage. I always test the soil pH first; blackberries prefer slightly acidic to neutral soil (pH 6.0-6.5). If your soil is heavy clay or sandy, amend it with 2-3 inches of compost mixed into the top 12 inches of soil.
Dig a trench 12 inches deep and 18 inches wide for each row of plants. This encourages deep root growth and improves drainage. If your soil drains poorly, add a 2-inch layer of coarse sand or gravel at the bottom of the trench before filling with amended soil. Blackberries hate soggy roots, so prioritize well-draining soil above all else.
🪴 Step 2: Plant Bare-Root Blackberry Canes at the Right Time
Plant bare-root canes in early spring, just as buds begin to swell, or in early fall when temperatures cool. Space canes 4-6 feet apart in rows 6-8 feet apart to allow for airflow and future growth. Dig a hole slightly wider than the root ball but no deeper—blackberries develop shallow roots and dislike being buried too deeply.
Soak the bare roots in lukewarm water for 1-2 hours before planting to revive them. Position the crown (the area where roots meet the stem) 1-2 inches above soil level—burying it too deep invites rot. Backfill the hole with soil, firming it gently around the roots to eliminate air pockets. Water deeply immediately after planting to settle the soil and encourage root contact.
☀️ Step 3: Install Support and Prune for Optimal Growth
Blackberries are vigorous climbers, so install T-posts or a sturdy trellis system at planting to support canes as they grow. I use 6-foot T-posts spaced 8 feet apart with 3-4 horizontal wires at 18-inch intervals to guide the canes upward. This keeps fruits clean, improves airflow, and makes harvesting easier.
In the first year, prune aggressively to establish a strong framework. Remove any weak, diseased, or crossing canes, leaving only the healthiest 4-6 canes per plant. Cut back any flowering shoots in the first year—they’ll produce sparse, poor-quality berries, and you want the plant to focus on root and cane development. Mulch around the base with 2-3 inches of organic mulch (like wood chips) to retain moisture and suppress weeds.
💧 Step 4: Water and Fertilize for Maximum Yield
Blackberries need consistent moisture, especially during fruit development. Water deeply 1-2 times per week, aiming for 1-1.5 inches of water per week. Let the soil dry slightly between waterings to prevent root rot, but never let it dry out completely—wilting canes mean lost fruit. I water in the early morning to reduce evaporation and fungal risks.
Fertilize in early spring with a balanced, slow-release fertilizer (10-10-10) at ½ pound per 100 square feet. Avoid high-nitrogen fertilizers, which promote leafy growth at the expense of fruit. In late spring, apply a low-nitrogen, high-phosphorus fertilizer (5-10-10) to encourage flowering and fruiting. Blackberries are heavy feeders, so repeat this feeding in early summer if the soil is depleted.
✂️ Step 5: Prune and Harvest for Year-Round Productivity
Prune annually in late winter or early spring before new growth begins. Remove all dead, weak, or diseased canes at the ground level. Cut back primocanes (first-year canes) to 4-5 feet tall to encourage bushier growth and larger fruit. For floricane (second-year) canes, prune back old fruiting canes after harvest—these won’t produce again and take energy from new growth.
Harvest begins in late spring or early summer, depending on your climate, and continues into early fall. Pick berries when they’re fully black and slightly soft to the touch—they won’t ripen further once picked. I harvest every 2-3 days during peak season to prevent overripe berries from attracting pests. After harvesting, thin canes again to 4-6 of the strongest primocanes for next year’s crop.
Tips & tricks for perfect blackberry bushes in the garden
A few strategic moves can transform your blackberry patch from decent to extraordinary—here's what I've learned after years of trial and error.
Sunlight Strategy: While 6-8 hours of sunlight is ideal, blackberries are surprisingly adaptable. If your garden only gets 5 hours of direct sun, position your bushes to catch morning sunlight and afternoon shade—this prevents heat stress during peak summer afternoons. I've seen thriving bushes in partial shade, though yields may be slightly lower. The key is consistent light exposure without scorching.
Soil Science: Don't just amend the top 12 inches of soil—create your trench with a 50/50 mix of native soil and compost for the full 12-inch depth. This ensures roots have access to nutrients throughout their growing zone. For clay-heavy soils, incorporate 1 part perlite to 3 parts compost in your trench mix to improve drainage without sacrificing moisture retention. Blackberries appreciate this deep, airy environment.
Pruning Precision: When establishing your 4-6 canes in the first year, look for canes with multiple buds spaced evenly along the stem. These will develop into stronger fruiting canes. I mark my best canes with a ribbon during pruning—this helps me identify them quickly during annual maintenance. Remember, aggressive first-year pruning pays off with larger, healthier canes that produce for years.
Watering Wisdom: The 1-1.5 inches of water per week guideline works best with deep watering. Use a rain gauge or tuna can to measure your water output—most garden hoses deliver far more than we realize. I water my blackberries for 20-30 minutes twice weekly, letting the water penetrate to the full depth of the trench. This encourages deep root growth that makes your bushes more drought-resistant over time.
Pro Tips for Blackberry In Garden
- A few strategic moves can transform your blackberry patch from decent to extraordinary—here's what I've learned after years of trial and error.
- Sunlight Strategy: While 6-8 hours of sunlight is ideal, blackberries are surprisingly adaptable.
- Soil Science: Don't just amend the top 12 inches of soil—create your trench with a 50/50 mix of native soil and compost for the full 12-inch depth.
Frequently asked questions
Got questions about growing blackberries? You’re not alone! Here are answers to the most common queries to help you cultivate a thriving, low-maintenance blackberry patch.
How long does it take for blackberry bushes to produce fruit?
Most blackberry varieties start producing fruit within 1–2 years of planting, though thornless types may take slightly longer. Patience pays off—young plants focus on root and cane growth first. For faster results, choose established canes (1–2 years old) from a nursery.
Do blackberry bushes need full sun?
Yes! Blackberries thrive in 6–10 hours of direct sunlight daily. While they tolerate partial shade (especially in hot climates), fruit production drops significantly in low-light spots. South-facing gardens or trellises work best. If shade is unavoidable, opt for shade-tolerant varieties like ‘Natchez’ or ‘Arapaho.’
How do I prune blackberry bushes for bigger harvests?
Pruning is key! In late winter or early spring, remove:
- Dead or weak canes (cut at ground level).
- Canes older than 3–4 years (they produce fewer berries).
- Suckers (shoots growing from the base) to redirect energy to fruiting canes.
What pests or diseases should I watch for?
Blackberries are hardy but can face:
- Japanese beetles (skeletonize leaves)—handpick or use neem oil.
- Spider mites (yellowing leaves)—spray with water to deter them.
- Anthracnose fungus (black spots)—prune for airflow and avoid overhead watering.
- Birds (they love ripe berries!)—cover plants with netting when fruit appears.
Can I grow blackberries in containers or small spaces?
Dwarf or semi-dwarf varieties like ‘Triple Crown’ or ‘Ouachita’ work well in 5-gallon containers or raised beds. Use well-draining soil and a trellis to save space. Containers need regular watering (they dry out faster) and winter protection in cold climates (move to a garage or insulate with burlap).
How do I protect blackberries in winter?
Blackberries are semi-hardy but benefit from winter prep:
- Mulch heavily (4–6 inches) with straw or leaves after the ground freezes.
- Wrap young plants with burlap or frost cloth in extreme cold (<10°F).
- Avoid pruning until after the last frost—dormant canes are more cold-resistant.
What’s the best way to harvest blackberries?
Pick berries when they’re fully colored and slightly soft to the touch (usually late summer to early fall, depending on variety). Use scissors or your fingers to avoid damaging canes. Harvest in the morning for the sweetest flavor. Pro tip: Wear gloves—ripening berries stain! And leave a few for birds (they’ll help pollinate next year).
Wrapping up and next steps
Growing blackberry bushes in your garden is a rewarding way to enjoy fresh, delicious fruit year-round—even in tight spaces! 🌱 With the right variety, soil prep, and care, you’ll soon be harvesting juicy berries that taste straight from the farm.
Whether you’re a seasoned gardener or just starting out, these low-maintenance plants offer big flavor with minimal effort.
Ready to take the next step? Start by selecting your blackberry type, prepping your soil, and planting with confidence. Your future harvests will thank you! 🍇