Tools
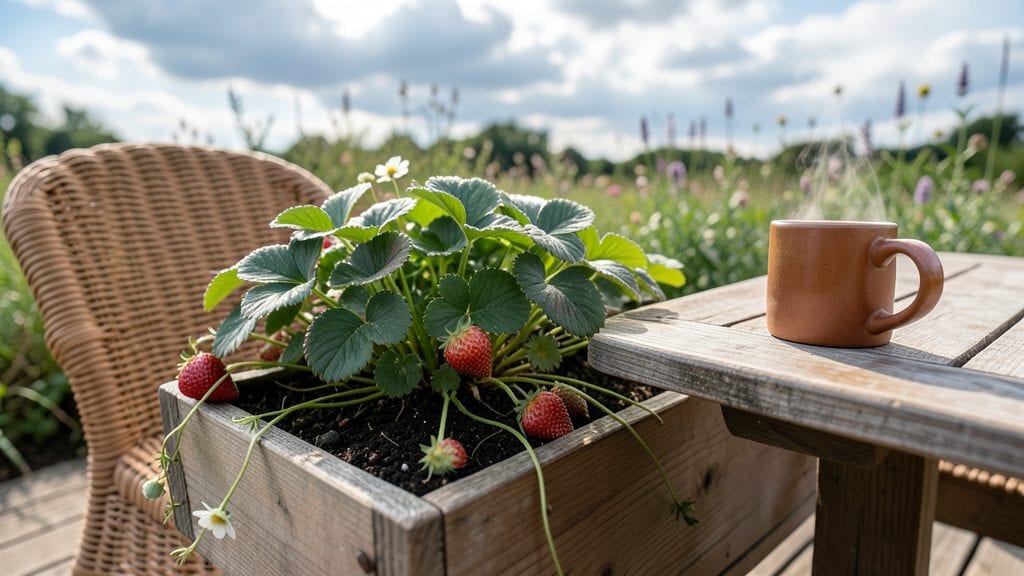
Creating a breakfast garden on your balcony is the fastest way to transform morning coffee into a fragrant, productive ritual. The right herb planters—filled with basil, mint, and thyme—turn a simple table into a kitchen extension where you can snip fresh leaves directly into your omelet.
I designed mine around a compact weather-resistant bistro set that fits two people comfortably, with planters tucked into the space between chairs and the table edge.
Start with three 12-inch-wide planters (one for each herb) and a lightweight table that won’t sag under morning traffic. Use well-draining potting mix and place the setup where it gets at least 6 hours of morning sun—herbs like basil thrive with sunlight but hate afternoon heat.
The key to low maintenance? Grouping plants with similar water needs and using self-watering planters to prevent overwatering during weekend trips.
By mid-July, you’ll be harvesting enough basil for pesto weekly and thyme for homemade bread, all while enjoying shade from a retractable umbrella that doubles as a rain shield. The herbs’ fragrance alone makes breakfast feel like a vacation—no travel required.
Plus, the setup stays functional through fall if you swap herbs for cold-hardy greens like parsley or chives.
This design works for any balcony size, from studio railings to spacious terraces. The same principles apply whether you’re using vertical pockets or traditional pots—just adjust the number of planters to fit your space. Here’s how to assemble it in under an hour with tools you likely already own.
📚 In This Guide
- What you need
- Instructions
- Tips and common mistakes
- Wrapping up and next steps
What you need
- ● Planters or Containers: 1-3 terracotta pots (6-8 inches in diameter, with drainage holes)
- ● OR 1 wooden window box (12-18 inches long, 6-8 inches deep)
- ● OR hanging baskets (10-12 inches wide, with self-watering features if possible)
- ● Potting Soil: 2-3 quarts of well-draining potting mix (look for "organic" or "herb-specific" blends)
- ○ Optional: 1 cup of perlite or vermiculite (for extra aeration)
- ● Herb Seeds or Starters: 3-5 herb seedlings (basil, chives, parsley, mint, or thyme—choose 2-3 varieties)
- ● OR herb seeds (fast-growing varieties like basil or cilantro for quicker results)
- ● Drainage: Small gravel or pebbles (1/2 cup per pot, for bottom layer)
- ● Basic Tools: 1 trowel or small hand shovel (for planting)
- ● 1 spray bottle (for gentle watering)
- ● 1 measuring cup (for soil and additives)
- ○ Decorative Touches (Optional): Paint or chalk (for labeling pots with herb names)
- ● Small decorative stones or mulch (to enhance aesthetics)
- ● Mini wooden stakes or plant markers (for identifying herbs)
- ● Prerequisites: A sunny balcony or outdoor space (6+ hours of sunlight daily for herbs)
- ● Access to water (for consistent hydration)
Instructions for designing morning-inspired herb planters
Here’s how to create a functional, fast-growing breakfast garden that delivers fresh flavors in weeks.
Select and Prep Containers for Optimal Drainage
Choose 4 shallow but deep containers (at least 8 inches deep) with drainage holes—terra cotta or ceramic work best. If your pots lack holes, drill ¼-inch holes in the bottom using a masonry bit. Line the holes with ¼-inch mesh to prevent soil from washing out while allowing excess water to escape.
I recommend placing a 2-inch layer of coarse gravel at the bottom of each container before adding soil. This creates an air pocket that prevents root rot, which is especially critical for herbs that despise soggy conditions. Tap the containers gently on a hard surface to settle the gravel evenly.
Layer Soil and Amendments for Fast Growth
Fill each container with 4 gallons of premium potting mix, leaving 1 inch of space at the rim for watering. Lightly fluff the soil with your fingers to aerate it—herbs grow best in loose, well-draining mixes that mimic their natural rocky Mediterranean habitats.
Mix in 1 tablespoon of balanced organic fertilizer (10-10-10) into the top 2 inches of soil. This ensures immediate nutrient availability for seedlings. Moisten the soil thoroughly with warm water until it’s damp 1 inch deep—you’ll know it’s right when water runs out the drainage holes without pooling.
Plant Fast-Germinating Herbs for Quick Harvests
Sow 4 basil seeds and 4 chive seeds per container, pressing them ¼ inch deep into the soil. Space them 1 inch apart—crowding leads to weak stems and fungal diseases. For parsley, plant 3 seeds per container, ½ inch deep, as it germinates slower but thrives in cooler mornings.
Cover the seeds with a thin layer of vermiculite to retain moisture without burying them too deeply. Mist the surface with a spray bottle until the soil looks uniformly damp. Place the containers in a warm, shaded spot (around 70°F) until germination, which should occur in 7–14 days for basil and chives, and 2–3 weeks for parsley.
Position for Morning Sun and Evening Shade
Move the planters to a south-facing balcony where they receive 4–6 hours of direct morning sun and partial afternoon shade. Herbs like basil and chives need bright light to prevent legginess, but afternoon sun can scorch tender leaves. Rotate the containers ¼ turn daily to ensure even growth.
Water deeply every 2–3 days until the top inch of soil feels dry to the touch. Avoid wetting the leaves—water at the base to prevent fungal spores from splashing onto foliage. You’ll notice new growth within 10–14 days, signaling it’s time to thin seedlings to 2–3 per herb type per container.
Maintain and Harvest for Continuous Breakfast Flavor
Fertilize again after 4 weeks with ½ tablespoon of slow-release granules mixed into the topsoil. This supports steady growth without burning young roots. Prune leaves regularly—snip ½ inch above a leaf node to encourage bushier plants and prevent flowering, which makes herbs bitter.
Harvest basil leaves when they reach 2–3 inches, and chives when 4–6 inches tall, always cutting just above a set of leaves. Parsley can be harvested once it reaches 6 inches, pulling outer stems first. With this setup, you’ll have continuous harvests in 6–8 weeks—perfect for fresh eggs, omelets, or morning teas.
Tips & tricks for perfect morning-inspired herb planters
Creating a thriving breakfast garden on your balcony doesn't have to be complicated—these key strategies will help you achieve lush, fast-growing herbs with minimal effort.
Container Selection: While terra cotta and ceramic are ideal, you can also use high-quality plastic pots that meet the 8-inch depth requirement. The critical factor isn't the material but ensuring the containers have proper drainage. If repurposing pots, test their drainage capacity by filling them with water—if they hold moisture for more than 10 minutes, they're not suitable. I've successfully used repainted ceramic pots that were originally meant for decorative purposes.
Soil Preparation Strategy: The 2-inch layer of coarse gravel isn't just about drainage—it's creating an oxygen-rich zone for roots. For faster germination, I recommend pre-moistening the potting mix before adding it to containers. Simply mix the 4 gallons with warm water until it holds together when squeezed but doesn't form a muddy paste. This pre-hydration eliminates the need for immediate watering after planting, giving your seeds a head start in the consistent moisture they crave.
Germination Environment: Maintaining that 70°F temperature is crucial, but don't worry if your home fluctuates. Place containers on a seedling heat mat set to 70°F for the first 7 days, then move them to your warmest spot. I've found that placing containers on top of refrigerators (which generate heat) works surprisingly well. The key is keeping seeds consistently warm during germination—the difference between 65°F and 75°F can mean the difference between germination in 7 days versus 3 weeks.
Light Positioning: The 4-6 hours of morning sun is non-negotiable for basil and chives, but you can experiment with the afternoon shade. If your balcony receives intense afternoon sun, consider using a sheer white curtain to filter light rather than complete shade. This allows some light penetration while protecting tender leaves. I've seen herbs grow just as well with 3 hours of direct morning sun plus filtered afternoon light compared to full shade afternoons.
Pro Tips for Breakfast In Garden
- Creating a thriving breakfast garden on your balcony doesn't have to be complicated—these key strategies will help you achieve lush, fast-growing herbs with minimal effort.
- Container Selection: While terra cotta and ceramic are ideal, you can also use high-quality plastic pots that meet the 8-inch depth requirement.
- Soil Preparation Strategy: The 2-inch layer of coarse gravel isn't just about drainage—it's creating an oxygen-rich zone for roots.
Frequently asked questions
Got questions about growing your own breakfast garden? Here are some of the most common queries—and their answers—to help you get started with confidence!
What’s the best time of year to start a breakfast garden?
For most herbs like basil, parsley, and chives, aim to plant in early spring (after the last frost) or late summer (for a fall harvest). If you’re in a warm climate, you can grow herbs year-round! Just ensure your planters have good drainage—herbs hate soggy roots.
How much sunlight do breakfast herbs need?
Herbs thrive with 6–8 hours of sunlight daily. Place your planters in a spot that gets morning sun (gentler rays) and partial afternoon shade if you’re in a hot climate. South- or west-facing balconies are ideal. If sunlight is limited, opt for low-light herbs like mint or cilantro.
How often should I water my breakfast garden?
Water when the top inch of soil feels dry—usually every 2–3 days (or daily in extreme heat). Avoid overwatering; herbs prefer slightly dry soil over soggy conditions. A self-watering planter can help maintain consistency. Pro tip: Water in the morning to reduce evaporation.
Can I grow more than just herbs in a breakfast garden?
Add microgreens (like pea shoots or radish), cherry tomatoes, or small lettuce varieties for a full breakfast spread. Just ensure each plant has enough space—herbs and greens pair beautifully in shared planters. Rotate crops seasonally for variety!
What should I do if pests attack my breakfast garden?
Start with prevention: Use neem oil or insecticidal soap for early signs of aphids or spider mites. Introduce beneficial insects like ladybugs, or handpick pests gently. Avoid chemical sprays—they can harm your herbs. A fine mesh cover can also deter pests while allowing sunlight.
Wrapping up and next steps
Transforming your balcony into a breakfast garden isn’t just about aesthetics—it’s a delicious way to start your day with fresh, homegrown herbs that elevate your morning meals.
Whether you’re a seasoned gardener or just dipping your toes into green thumbs, these herb planters are simple, rewarding, and packed with flavor. 🌱✨
Now that you’ve got the materials and answers to common questions, it’s time to roll up your sleeves and bring your garden to life! Start small—pick one or two herbs to grow—and let the joy of harvesting your own breakfast ingredients inspire you.
Before you know it, you’ll be savoring the taste of sunshine in every bite. Happy gardening!