
Landscaping
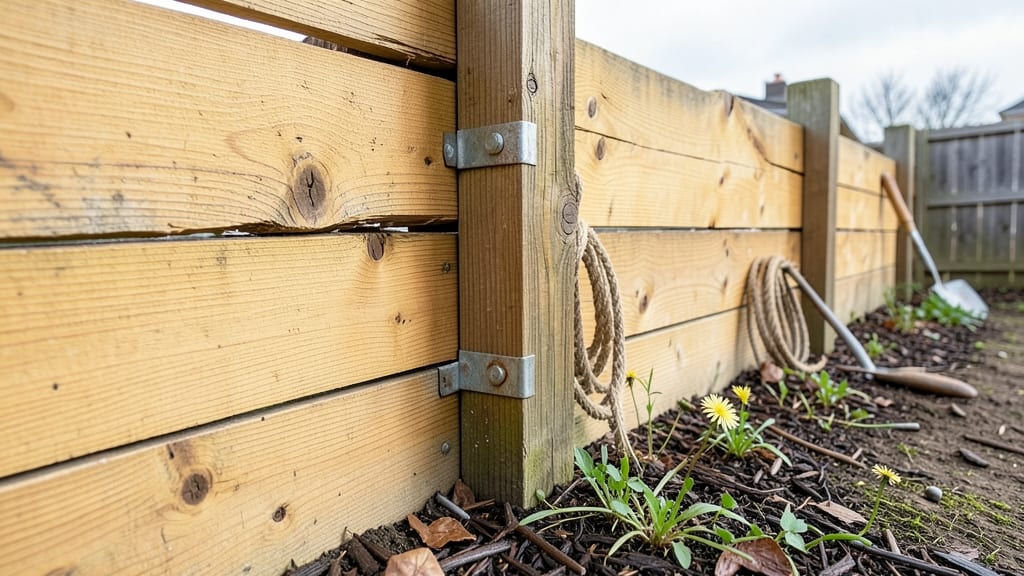
Building a garden fence turned my backyard into a private retreat where my plants could finally thrive without prying eyes—after years of struggling with flimsy chicken wire that sagged under the weight. the weight of climbing roses—and now my garden feels like a sanctuary.
The right materials make all the difference, especially if you want something that lasts decades without rotting or rusting.
You don’t need fancy tools or expensive lumber to get started. Basic supplies like a post hole digger, galvanized screws, and pressure-treated wood (or cedar for natural rot resistance) will handle most DIY projects. For extra durability, consider composite wood or metal panels if your budget allows.
The key is matching your fence’s height and material to your garden’s needs—whether that’s blocking nosy neighbors or protecting delicate perennials from strong winds.
Once installed, your fence becomes more than just a barrier—it frames your garden like a living painting. Staggered pickets create visual interest, while lattice panels let you train climbing flowers upward. A well-built fence also adds value to your home, making it easier to sell later.
The best part? You’ll finally stop worrying about stray pets, wandering kids, or neighborhood dogs digging up your carefully tended beds.
Local building codes often require permits for fences over six feet tall, so check before digging post holes. If you’re unsure about layout or measurements, sketching a simple design first saves time and frustration.
Either way, a good fence turns your garden into the peaceful, productive space you’ve always wanted—without sacrificing style or durability.
📚 In This Guide
- What you need
- Instructions
- Tips and common mistakes
- Wrapping up and next steps
What you need
- ● Pressure-treated lumber: 4x4 posts (8–12 ft, depending on height) – quantity varies by fence length
- ● Fence pickets or panels: 1x6 or 1x8 boards (pre-cut or raw, 6–8 ft long) – calculate based on panel width (e.g., 48" for standard spacing)
- ● Galvanized or stainless steel hardware: Deck screws (2.5"–3") – ~100–150 per panel, depending on size
- ● Post anchors or concrete (60 lb quick-setting mix) – 1 bag per post
- ● Hinges (if adding gates) – 2 per gate
- ○ Optional rust-proofing: Wood sealant or stain (waterproof, UV-resistant)
- ● Metal caps for post tops (to prevent water pooling)
- ● Measuring & marking: Tape measure, chalk line, speed square, pencil
- ● Cutting: Circular saw or miter saw, handsaw (for touch-ups)
- ● Digging & setting: Post hole digger or auger, shovel, level
- ● Driving & securing: Drill/driver, impact driver (for screws), hammer
- ● Safety: Work gloves, safety glasses, ear protection
- ○ Optional: Staple gun (for wire mesh reinforcement), clamps (for holding panels)
- ● Permits: Check local regulations—some areas require permits for fences over 6 ft tall.
- ● Site prep: Clear vegetation, mark fence line with stakes and string, and call 811 to check for underground utilities.
- ● Weather: Plan for dry, mild days—avoid rainy or windy conditions.
- ● Helper(s):strong> Fences are easier (and safer) with at least one extra pair of hands!
Step-by-Step instructions for building a durable garden fence
Here's how to construct a sturdy, rust-resistant wooden fence that stands up to seasons and weather.
Measure and Mark the Fence Layout
Start by measuring the exact length of your fence line and mark the corners with wooden stakes. Use a 4-foot level to ensure each corner is perfectly square—this prevents the fence from leaning or bowing over time. I like to stretch a 100-foot mason's line between stakes to visualize the straight path before digging post holes.
Measure 8 feet between corner stakes for an 8-foot fence (adjust for shorter sections). Drive a 4-foot wooden stake at each mark to create a visual guide. Double-check diagonals to confirm the layout is perfectly rectangular—any deviation now will show up as a crooked fence later.
Dig Post Holes and Set Corner Posts
Dig holes 12 inches deep and 10 inches wide for each corner post using a post hole digger or manual auger. The hole should be deep enough so that 1/3 of the post sits below ground—this ensures stability against wind and soil shifts. I mix 1 part concrete with 3 parts sand to create a sturdy base for each post.
Place the 4x4 pressure-treated corner posts in the holes, ensuring they're perfectly vertical. Use a 2x4 brace to hold them straight while the concrete sets. Pour the concrete mix into the hole, tamping it down firmly around the post. Let it cure for 24 hours before attaching the first horizontal rail—rushing this step weakens the entire structure.
Attach Horizontal Rails and Install Posts
Cut 2x4 rails to fit between corner posts, leaving a 1-inch gap at each end for expansion. Use 3-inch exterior-grade deck screws to secure the rails at 16-inch intervals vertically. I mark screw locations with a pencil and tape measure to ensure perfect alignment—uneven rails make the fence look shoddy.
For intermediate posts, dig holes 10 inches deep and repeat the concrete-setting process. Space posts 6 feet apart for an 8-foot fence to prevent sagging. Use a speed square to check that each post is perfectly plumb before securing it with 2x4 braces—this is where most DIY fences go wrong.
Install Fence Panels or Pickets
For privacy fences, attach 6-foot tall panels between posts using 3-inch exterior screws at 18-inch intervals along the top and bottom rails. Leave a 1/8-inch gap between panels to allow for wood expansion in humidity. For picket fences, space 4x4 pickets 12 inches apart and secure them with 2-inch deck screws driven at a 45-degree angle into the rails.
Pre-drill holes to prevent wood splitting—this is especially critical for cedar or redwood, which are prone to cracking when screwed directly. Use a drill bit just slightly smaller than your screw shank to ensure a snug fit without stripping the wood.
Finish and Maintain for Longevity
Apply a waterproof sealant to all exposed wood surfaces to prevent rot and insect damage. I recommend a penetrating oil-based stain for cedar and redwood, as it enhances natural grain while providing UV protection. Reapply every 2-3 years to maintain durability—skipping this step shortens the fence's lifespan by half.
Check for loose screws or sagging rails annually, especially after heavy rain or wind. Tighten any connections and reinforce weak spots with additional screws or braces. A well-maintained fence lasts 20+ years—neglect it, and you'll be replacing it in half that time.
Tips & tricks for building a durable garden fence
A few simple strategies can transform your fence project from a shaky DIY attempt into a long-lasting centerpiece for your garden. The details in these steps make all the difference between a fence that sags in a year and one that stands strong for decades.
Precision in Step 1 Pays Off: When measuring your fence layout in Step 1, don't rely solely on the tape measure—use the 4-foot level to verify square corners before driving stakes. I've seen too many fences start crooked because builders skipped this verification. The 100-foot mason's line is your secret weapon for visualizing the straight path; without it, you risk creating a fence that looks like it was built by someone who's never seen a straightedge. The 8-foot spacing between corner stakes is critical—any less and your fence will bow under pressure, any more and you'll have awkward gaps between panels.
Concrete Curing in Step 2 is Non-Negotiable: The 24-hour concrete curing time in Step 2 isn't just a suggestion—it's the foundation of your fence's stability. I've learned this the hard way after watching a neighbor's fence lean dramatically after only six months because he attached rails too soon. Mix your concrete with exactly 1 part concrete to 3 parts sand for the right balance of strength and workability. When tamping the concrete around the post, work it firmly but don't overpack—you want air pockets eliminated but not compacted soil beneath. And here's a pro move: wrap the top of each post with plastic sheeting during curing to prevent moisture loss, which actually strengthens the concrete.
Screw Placement Matters More Than You Think: In Step 3, those 16-inch vertical intervals for securing 2x4 rails might seem arbitrary, but they're based on engineering principles about wood movement and load distribution. Pre-drilling holes for your 3-inch exterior-grade deck screws is absolutely essential—especially for cedar or redwood—which can split spectacularly if you don't. I use a drill bit that's 1/32-inch smaller than my screw shank to create a snug fit without stripping. For the 6-foot spacing between intermediate posts, think of it as creating manageable sections that can flex independently during temperature changes. This prevents the entire fence from developing stress points that lead to cracks.
Wood Expansion Secrets in Step 4: The 1/8-inch gap between panels in Step 4 is your fence's breathing room—without it, humidity changes will cause panels to warp and rails to bow. For picket fences, that 45-degree angle when driving 2-inch deck screws isn't just for looks; it creates a stronger mechanical connection that resists pulling out. And here's a tip I wish I'd known earlier: when attaching panels, start with the top rail first, then the bottom. This prevents the panels from sagging while you work, which would be nearly impossible to correct later. For cedar or redwood, consider using stainless steel screws—they may cost more upfront but will prevent rust stains that mar your beautiful wood.
Pro Tips for Build Garden Fence
- A few simple strategies can transform your fence project from a shaky DIY attempt into a long-lasting centerpiece for your garden.
- Precision in Step 1 Pays Off: When measuring your fence layout in Step 1, don't rely solely on the tape measure—use the 4-foot level to verify square corners before driving stakes.
- Concrete Curing in Step 2 is Non-Negotiable: The 24-hour concrete curing time in Step 2 isn't just a suggestion—it's the foundation of your fence's stability.
Frequently asked questions
Got questions about building your garden fence?
You’re not alone! Here are answers to the most common concerns—from planning to execution—to help you get started with confidence.
What’s the best time of year to build a garden fence?
The ideal time is spring or early fall—when temperatures are mild, and soil isn’t too wet or dry. Avoid winter (frost can damage materials) and peak summer (heat warps wood). If you’re in a dry climate, morning or evening installations prevent wood from expanding in the heat.
How do I prevent rust on metal fence hardware?
Rust is a sneaky enemy! Use galvanized, stainless steel, or coated hardware (like screws and brackets) to start. Apply a rust-inhibiting primer before painting metal components, and reapply paint every 2–3 years. For extra protection, store spare parts in a dry, ventilated space.
Can I build a fence without digging post holes?
If digging isn’t an option, try surface-mounted posts (like T-posts or concrete footings) or gravel-filled sleeves for stability. For heavy privacy fences, pre-assembled panels with hidden brackets can attach to existing structures (e.g., decks or sheds). Just ensure local codes allow it—some areas require buried posts for wind resistance.
Is cedar or redwood better for rust-proof fences?
Both are naturally rot-resistant, but cedar wins for affordability and lighter weight, while redwood resists warping better in humid climates. For zero maintenance, treat either with a penetrating sealer every 3–5 years. If rust-proofing is your top priority, composite wood (like Trex) eliminates wood rot entirely but costs more upfront.
What’s the trickiest part of building a fence, and how do I avoid mistakes?
The biggest pitfall? Uneven posts or gaps between panels. Measure diagonally (not just horizontally) to ensure square corners, and use a level on every post before securing. For panels, pre-drill holes to prevent wood splitting. Pro tip: Bury posts 6–8 inches deep (or deeper in windy areas) to lock them in place.
Wrapping up and next steps
Building a garden fence is a rewarding project that enhances privacy, security, and curb appeal—and you’ve got all the tools to make it happen! 🌿 From selecting rust-proof wood like cedar or redwood to mastering installation techniques, every step brings you closer to a durable, long-lasting fence.
With the right materials and a little elbow grease, your outdoor space will transform into a serene retreat.
Ready to take the next step? Grab your tools, gather your team (or go solo!), and start measuring—your dream fence is just a few cuts away! 🛠️