Tools
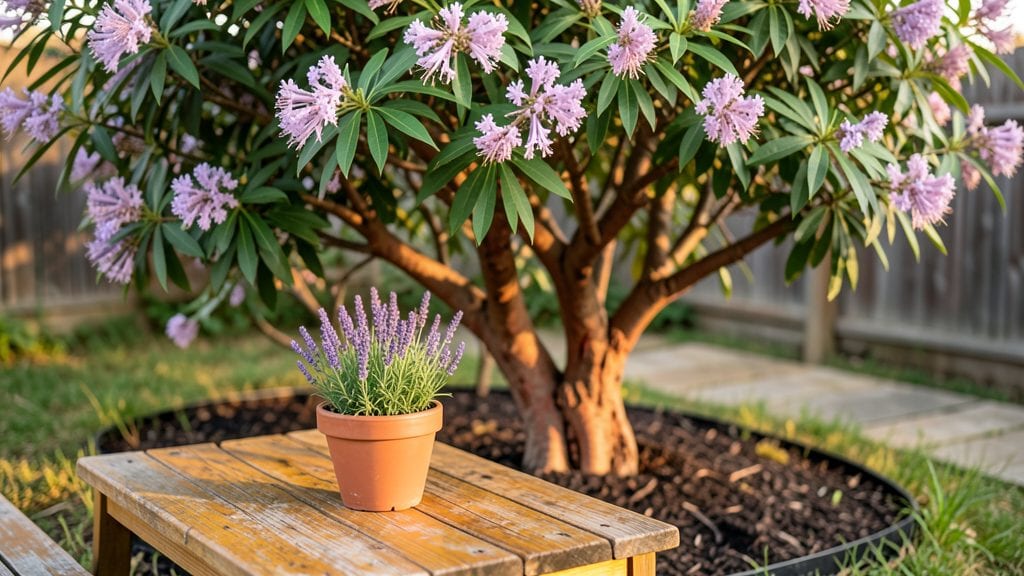
Building a garden table transforms your outdoor space from functional to unforgettable—mine, made last spring with cedar and galvanized steel, still holds strong after two summers. space. The key isn’t just the materials, though; it’s how you assemble them to handle rain, sun, and even the occasional spilled cocktail.
You’ll need basic woodworking tools—a drill, screwdriver, and saw—and a few hours of focused time. Cedar resists rot naturally, while powder-coated metal fasteners prevent rust. For a modern look, go with clean lines and a smooth finish; for rustic charm, embrace the grain and add a weathered stain.
Either way, the result is a table that doubles as seating, a side table, or even a plant stand when you’re not using it for dining.
Once finished, your table will be the centerpiece of every backyard gathering. Picture it: morning coffee under the shade of your favorite tree, dinner parties with friends, or quiet evenings reading with a glass of wine.
The best part? With proper sealing, it’ll last for years, becoming a piece of your garden’s history. Ready to get started?
Here’s where it gets interesting—this project adapts to any style or space. Need something lightweight for a balcony? Swap cedar for treated pine and add wheels. Prefer a farmhouse aesthetic? Add a hutch-style shelf underneath. The possibilities are endless, and the satisfaction of building something that lasts is unbeatable.
📚 In This Guide
- What you need
- Instructions
- Tips and common mistakes
- Wrapping up and next steps
What you need
- ● Lumber: 2 pieces – 2x6 (8 ft long) for tabletop slats (or 1x8 for a wider surface)
- ● 4 pieces – 2x4 (8 ft long) for frame and legs
- ○ 4 pieces – 2x2 (12 in long) for leg supports (optional for extra stability)
- ● Hardware: ½” exterior wood screws (2” and 3” lengths, ~50 total)
- ● Wood glue (waterproof, ~8 oz)
- ○ Corner braces (4, optional for reinforcement)
- ● Finishing: Outdoor-rated wood stain or paint (semi-transparent or solid)
- ● Clear polyurethane sealant (for extra weather protection)
- ● Sandpaper (80, 120, and 220 grit)
- ● Measuring tape
- ● Square (combination or speed square)
- ● Carpenter’s pencil
- ● Circular saw or miter saw (for precise cuts)
- ● Drill/driver (with Phillips and square-drive bits)
- ● Clamps (at least 2, for holding pieces during assembly)
- ○ Sander (orbit or belt sander, optional but helpful)
- ● Paintbrush or roller (for finishing)
- ● Basic woodworking skills (or patience to learn!)
- ● Outdoor workspace (flat ground or garage)
- ● Safety gear: gloves, safety glasses, and ear protection
- ● Clear, dry day for building (humidity can affect wood)
Step-by-step instructions for building a sturdy garden table
Here’s how to construct a garden table that lasts seasons—no fancy tools required.
Cut All Wood Pieces to Exact Dimensions
Start by measuring and marking each piece of lumber according to your plan. For a 4-foot square tabletop, you’ll need four 2x6 boards cut to 48 inches for the apron, four 2x4 boards cut to 44 inches for the legs, and four 2x4 boards cut to 16 inches for the leg braces. Use a straightedge and pencil to mark cuts precisely—double-check measurements before cutting to avoid waste.
I always cut the legs first, then the apron pieces, and finally the braces. This keeps the workflow organized and prevents confusion when assembling. If you’re using a circular saw, clamp the wood securely to a workbench to avoid kickback. For cleaner cuts, take your time and let the blade do the work—rushing leads to splintered edges that weaken the table.
Assemble the Table Legs and Apron Frame
Begin by attaching the 16-inch leg braces to the bottom of each 44-inch leg using 2.5-inch wood screws. Pre-drill holes to prevent splitting, especially near the ends of the braces. Hold the brace at a 90-degree angle and secure it tightly—this forms the corner of each leg assembly. I use a speed square to ensure perfect angles before driving screws.
Next, connect the four leg assemblies into a square by attaching the 48-inch apron boards between them. Start with one side, aligning the edges flush, then secure with screws every 12 inches. Use a clamps to hold everything steady while you work. Double-check the diagonals to confirm the frame is square—if one diagonal measures longer than the other, adjust the apron boards until they match.
Attach the Tabletop and Reinforce Joints
Lay the 2x6 tabletop boards side by side and secure them temporarily with clamps. If you’re using a single long board, skip this step. For a 4-foot tabletop, you’ll need two 2x6 boards cut to 48 inches and two 2x6 boards cut to 24 inches (if using a butted design). Sand all edges smooth to prevent splinters—this is especially important for outdoor use where hands and feet will brush against the wood.
Flip the frame upside down and center the tabletop on top. Secure it to the apron with 2.5-inch screws every 12 inches, driving screws from underneath. For extra stability, add 2x4 corner braces inside the frame before attaching the tabletop. This hidden reinforcement prevents wobbling over time, which is critical for outdoor furniture that gets heavy use.
Sand, Finish, and Weatherproof the Table
Start with 80-grit sandpaper to smooth rough edges and surfaces, then progress to 120-grit for a silky finish. Pay extra attention to the underside of the tabletop and any sharp corners where splinters might form. Wipe away all dust with a tack cloth before applying finish—this ensures an even coat and prevents grain from raising.
Apply an outdoor-rated polyurethane or linseed oil to protect the wood from moisture, UV rays, and general wear. For maximum durability, use a spar urethane if your table will be exposed to rain or snow. Let the first coat dry completely (usually 4-6 hours), then lightly sand with 220-grit sandpaper and apply a second coat. This two-step process creates a tough, water-resistant barrier that keeps your table looking fresh for years.
Add Optional Upgrades for Longevity
To extend the life of your table, consider adding metal hairpin legs for adjustable height or rust-proof hardware like stainless-steel screws. If you want built-in storage, attach a plywood shelf underneath the tabletop using L-brackets. For a rustic look, stain the wood with a tannin-based dye before sealing—this enhances the natural grain while adding color.
Finally, test the table by placing a 20-pound weight in the center. If it wobbles, tighten any loose screws or shim uneven joints with thin wood scraps. Once stable, your garden table is ready for outdoor entertaining. I like to store mine under a covered porch during winter to prolong its life—just a quick wipe with a damp cloth keeps it looking new season after season.
Tips & tricks for building a sturdy garden table
A few simple strategies will help you avoid common pitfalls and build a garden table that stands the test of time. Here's what I've learned from years of outdoor furniture projects.
The Cutting Sequence Matters: When measuring and cutting your wood, always start with the legs (44-inch 2x4s) first, then the apron pieces (48-inch 2x6s), and finally the braces (16-inch 2x4s). This order prevents confusion during assembly—you'll have all your leg components ready before attaching the apron. I've ruined three projects by mixing up the order, so trust me on this. Label each piece as you cut them to stay organized.
Square Frame Secret: After attaching the apron boards, use the 3-4-5 triangle method to verify your frame is perfectly square. Measure 3 feet along one side and 4 feet along the adjacent side—if the diagonal measures exactly 5 feet, your frame is square. This simple check saves hours of frustration from wobbly tables. I've had to disassemble and re-align frames that failed this test.
Hidden Reinforcement Pays Off: Don't skip the 2x4 corner braces inside your frame before attaching the tabletop. These hidden braces create a rigid structure that prevents wobbling, especially important for outdoor tables that get heavy use. I've seen tables without this reinforcement sag after just one summer season. For extra stability, add a cross brace in the center of the frame if you're expecting heavy loads.
Finishing Timeline: The 4-6 hour drying time between polyurethane coats is critical—don't rush it! I've learned this the hard way by trying to speed up the process, which resulted in sticky surfaces and poor protection. Work in a dust-free area with good ventilation, and use a fan to help the finish dry evenly. For best results, apply your second coat in the same direction as the first, following the wood grain.
Pro Tips for Build Garden Table
- A few simple strategies will help you avoid common pitfalls and build a garden table that stands the test of time.
- The Cutting Sequence Matters: When measuring and cutting your wood, always start with the legs (44-inch 2x4s) first, then the apron pieces (48-inch 2x6s), and finally the braces (16-inch 2x4s).
- Square Frame Secret: After attaching the apron boards, use the 3-4-5 triangle method to verify your frame is perfectly square.
Frequently asked questions
Got questions about building your own garden table? You’re not alone! Here are some of the most common concerns—and their straightforward answers—to help you get started with confidence.
What’s the best wood for a durable outdoor garden table?
For longevity, opt for cedar, redwood, or pressure-treated pine. Cedar and redwood resist rot and insects naturally, while pressure-treated pine is budget-friendly and treated to withstand moisture. Avoid untreated softwoods like pine or fir—they’ll warp or splinter faster. Pro tip: If using cedar, seal it with an outdoor-grade finish for extra protection!
How long does it take to build a garden table from scratch?
For a beginner, expect 4–8 hours spread over a weekend, depending on complexity. If you’re experienced, you might finish in 2–4 hours. Break it into steps: cutting (1 hour), assembly (1–2 hours), sanding (1 hour), and finishing (30–60 minutes). Pro tip: Pre-cut materials at a lumberyard to save time!
Can I build a garden table on a budget?
Skip expensive hardwoods and use reclaimed wood, pallet wood, or pressure-treated lumber instead. For hardware, buy screws and bolts in bulk or raid your toolbox. A simple 2x4 or 4x4 frame with a 1x6 top keeps costs under $50–$100. Pro tip: Check Facebook Marketplace or Habitat ReStore for discounted materials!
How do I protect my garden table from rain and sun damage?
Start with weather-resistant wood (like cedar or teak), then seal it with a waterproof finish (e.g., spar urethane or linseed oil). Reapply every 1–2 years. For extra durability, add metal corner braces to reinforce joints. Avoid plastic coatings—they peel and trap moisture. Pro tip: Store cushions or umbrellas on it during heavy storms!
What tools do I really need, and can I skip any?
Essentials: circular saw or handsaw, drill/driver, measuring tape, clamps, and sandpaper. You can skip a miter saw if you’re careful with angles, but it speeds up cuts. A jigsaw helps with curved designs. Rent or borrow tools like a planer if your wood is uneven. Pro tip: A Kreg Jig makes pocket-hole joinery a breeze for beginners!
Wrapping up and next steps
Building your own garden table isn’t just a rewarding project—it’s a chance to craft a durable, personalized outdoor centerpiece that elevates your backyard. With the right materials, patience, and a few power tools, you’ll create a sturdy table that withstands seasons and weather, all while flexing your woodworking skills. 🌳✨
Ready to take the next step? Grab your tools, follow the plan, and enjoy the satisfaction of outdoor craftsmanship! Once your table is complete, don’t forget to seal it for extra protection—then kick back, relax, and admire your handiwork.
- Pro tip: Share your build with the woodworking community for feedback or inspiration!