Landscaping
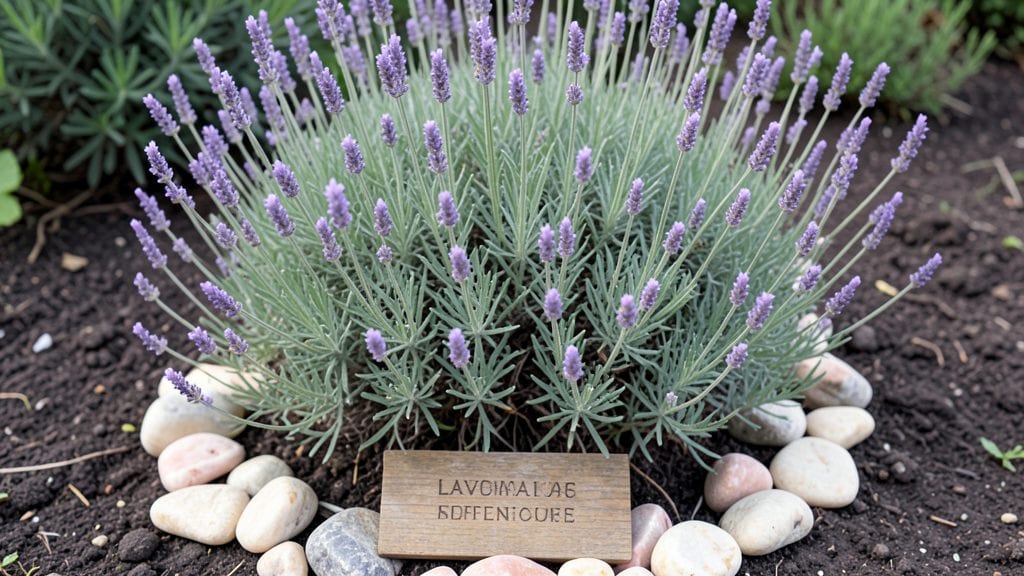
Designing a cremation garden transforms grief into something green and growing. 🌱 I learned this after scattering my father’s ashes in a sunlit corner of my yard—now it’s a thriving memorial space where wildflowers bloom in his favorite colors.
The key isn’t just planting; it’s creating a quiet place that feels like him, whether through fragrant lavender or a smooth river rock path.
Start with what matters most: sunlight, soil, and symbols. Most memorial plants—like boxwoods, junipers, or native wildflowers—thrive with minimal fuss. A simple urn buried beneath a tree or a scattering of ashes into the soil creates a natural bond.
For durability, consider drought-resistant plants or evergreens that stay green year-round, offering comfort in every season.
You’ll end up with a space that feels alive with memory. The rustle of leaves, the scent of blooms, or even the quiet hum of bees visiting flowers becomes part of the healing. This isn’t just a garden—it’s a place to sit, remember, and let nature keep watch over time.
Works for any yard size, from a small balcony container to a full backyard corner. The only rule? Make it yours. Here’s how to begin thoughtfully and practically.
📚 In This Guide
- What you need
- Instructions
- Tips and common mistakes
- Wrapping up and next steps
What you need
- ● Soil & Mulch: Topsoil – 2–4 cubic yards (depending on garden size)
- ● Organic mulch (cedar, pine, or cypress) – 1–2 bags (2–3 cubic feet each)
- ● Plants & Flowers: Perennials (e.g., lavender, roses, or coneflowers) – 5–10 plants
- ● Evergreens (e.g., boxwood or juniper) – 3–5 shrubs (for structure)
- ● Native grasses or ground cover (e.g., creeping thyme) – 1–2 bags
- ● Memorial Elements: Urn or biodegradable container (if burying ashes) – 1
- ● Natural markers (e.g., engraved stones, wooden plaques, or metal tags) – 1–2
- ● Sand or gravel (for pathways or urn placement) – 1–2 bags (50 lbs each)
- ● Garden trowel or spade – 1
- ● Pruners (bypass or anvil type) – 1
- ● Wheelbarrow – 1 (for hauling soil/mulch)
- ● Rake (leaf or bow rake) – 1
- ● Measuring tape – 1
- ● Gloves (gardening or work gloves) – 1 pair
- ○ Optional: Hose with nozzle or watering can
- ● String line (for marking layouts)
- ● Portable saw (for cutting branches)
- ● Check local regulations on burial of ashes (some areas require urns or specific depths).
- ○ Test soil pH (optional but helpful for plant health).
- ● Plan for sunlight/shade exposure (most memorial gardens thrive in partial sun).
- ● Consider accessibility (e.g., flat pathways for wheelchairs or strollers).
Step-by-Step instructions for designing a cremation garden
Transforming ashes into living memories starts with thoughtful design—here's how to create a space that feels deeply personal.
🌱 Step 1: Choose a Meaningful Location
Select a spot that connects with your loved one’s life—whether it’s near their favorite tree, beside a quiet bench, or where they loved to sit. Consider sunlight exposure: most memorial plants thrive in 4-6 hours of sunlight daily, but shade-tolerant varieties like hostas or ferns work well in low-light areas.
Test the site for a week first. Notice how the light shifts throughout the day and where water collects after rain. If the ground feels soggy, you’ll need to improve drainage with 1-2 inches of gravel before planting. This ensures roots stay healthy and the space remains accessible year-round.
☀️ Step 2: Design for Symbolism and Accessibility
Incorporate elements that reflect your loved one’s personality—perhaps a winding path for contemplation, a bench for quiet reflection, or a small water feature for soothing sounds. Use natural materials like stones, wood, or recycled bricks to create borders that feel timeless and intentional.
Design with accessibility in mind. Place the garden close to a walking path or driveway so it’s easy to visit, especially during changing seasons. Include a flat, stable surface (like a stone slab or wooden deck) where you can place photos, letters, or small mementos. This creates a focal point for visitors to gather and remember.
🌿 Step 3: Select Plants with Personal Significance
Choose plants that hold meaning—maybe their favorite flower, a tree from their hometown, or a hardy perennial that blooms during their birthday month. For example, lavender symbolizes devotion, while sunflowers represent joy and longevity. Start with 3-5 key plants to avoid overwhelming the space.
Consider low-maintenance options like ornamental grasses, succulents, or drought-resistant shrubs if you won’t be visiting frequently. These plants thrive with minimal care and still offer beauty. Group plants by their watering needs to simplify upkeep—place thirsty plants like impatiens near a water source and drought-tolerant ones like sedum in drier areas.
🪴 Step 4: Scatter Ashes and Plant for Growth
If you’re scattering ashes, choose a gentle method—sprinkle them lightly over the soil or mix them into the top 1-2 inches of the planting area. Avoid deep burial, as it can disrupt root growth. For a more structured approach, plant a memorial tree or shrub and scatter ashes around its base as it grows.
Plant your chosen memorial plants according to their care instructions. Dig holes twice as wide as the root ball but only as deep. Water deeply after planting to help roots settle, then mulch with 2-3 inches of organic mulch to retain moisture and suppress weeds. This protects the plants while they establish.
⏰ Step 5: Maintain the Space with Intention
Schedule regular visits to tend the garden—even small tasks like weeding or pruning keep the space alive and meaningful. Trim back dead foliage in early spring to encourage new growth, and add seasonal blooms like tulips or daffodils to mark special times of the year.
Consider adding a simple care guide near the garden with basic instructions, like when to water or fertilize. This ensures anyone who visits can help maintain the space, even if you’re not there. Over time, the garden will evolve into a living tribute that grows and changes just like your memories of them.
Tips & tricks for perfect cremation garden design
Creating a meaningful memorial garden takes more than just planting—it's about layering intention with practicality. Here are the key insights that'll help you craft a space that truly honors your loved one.
Location Intelligence: I can't stress enough how important that initial week-long test is in Step 1. Walk through your yard at different times of day—morning sunlight feels completely different from afternoon warmth. Notice which spots feel most peaceful to you, as this will likely resonate with others visiting the space. Pro tip: If you're working with a slope, consider creating terraced levels with natural stone borders. This not only improves drainage but also creates distinct visual layers that can symbolize different aspects of your loved one's life.
Symbolic Material Selection: When choosing stones or wood for borders in Step 2, think about durability and meaning. Locally sourced stones connect to the land and often have natural variations that tell their own stories. For wood, untreated cedar or redwood resists rot beautifully while adding warmth. I always recommend placing a few larger, flat stones in the garden—these can serve as natural seating or surfaces for placing photos and letters, making them both functional and meaningful. The key is to select materials that feel permanent and intentional.
Plant Pairing Strategy: In Step 3, the 3-5 plant guideline is perfect for creating visual harmony without overwhelming the space. When selecting your plants, consider their mature sizes and growth habits. For example, pair a tall ornamental grass with low-growing lavender to create natural height variation. I like to create "memory clusters" where I group plants by their symbolic meanings—like placing sunflowers near a bench for joyful memories, or planting roses where your loved one enjoyed gardening. This creates intuitive focal points for visitors.
Ash Scattering Technique: The gentle scattering method in Step 4 makes all the difference. I've seen people accidentally create dense ash piles that can prevent water absorption. Instead, try this: lightly sprinkle ashes while gently pressing them into the top inch of soil with your fingers. For larger quantities, mix them with the top layer of soil using a small rake. This distributes nutrients naturally while allowing plants to establish properly. And if you're planting a memorial tree, consider scattering ashes in concentric circles around its base—this creates a natural pattern that grows with the tree over time.
Pro Tips for Cremation Garden Design
- Creating a meaningful memorial garden takes more than just planting—it's about layering intention with practicality.
- Location Intelligence: I can't stress enough how important that initial week-long test is in Step 1.
- Symbolic Material Selection: When choosing stones or wood for borders in Step 2, think about durability and meaning.
Frequently asked questions
Got questions about creating a meaningful cremation garden? Here are some of the most common concerns—and thoughtful answers—to help you design a space that feels truly special.
What’s the best time of year to plant a cremation garden?
The ideal time depends on your climate, but spring or early fall are generally best. These seasons offer mild weather, allowing roots to establish before extreme heat or cold. If planting in summer, prioritize shade and frequent watering to protect young plants. Pro tip: Check your local frost dates for guidance!
Do I need special soil or fertilizers for cremation gardens?
Most plants thrive in well-draining, nutrient-rich soil—but avoid freshly turned or chemically treated soil. Mix in compost or organic matter to enrich the area. For urns, use biodegradable containers (like seed paper or cardboard) to avoid disrupting soil pH. No fertilizers are needed if you’re planting native wildflowers or herbs!
Can I scatter ashes in a cremation garden without planting?
Many people opt for scattering ashes directly into the soil, especially in natural areas like meadows or under trees. For a structured look, create a memory path by sprinkling ashes along a garden border or around a favorite plant. Just avoid windy spots to prevent ash dispersal beyond your garden.
What are some low-maintenance plant ideas for cremation gardens?
Choose hardy, drought-tolerant plants like lavender, sunflowers, or succulents for minimal upkeep. Native wildflowers (e.g., coneflowers or black-eyed Susans) attract pollinators and thrive with little care. For a living tribute, try herbs like rosemary or thyme—they’re resilient and symbolize remembrance beautifully.
What should I do if my cremation garden isn’t growing well?
Check for poor drainage, over/under-watering, or pests first. Amend the soil with compost if it’s compacted, and mulch to retain moisture. If plants struggle, consider sun exposure adjustments—some species (like ferns) prefer shade, while others (like marigolds) thrive in full sun. Patience is key; cremation gardens often take time to flourish!
Wrapping up and next steps
Designing a cremation garden is a deeply personal way to honor a loved one while embracing nature’s beauty. By blending meaningful materials, thoughtful layouts, and symbolic touches, you create a serene space that feels both intimate and enduring.
Whether you’re just starting or refining your vision, every detail—from plant choices to memorial markers—can reflect love, memory, and tranquility.
Ready to bring your garden to life? Start small: sketch your layout, gather a few key elements, and let the space evolve over time. Your loved one’s legacy will grow alongside the garden—one seed, stone, or whisper at a time. 🌿✨