Pruning
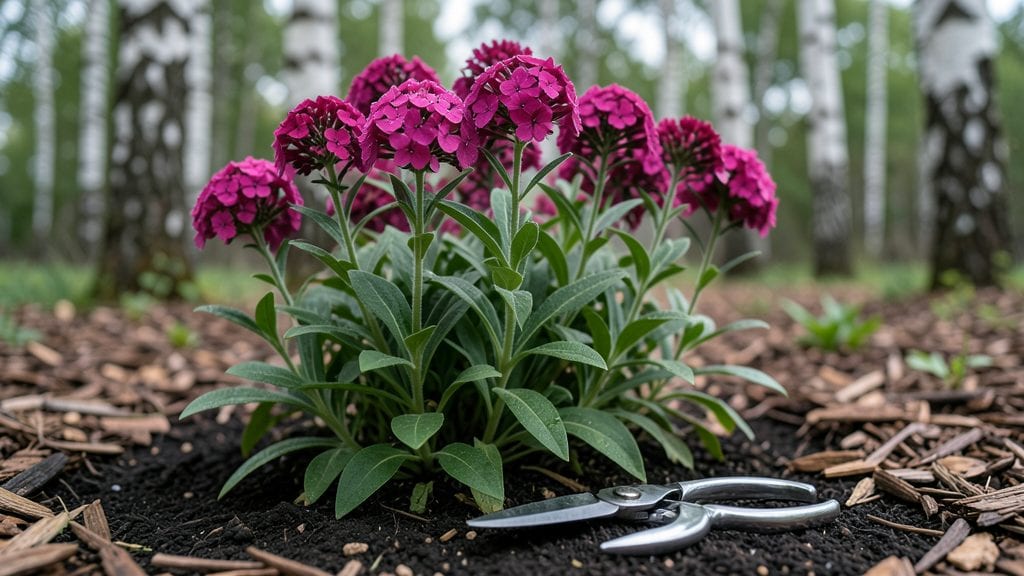
Deadheading garden phlox isn’t just about tidying up—it’s the secret to turning one flush of blooms into a season-long show that makes your garden the envy of the neighborhood. 🌸 Last summer, I watched my phlox go from a single burst of color in July to a continuous cascade of flowers through September, all because I spent just 10 minutes every week snipping spent blooms.
The key? Timing and technique—cut at the right spot, and you encourage new growth; miss it, and you waste energy on seeds instead of flowers.
You’ll need sharp pruners (dull blades crush stems and invite disease) and a clear morning to work when blooms are dry but still fresh. Grab a small bucket for clippings, and wear gloves—phlox can be fuzzy, and those tiny stems pack a punch if they snag your skin.
The best time to deadhead is right after the flower fades but before the seed pod swells; that’s when your plant is still putting energy into new blooms, not seeds. One wrong cut, and you’ll stunt growth for weeks.
What you’ll end up with is a bush that looks like it’s been professionally groomed, with bold clusters of blooms instead of straggly stems. The color stays vibrant longer, too—no faded petals or leggy stems. Plus, you’ll skip the late-season cleanup when phlox starts to look ragged.
This method works for both tall border phlox and shorter varieties in containers, so whether you’ve got a sun-drenched backyard or a balcony garden, the same rules apply.
Here’s the thing—most gardeners skip deadheading because they think it’s too much work. But once you see the difference between a neglected phlox and one that’s been properly maintained, you’ll never go back.
The payoff is weeks of extra blooms with almost no effort. Ready to turn your phlox into the star of your garden? Let’s get those shears sharp and those blooms coming.
📚 In This Guide
- What you need
- Instructions
- Tips and common mistakes
- Wrapping up and next steps
What you need
- ● Pruning shears or sharp bypass pruners – Choose clean, sharp tools (1 pair) to avoid crushing stems or spreading disease.
- ○ Gloves (optional but recommended) – A pair of gardening gloves (medium to large) to protect hands from thorns or rough stems.
- ● Garden waste bag or bucket – A 1-2 gallon capacity container to collect spent blooms and debris.
- ● Water spray bottle or hose – For light misting before/after pruning to deter pests and keep tools clean.
- ● Disinfectant (70% isopropyl alcohol or bleach solution) – A small bottle to wipe down tools between cuts (1:9 bleach-to-water ratio if using bleach).
- ● Knee pads or stool – For comfort if phlox is tall or ground-level pruning is needed.
- ● Hand lens or magnifying glass – To spot hidden pests or diseases on stems.
- ● Compost bin or mulch – To repurpose spent blooms as nutrient-rich soil amendments.
- ● Label markers – If you’re tracking varieties (e.g., Phlox paniculata vs. Phlox subulata).
Instructions for deadheading garden phlox
Here’s how to keep your phlox flowering like crazy all season—no fancy tools required.
✂️ Step 1: Wait for the Right Time
Deadhead phlox only after 1-2 blooms on a stem have fully opened. If you snip too early, you’ll remove buds that could still flower. I always check for at least 3 spent blooms clustered together—that’s your signal to act. Grab a pair of clean, sharp pruners or even your fingers (yes, really) and pinch or cut just above the first set of healthy leaves below the faded flowers.
This encourages the plant to redirect energy into new buds rather than seed production. If your phlox is still in early bloom, hold off—you’ll only stress the plant by removing too much too soon. Think of it like giving your phlox a little energy boost to keep flowering.
✂️ Step 2: Cut at the Right Spot
Always cut or pinch just above a leaf node or set of leaves, never at a bare stem. This is where new growth will sprout. If you cut too high, you’ll leave a stub that can rot or invite disease. I like to make my cuts at a 45-degree angle—it helps water run off the stem instead of pooling and causing rot.
For large clusters, you can snip the whole stem down to the first healthy leaves. For single spent blooms, just pinch them off with your fingers. The key is to remove only the faded flowers, not the entire stem unless it’s completely done blooming. This keeps the plant looking tidy while encouraging more flowers.
✂️ Step 3: Keep It Up Consistently
Deadhead phlox every 2-3 days during peak bloom season to keep the flowers coming. I set a reminder on my phone because it’s easy to forget in the hustle of summer. If you see a stem with only a few spent blooms, leave it—let those last flowers go to seed. But for stems that are mostly faded, snip them off to encourage fresh growth.
This regular maintenance prevents the plant from wasting energy on seed production, which means more blooms for you. Just avoid cutting back too aggressively late in the season—you want to give the plant time to recover before winter.
🌿 Step 4: Clean Up and Prevent Disease
After deadheading, remove all spent blooms and fallen petals from the garden bed. This keeps the area tidy and reduces the risk of fungal diseases like powdery mildew, which loves to hide in decaying plant matter. I like to shake off any debris into a bucket or bag before tossing it in the compost.
If you notice any yellowing leaves or spots on the stems, stop deadheading and treat the plant with a fungicide if needed. Keeping the area clean and dry is the best way to prevent issues. A little prevention now means more vibrant blooms later in the season.
Tips & tricks for perfect deadheading garden phlox
A few quick tricks that'll make all the difference in keeping your phlox blooming beautifully all season.
Timing is Everything: In Step 1, when you spot those 3 spent blooms clustered together, that's your golden signal. I've learned the hard way that waiting for this exact moment prevents removing potential buds that could still open. Trust me on this—patience here means more flowers later! If you're unsure, just remember: the more faded blooms you see, the more ready your phlox is for deadheading.
Precision Cutting Technique: That 45-degree angle in Step 2 isn't just for looks—it's a water runoff hack! When you make clean cuts at this angle, rainwater flows away from the stem instead of pooling and causing rot. For stubborn stems, I like to use my clean pruners to make a slight twist while cutting, which helps prevent tearing the stem. And remember, always cut just above a leaf node—this is where new growth will emerge.
Consistency Wins the Game: The every 2-3 days schedule in Step 3 might seem frequent, but it's what keeps your phlox producing nonstop. I've found that setting phone reminders helps me stay consistent, especially when I'm busy with other garden tasks. The key is balance—don't deadhead stems with only a few spent blooms, as those last flowers can still go to seed and provide some energy to the plant.
Disease Prevention: After deadheading, I always take an extra 30 seconds to shake off any debris into a bucket rather than leaving it on the ground. This simple step has dramatically reduced powdery mildew issues in my garden beds. If you notice any yellowing leaves or spots during the process, that's your plant's SOS signal—stop deadheading immediately and address the issue before it spreads.
Pro Tips for Deadheading Garden Phlox
- A few quick tricks that'll make all the difference in keeping your phlox blooming beautifully all season.
- Timing is Everything: In Step 1, when you spot those 3 spent blooms clustered together, that's your golden signal. I'...
- Precision Cutting Technique: That 45-degree angle in Step 2 isn't just for looks—it's a water runoff hack! When you m...
Frequently asked questions
Got questions about deadheading garden phlox?
Here are some of the most common ones—plus quick, expert-backed answers to keep your blooms thriving all season.
When is the best time to deadhead garden phlox?
Deadhead phlox as soon as blooms fade—usually in late spring to early summer for most varieties. For late-summer bloomers, keep trimming spent flowers until frost. The key? Don’t wait too long—overripe blooms can signal the plant to stop producing new flowers.
How exactly do I deadhead phlox without hurting the plant?
Snip just above the first set of healthy leaves (about ¼ inch above) using clean, sharp pruners. Avoid cutting into woody stems—focus on the flower stems only. Pro tip: Wear gloves—phlox leaves can be prickly!
Will deadheading make my phlox grow more blooms?
Deadheading redirects the plant’s energy from seed production to new flower growth. Regular trimming can extend your phlox’s bloom time by weeks—sometimes even months—depending on your climate and variety.
What if my phlox stops blooming after deadheading?
If blooms taper off, check for these issues:
- Over-pruning: Never cut more than ⅓ of the plant’s height at once.
- Poor nutrition: Feed with a balanced fertilizer (10-10-10) after deadheading.
- Pests/disease: Yellow leaves or spots? Treat with neem oil or fungicide.
Still struggling? Your phlox may need a renewal prune in early spring.
Are there alternatives to deadheading for lazy gardeners?
Yes! If deadheading feels tedious:
- Let some flowers seed—phlox self-seeds easily, and you’ll get free plants next year.
- Use florist’s tape to bundle stems and encourage vertical growth.
- Plant short-lived annuals nearby (like cosmos) to mask fading phlox.
But for maximum blooms, deadheading still wins!
Wrapping up and next steps
Deadheading garden phlox doesn’t have to be a chore—it’s your secret weapon for prolonged, vibrant blooms all season! 🌸 With just a little effort, you’ll reward your garden with lush, continuous color and healthier plants.
Now that you’re armed with the right techniques and tools, take that next step: grab your pruners and give your phlox a fresh start this weekend!
Watch your garden thrive—one bloom at a time! 🌿