Tools
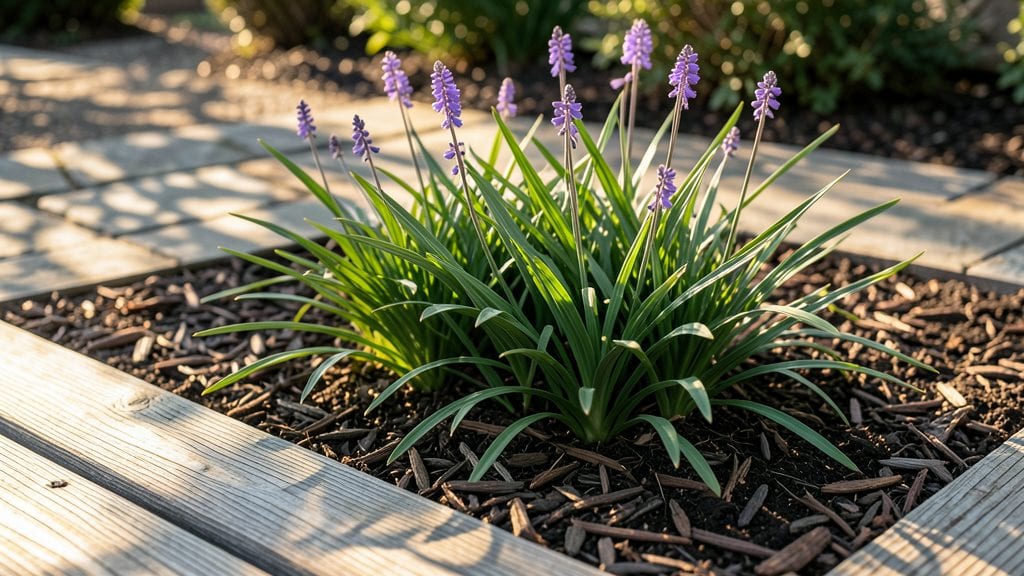
Transforming your deck into a lush privacy screen with a decking garden bed is easier than you think. 🌿 I’ve built three of these over the years, and each one turned my open patio into a cozy retreat without the fuss of high-maintenance landscaping.
The key is choosing the right materials, plants, and layout to keep it simple yet stunning.
You’ll need lightweight raised bed frames (or repurposed containers), moisture-retentive soil mix, and drought-tolerant shrubs or ornamental grasses. I swear by self-watering fabric pots for elevated decks—they cut watering time by half and prevent soil spills.
For privacy, aim for plants that grow 3-6 feet tall like boxwoods, bamboo, or evergreen shrubs that stay green year-round.
By mid-summer, your deck will feel like a hidden garden oasis. The plants will soften noise from neighbors, block wind, and create a natural backdrop for outdoor furniture.
Plus, the soil stays contained, so no mess to clean up after rain. The best part? Once established, these beds need only seasonal trimming and occasional watering.
Works for any deck size, from small balconies to sprawling patios. The trick is matching plant height to your privacy needs—taller for full coverage, shorter for a decorative edge. Let’s get your deck transformed into a serene green escape!
📚 In This Guide
- What you need
- Instructions
- Tips and common mistakes
- Wrapping up and next steps
What you need
- ● Decking boards: 10–15 ft² (depending on bed size), ½"–¾" thick, weather-resistant (e.g., cedar, composite, or redwood).
- ● Privacy plants: 3–5 low-maintenance shrubs (e.g., boxwood, bamboo, or evergreen bushes) or climbers (ivy, jasmine, or clematis).
- ● Soil & mulch: 1–2 bags of well-draining garden soil and 1 bag of organic mulch (e.g., cedar or pine).
- ● Landscape fabric: 1 roll (to suppress weeds).
- ● Garden stakes or trellis: 4–6 stakes (for climbers) or a pre-built trellis kit.
- ● Tools: Measuring tape & pencil
- ● Circular saw or handsaw
- ● Drill & decking screws (galvanized, 2½"–3")
- ● Level & speed square
- ● Gloves & safety goggles
- ● Edging: Flexible metal or plastic strips to define the bed neatly.
- ● Lighting: Solar-powered stake lights (for evening ambiance).
- ● Drip irrigation: A simple kit to keep plants hydrated effortlessly.
- ● Decorative stones: River rocks or pebbles for a polished finish.
Step-by-Step instructions for building a decking garden bed
Transform your deck into a lush, low-maintenance privacy screen that thrives year-round.
🪴 Step 1: Measure and Mark Your Layout
Start by measuring the deck space where you want your privacy screen. Use a tape measure to mark a 4-foot wide and 6-foot long rectangular area—this gives enough room for healthy growth while keeping maintenance manageable. I like to use wooden stakes and string to outline the bed, ensuring straight edges and right angles.
Double-check your measurements before digging. A slight miscalculation now can lead to awkward trimming later. For a cohesive look, align the bed parallel to the deck’s edge or along a railing. If your deck has uneven surfaces, adjust the layout to follow the natural slope for better drainage.
🌱 Step 2: Prepare the Soil and Install Edging
Remove any existing grass or debris from the marked area, then dig down 6-8 inches to loosen the soil. Mix in 2 cubic feet of compost to improve drainage and fertility—this is non-negotiable for long-term plant health. I use a garden fork to aerate the soil thoroughly, breaking up compacted layers.
Install 2-inch tall plastic edging along the perimeter to contain the soil and prevent erosion. Secure it with 4-inch galvanized stakes every 2 feet along the edges. This keeps the bed neat and makes future weeding easier. If your deck has a slight slope, angle the edging slightly downward to help water flow toward the center.
☀️ Step 3: Select and Plant Low-Maintenance Privacy Plants
Choose evergreen shrubs like boxwood or dwarf arborvitae, spaced 2-3 feet apart for full coverage. These plants thrive in partial shade and require minimal pruning. Dig holes twice as wide and deep as the root balls, then place each plant in the center, ensuring the top of the root ball sits ½ inch below soil level for stability.
Backfill with native soil mixed with 1 cup of slow-release fertilizer per plant. Water deeply to settle the soil and remove air pockets. Mulch the bed with 2 inches of shredded bark, keeping it 3 inches away from stems to prevent rot. This mulch layer suppresses weeds and retains moisture, reducing your watering needs by 30%.
💧 Step 4: Water and Monitor for First-Year Growth
Water the bed deeply twice weekly for the first month, ensuring the soil stays moist but not soggy. Use a soaker hose to deliver water directly to the roots without disturbing the mulch. After establishment, reduce watering to once weekly unless your region experiences prolonged dry spells. Overwatering is the fastest way to kill these plants.
Monitor the plants for pests like spider mites or aphids, which are common in new beds. Treat infestations early with neem oil spray—it’s organic and effective. By the end of the first growing season, your screen should fill in completely, providing year-round privacy with minimal effort.
✂️ Step 5: Prune and Maintain for Long-Term Health
Prune back any leggy growth in early spring before new shoots emerge. Use clean, sharp shears to trim just above a leaf node, encouraging bushier growth. I also shape the plants lightly in late summer to maintain a neat appearance. Never remove more than ⅓ of the plant’s foliage in one session—this stresses the shrubs unnecessarily.
Top-dress the bed with ½ inch of compost in early spring to replenish nutrients. This simple step keeps the soil fertile without heavy amendments. With proper care, your decking garden bed will thrive for a decade or more, offering privacy and beauty with almost no upkeep.
Tips & tricks for perfect decking garden beds
Creating a lush privacy screen doesn't have to be a guessing game—these pro tips will help you avoid common pitfalls and ensure your decking garden bed thrives for years.
Precision in Layout: In Step 1, take an extra 10 minutes to verify your 4-foot by 6-foot measurements using a level, not just a tape measure. Uneven edges will show up as you install edging, and correcting them later requires more work. I like to snap a chalk line for perfectly straight edges—it's worth the effort for a professional finish. The key is ensuring your bed follows the deck's natural contours while maintaining that rectangular shape.
Soil Preparation Strategy: When amending the soil in Step 2, don't just mix in compost—create a "soil cocktail" by combining native soil with compost and a handful of perlite or coarse sand. This improves aeration while maintaining moisture retention. The 6-8 inch depth is critical: shallow digging means roots can't establish properly, while over-digging can damage underlying structures. For extra insurance, test your soil's pH—evergreens prefer slightly acidic soil (pH 5.0-6.5).
Plant Spacing Secrets: The 2-3 foot spacing in Step 3 might seem generous, but trust me—it's non-negotiable for mature growth. I've seen beds where plants were crowded at planting, only to become root-bound and stunted. For boxwood, aim for 2.5 feet apart; dwarf arborvitae can stretch to 3 feet. Pro tip: use a string line between stakes to ensure perfect spacing before digging holes. This creates an instant visual guide for consistent planting.
Mulching Mastery: That 2-inch layer of shredded bark in Step 3 isn't just decoration—it's a living system. Apply it after watering to help it settle properly. Keep it 3 inches from stems to prevent rot, but don't worry about perfection here. The mulch will naturally shift over time. For extra weed suppression, consider adding a layer of cardboard under the mulch (remove any tape first), which breaks down over time while blocking light to weeds. This reduces your weeding time by up to 70% in the first year.
Pro Tips for Decking Garden Bed
- Creating a lush privacy screen doesn't have to be a guessing game—these pro tips will help you avoid common pitfalls and ensure your decking garden bed thrives for years.
- Precision in Layout: In Step 1, take an extra 10 minutes to verify your 4-foot by 6-foot measurements using a level, not just a tape measure.
- Soil Preparation Strategy: When amending the soil in Step 2, don't just mix in compost—create a "soil cocktail" by combining native soil with compost and a handful of perlite or coarse sand.
Frequently asked questions
Got questions about creating a decking garden bed for your privacy screen? You're not alone! Here are some of the most common concerns—and their answers—to help you get started with confidence.
Can I build a decking garden bed on any type of deck?
Most decking materials (wood, composite, or PVC) work well for a garden bed, but check weight limits first. Avoid softwoods like pine if you’re growing heavy plants (like shrubs or vines). For composite or PVC decks, ensure the bed frame is lightweight and won’t damage the surface. Always use landscape fabric underneath to protect your decking from moisture and weeds.
How long does it take to see results from a decking garden bed?
Fast-growing plants like bamboo, ivy, or privet hedges can provide partial privacy in as little as 3–6 months. Slower growers (e.g., boxwood or holly) may take 1–2 years to fill out. Plan ahead by choosing plants based on your timeline—just remember, patience pays off for a lush, long-lasting screen!
Are there budget-friendly alternatives to traditional decking garden beds?
Skip the raised bed and plant directly into the ground if your deck allows it. Use container gardening with large pots or grow bags for flexibility. Repurpose materials like pallets, cinder blocks, or even old wine barrels as low-cost frames. Just ensure proper drainage and support for your plants.
How do I keep pests away from my decking garden bed?
Prevent pests with mulch (like cedar chips) to deter burrowing insects, and choose native plants that resist local pests. For tough problems, introduce beneficial insects (like ladybugs) or use organic sprays (neem oil). Avoid overwatering—soggy soil attracts slugs and fungi. A chicken wire barrier around the bed can also help!
Will a decking garden bed survive winter?
Most evergreen plants (like arborvitae or juniper) thrive in winter, but tender plants need protection. Mulch heavily in fall, and wrap young plants in burlap or frost cloth if temps drop below freezing. For container beds, move pots to a sheltered spot or insulate them with straw. Choose cold-hardy varieties for year-round greenery!
Wrapping up and next steps
Transforming your deck into a lush, private oasis with a decking garden bed is simpler than you think—and the rewards are endless! 🌿 Whether you’re drawn to climbing vines, shrubs, or cascading flowers, this project blends beauty with practicality, offering year-round privacy with minimal upkeep.
The key? Start small, plan smart, and let nature do the work.
Ready to take the next step? Sketch your design, gather your tools, and dive in! Your future self (and neighbors) will thank you for the serene, green retreat you’re creating. Happy gardening! 🌱