Tools
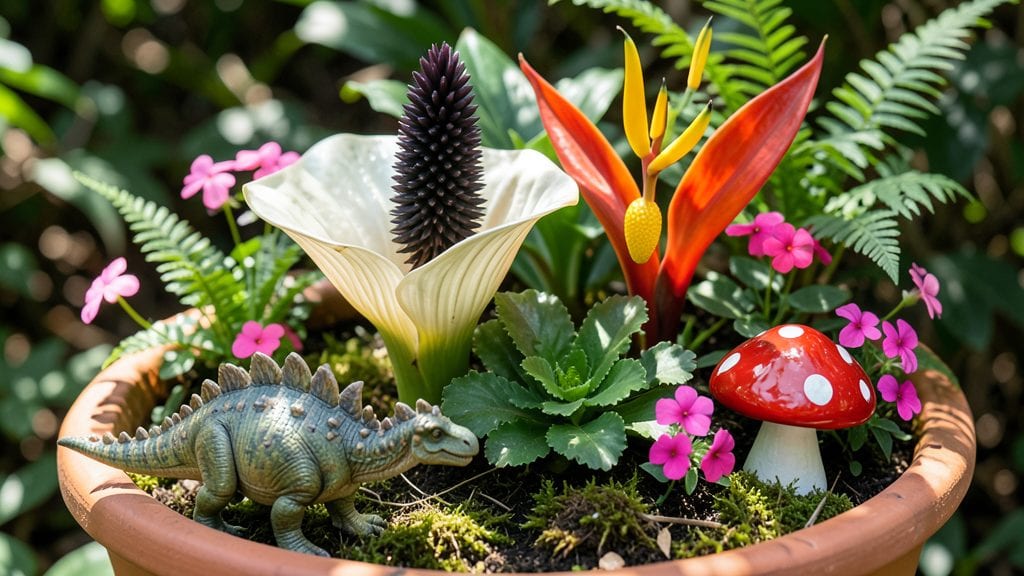
Building a dinosaur fairy garden turns your backyard into a prehistoric wonderland where tiny dinosaurs roam mossy hills and fairy lights twinkle like fireflies. ✨ I stumbled onto this idea after my kids begged for a garden that felt like stepping into a storybook—part Jurassic Park, part Enchanted Forest.
The magic lies in layering textures: rough river rocks for dinosaur footprints, velvety moss as their habitat, and delicate ferns as prehistoric foliage. You’ll create a scene so immersive that even grown-ups will want to crouch down and explore.
The best part? You don’t need a big space or fancy tools—just a shallow container, some potting soil, and a mix of plants that thrive in shade.
Ferns, small succulents like hens-and-chicks, and creeping thyme make perfect "prehistoric" greenery, while mini dinosaur figurines (available at craft stores or online) bring the scene to life. Add a winding path of pebbles or a tiny "pond" made from a shallow dish, and suddenly, your garden has depth.
Most projects take under two hours to assemble, with plants filling in beautifully over a few weeks.
Imagine the reactions when your kids spot a "T-Rex" lurking behind a mossy rock or a "stegosaurus" grazing on thyme "grass." The garden stays lush with minimal care—just occasional watering and trimming—while the fantasy elements (like tiny fairy doors or dinosaur eggs made from clay) keep the wonder alive.
You’ll end up with a space that feels like a secret hideaway, perfect for quiet play or sparking imagination. Let’s make it happen!
This design works in containers, window boxes, or even a corner of your yard—no matter your space. For extra magic, add battery-operated fairy lights to mimic bioluminescent plants or a small solar-powered fountain for the sound of a prehistoric stream.
The key is mixing natural elements with playful touches, so every visit feels like a new adventure. Ready to build your own tiny world?
📚 In This Guide
- What you need
- Instructions
- Tips and common mistakes
- Wrapping up and next steps
What you need
- ● Base Container: A shallow tray, wooden box, or ceramic pot (12" x 16" or larger for a sprawling garden; smaller for mini versions).
- ● Soil: 5–10 lbs of well-draining potting mix (add perlite or sand for texture).
- ● Dinosaur Figurines: 10–20 small plastic dinosaurs (varied sizes for depth).
- ● Fairy Garden Elements: Miniature mushrooms (5–10)
- ● Pebbles or crushed stone (1–2 lbs for pathways)
- ● Twigs or driftwood (for fences/logs)
- ● Miniature lanterns or fairy doors (2–4)
- ● Plants: Succulents or moss (for ground cover)
- ● Small ferns or air plants (3–5)
- ● Hand Trowel: Small garden trowel for shaping soil.
- ○ Spray Bottle: For misting plants (optional but helpful for moss).
- ● Paint & Brushes: Acrylic paint (earthy tones) and fine brushes to customize dinosaurs or rocks.
- ○ Glue (Optional): Hot glue gun or craft glue to secure elements.
- ○ Waterproof Sealant (Optional): For outdoor gardens to protect against rain.
- ● 🌡️ Layer soil in stages: Start with a 1-inch base, add pebbles for drainage, then top with soil for planting.
- ● ✨ Mix textures—combine smooth pebbles with rough bark for a "jurassic-meets-fairy" vibe.
- ● 🎯 Lighting matters! Add LED tea lights (battery-operated) for a magical glow at night.
Step-by-Step instructions for building a dinosaur fairy garden
Create a magical miniature world where prehistoric creatures meet fairy-tale charm!
🪴 Step 1: Choose and Prepare Your Base Container
Pick a shallow, wide container at least 12 inches deep—I love using repurposed wooden crates or ceramic trays for that rustic fairy vibe. Line the bottom with landscape fabric to prevent soil from washing out when you add water features later. This fabric also keeps weeds at bay, which is a game-changer for tiny gardens.
Next, fill the container with 2-3 inches of small gravel or pebbles for drainage. This layer ensures water flows away from roots and prevents soggy soil that could rot delicate fairy plants. Press it down lightly with your fingers—just enough to create a stable base without compacting too tightly.
🌿 Step 2: Build Textured Terrain Layers
For the dinosaur fairy twist, mix 1 part potting soil with 1 part sand to create a lightweight, moldable base. Spread this 3-4 inches thick across the gravel layer. Here’s where the magic happens: use small rocks, bark pieces, and crushed charcoal (for that ancient, earthy look) to create textured terrain. I like to arrange larger rocks first to form "hills" or "cliffs," then fill gaps with smaller stones and moss.
Press down gently to secure everything, but leave room for tiny pathways. Fairy gardens thrive on whimsy—create winding trails with thin twigs or pebbles leading to "hidden" spots where you’ll place your dinosaur figurines. The goal is to make it feel like a real miniature landscape, not just a flat surface.
💧 Step 3: Plant Miniature Flora and Add Dinosaur Touches
Choose small succulents, moss, or tiny ferns—these stay compact and fit the fairy aesthetic perfectly. Plant them in clusters around your dinosaur figurines (I use 4-6 small dinos per garden). Dig small holes with a skewer, place the plants gently, and cover with soil. Water lightly right after planting, but don’t oversaturate—fairy gardens dry out fast!
Here’s the fun part: add miniature dinosaur figurines in "natural" poses, like one peeking out from behind a rock or another crossing a "stream" (made with a thin strip of blue pebbles). Place a few tiny fairy doors or mushrooms nearby to blend both themes seamlessly. The key is balance—dinosaurs should feel like they belong in this world, not like they were dropped in!
☀️ Step 4: Add Water Features and Final Touches
Fairy gardens need movement, so create a tiny "pond" or "stream" with a shallow dish of water (I use a small ceramic saucer) surrounded by smooth pebbles. For extra realism, add a few drops of blue food coloring to the water—just enough to tint it lightly. Place a tiny plastic lily pad or a flat stone to break the surface.
Now, add the finishing touches: sprinkle crushed eggshells (for calcium) and fairy lights (if your garden will be indoors). I also like to tuck in tiny pinecones or acorns as "trees" and delicate twigs as fences. Step back and admire your work—this is where your creativity shines! The goal is to make it look like a tiny, lived-in world where dinosaurs and fairies coexist.
⏰ Step 5: Maintain and Evolve Your Garden
Water lightly 2-3 times a week, just enough to keep the soil moist but not soggy. Fairy gardens dry out fast, so check the top inch of soil—if it feels dry, it’s time to water. Place your garden in bright, indirect light (a north or east-facing window works best). Too much direct sun can scorch tiny plants, while too little light makes them stretch and lose their charm.
Every few weeks, check for overgrowth and trim back any plants that get too large. This keeps the fairy and dinosaur scale intact. You can also rearrange elements seasonally—maybe move a dinosaur to a new spot or add a tiny "nest" of moss. The beauty of a fairy garden is that it’s always evolving, just like a real miniature ecosystem!
Tips & tricks for perfect dinosaur fairy gardens
Here's what I've learned after creating dozens of these magical miniature worlds—these little details make all the difference!
The Base Layer Secret: Don't skip the landscape fabric in Step 1—it's the unsung hero that prevents soil erosion and keeps your fairy garden looking pristine. I've ruined three gardens by skipping this step, and trust me, you don't want to deal with soil spilling everywhere when you add your water features. For extra stability, press the gravel layer just enough so it stays put when you add your dinosaur figurines later.
Texture is Everything: In Step 2, the crushed charcoal isn't just for looks—it creates that perfect prehistoric-meets-fairy aesthetic while also improving drainage. I like to arrange my larger rocks first to form natural-looking formations, then fill in with smaller stones and moss. Pro tip: Use a paintbrush to gently sweep away any loose debris before adding your plants—they'll look so much cleaner!
Plant Placement Matters: When you're arranging your miniature flora in Step 3, think about how the dinosaurs will interact with them. Place succulents near the "streams" (blue pebble paths) and moss around the base of rocks—this creates natural-looking habitats. And remember, 4-6 dinosaurs is perfect for balance, but feel free to adjust if you have more or fewer figurines. The key is making it look like they belong in this world!
Lighting Magic: If you're adding fairy lights in Step 4, use warm white lights for that magical glow. I like to tuck them around the edges or under rocks where they'll cast soft shadows. For outdoor gardens, consider solar-powered lights—they're perfect for creating that enchanted atmosphere without any cords. Just remember, less is more with lighting—you want to highlight the magic, not overpower it.
Pro Tips for Dinosaur Fairy Garden
- Here's what I've learned after creating dozens of these magical miniature worlds—these little details make all the difference!
- The Base Layer Secret: Don't skip the landscape fabric in Step 1—it's the unsung hero that prevents soil erosion and keeps your fairy garden looking pristine.
- Texture is Everything: In Step 2, the crushed charcoal isn't just for looks—it creates that perfect prehistoric-meets-fairy aesthetic while also improving drainage.
Frequently asked questions
Got questions about creating your own dinosaur fairy garden? You’re not alone! Here are some of the most common queries—plus quick, practical answers to help you bring this whimsical world to life.
What’s the best time of year to start a dinosaur fairy garden?
For optimal growth, plant in early spring (after the last frost) or early fall. This gives plants time to establish roots before extreme heat or cold. If you’re using succulents or drought-resistant plants, summer starts work too—just water deeply at first!
How much does a dinosaur fairy garden cost to build?
Costs vary widely! A budget-friendly setup (small container, thrifted rocks, basic plants) can run $20–$50. A premium garden (custom terrain, rare plants, handmade dinosaur figures) may cost $100–$300+. DIY-ing saves money—repurpose old containers or forage for free rocks and logs!
Can I use real dinosaur plants (like ferns or moss) in this garden?
While no plants are actually dinosaurs, ferns, moss, and world tree (like Podocarpus) mimic prehistoric vibes. For texture, add sedum or hen-and-chicks to resemble ancient landscapes. Just ensure your plants thrive in your climate!
How do I keep pests away from my dinosaur fairy garden?
Pests hate neatness and deterrents! Prune regularly to remove hiding spots, use diatomaceous earth (food-grade) for crawling bugs, and introduce beneficial insects like ladybugs. For slugs, try copper tape around the edges. A little maintenance goes a long way!
What if my garden looks too “real” and loses the magical feel?
Embrace the whimsy! Add hidden pathways (tiny stepping stones or pebbles), miniature bridges (twigs or wire), or glowing elements (solar-powered fairy lights). Overgrown vines or a “mystery” spot (like a hidden mushroom) can also enhance the fantasy!
Troubleshooting: My plants are wilting—what’s wrong?
Check these first:
- Watering: Too much (root rot) or too little (drought)? Aim for consistent moisture—not soggy soil.
- Drainage: Ensure containers have holes to prevent waterlogging.
- Sunlight: Most fairy garden plants need partial shade (4–6 hours/day).
- Soil: Use a well-draining mix (like cactus soil + perlite).
Wrapping up and next steps
A dinosaur fairy garden isn’t just a whimsical project—it’s a magical blend of creativity, texture, and storytelling that brings tiny worlds to life. Whether you’re crafting hidden pathways, sculpting rugged terrain, or adding hidden details, this project lets your imagination run wild while honing your hands-on skills. 🌿✨
Ready to turn your vision into reality? Gather your tools, pick your favorite dinosaur and fairy elements, and start building! Share your progress with fellow creators—you might inspire the next big trend in miniature gardens!