
Tools
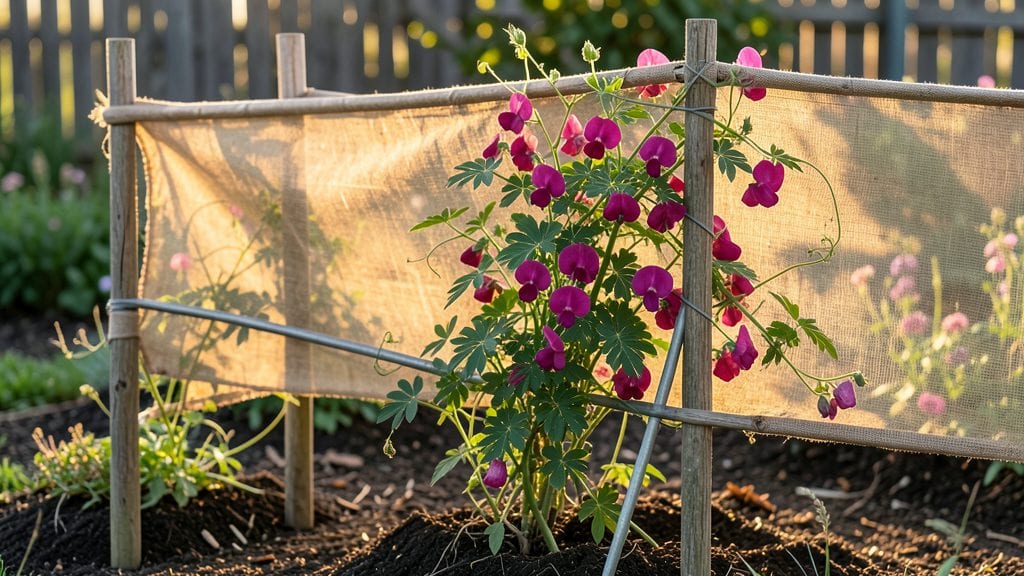
A sturdy DIY garden cover transforms your yard into a climate-controlled haven for plants year-round. I’ve tested this simple design using repurposed materials—old window screens, burlap sacks, and PVC pipes—that block wind, retain heat, and even deter pests without breaking the bank.
The key is balancing breathability with durability, so your tomatoes don’t overheat in July or your herbs freeze in December.
Most covers take under an hour to assemble and cost less than $20 for materials you might already have. You’ll need a measuring tape, scissors or a utility knife, and sturdy supports like wooden stakes or metal hoops.
For frost protection, add a layer of bubble wrap or old blankets; for shade, layer two screens with different weave densities. The best part? You can customize the size to fit raised beds, trellises, or even individual plants.
By summer’s end, you’ll harvest vegetables that stay crisp and vibrant, while delicate perennials survive winters without damage. The cover also extends the growing season by weeks, giving you a head start on spring planting and a later fall harvest.
Plus, it looks intentional—not like a last-minute fix—so your garden stays both functional and attractive.
This works equally well in small urban gardens or sprawling rural plots, from coastal climates to cold mountain regions. The only limit is your creativity. Let’s get started with the exact steps that’ve kept my garden thriving through every season.
📚 In This Guide
- What you need
- Instructions
- Tips and common mistakes
- Wrapping up and next steps
What you need
- ● Frame Material: PVC pipes (½” or ¾” diameter) – at least 4 for a basic 4x4 ft frame
- ● OR wooden stakes (2x2” or 2x4”) – 4-6 per corner/support
- ● Covering Fabric: Heavy-duty landscape fabric (60% shade cloth or UV-resistant) – enough to cover your garden bed + 2 ft overhang
- ● OR clear corrugated plastic (for lightweight protection) – cut to size
- ● Fasteners: Zippers (1-2, 6”-12” wide) – for adjustable ventilation
- ● Grommet kit (if using fabric) – for securing to the frame
- ● Staple gun + staples – for attaching fabric to wood
- ● Screws/nails + washer (if using wood) – for sturdy frame assembly
- ● Measuring tape
- ● Hacksaw or PVC cutter (for pipes)
- ● Drill + drill bits
- ● Scissors or utility knife (for fabric/plastic)
- ● Level (to ensure even framing)
- ● Pliers (for bending grommets or securing zippers)
- ● Staple gun (if not using screws)
- ● Bungee cords or rope – for securing covers during windy days
- ● Reflective tape – to deter pests or add durability
- ● Weatherstripping – for sealing edges against drafts
- ● Paint or stain (if using wood) – for extra weather resistance
- ● Weighted corners (bricks, sandbags) – to keep covers in place
Step-by-Step instructions for building a DIY garden cover
Here’s how to create a sturdy, weatherproof shield that protects plants from frost, rain, and pests—using simple materials you likely already have.
Measure and Cut Your Base Frame
Start by measuring the dimensions of your garden bed or the area you want to cover. For a 4-foot by 6-foot section, you’ll need a frame that’s 4 feet wide by 6 feet long—this matches the size of most garden beds. Use the 1x2-inch pine boards to build a rectangular frame, cutting them to the exact measurements with a saw. I like to use a miter box for clean, 90-degree corners, but a simple butt joint with wood glue works too.
Assemble the frame by screwing the corners together with deck screws—don’t skip this step, or your cover will sag under wind or snow. Double-check the square by measuring diagonally from corner to corner; both measurements should be equal. If they’re not, adjust the frame before moving forward. Once the frame is sturdy, lay it flat over your garden bed to visualize coverage.
Attach the Hoop Supports for Stability
To keep the cover from collapsing under snow or heavy rain, add hoop supports every 2 feet along the length of the frame. Cut the ½-inch PVC pipes into 2-foot lengths—these will act as vertical supports. Slide each pipe into the PVC connectors and secure them to the frame with zip ties. Space them evenly so the cover sits 12-18 inches above the plants, allowing airflow while blocking harsh weather.
If you’re covering taller plants like tomatoes or peppers, adjust the height by using longer PVC pipes. The goal is to leave enough space for the plants to grow without touching the cover, which can trap moisture and cause rot. Test the height by placing the frame over your garden and ensuring the highest plants won’t brush against it as they mature.
Secure the Weatherproof Fabric
Lay the heavy-duty landscape fabric over the frame, allowing it to drape loosely over the edges. Use staple guns to attach the fabric to the frame, starting at one corner and working your way across. Pull the fabric taut but not so tight that it distorts—you want it snug enough to block wind and rain but flexible enough to move with the structure. For extra durability, overlap the fabric edges by 2-3 inches and staple them together.
If you’re using clear plastic sheeting instead of fabric, cut it to the exact dimensions of your frame and secure it with binder clips or zip ties. Plastic works well for short-term frost protection but may trap too much heat in summer. Fabric breathes better and lasts longer, so it’s the better long-term choice. Leave the edges slightly loose so you can easily remove the cover during mild weather or for ventilation.
Add Weighting and Anchoring for Wind Resistance
To prevent the cover from blowing away in strong winds, add weighting at each corner. Place bricks or cinder blocks (about 5-10 pounds each) on the corners of the frame. If you’re in a particularly windy area, you can also secure the cover to the ground with stakes and bungee cords, looping them around the frame and anchoring them into the soil. This keeps the cover in place without damaging your plants.
For extra stability, consider adding sandbags along the edges of the fabric. Fill old burlap sacks with soil or sand and place them every 3 feet along the perimeter. This not only weighs down the cover but also helps block drafts. Test the setup by gently pulling on the fabric—if it doesn’t budge, your cover is secure.
Test and Adjust for Seasonal Use
Before the first frost, place the cover over your garden and leave it in place for 24 hours to check for gaps or weak spots. If you notice any areas where wind or rain might sneak through, reinforce them with additional staples or fabric. In spring, remove the cover during the day to allow sunlight and warmth to reach your plants, then replace it at night if temperatures drop below 40°F. This gradual exposure prevents shock and encourages healthy growth.
If you’re using the cover for pest control, ensure the fabric is tightly secured with no tears. For heat protection in summer, prop the cover slightly off the plants with additional hoops or stakes to allow airflow. Adjust the height as your plants grow, and always remove the cover during rain unless you’re using it to collect water for irrigation. With these adjustments, your DIY garden cover will last for years and keep your plants thriving year-round.
Tips & tricks for perfect DIY garden cover
A few simple strategies can make all the difference in creating a garden cover that lasts through every season. Here's what I've learned from building mine over the years.
Precision in Step 1 Pays Off: When measuring your 4-foot by 6-foot frame, take an extra 5 minutes to verify the diagonals are equal. I've seen covers sag after just one storm because someone skipped this step. Use a tape measure diagonally from corner to corner—both measurements should match exactly. This ensures your frame stays perfectly square and won't warp under snow or wind pressure. Trust me on this, it's worth the extra effort.
Hoop Spacing Matters: In Step 2, those 2-foot hoop supports should be evenly spaced along the entire length of your frame. I recommend marking your measurements with a pencil before cutting your ½-inch PVC pipes—this prevents uneven gaps that could create weak spots. For taller plants like tomatoes, extend the PVC pipes to maintain that 12-18 inch clearance above the plants. The goal is to let air circulate while blocking harsh weather, so don't skimp on this spacing.
Fabric Overlap is Key: When securing your heavy-duty landscape fabric in Step 3, that 2-3 inch overlap at the edges isn't just decoration—it's what keeps your cover waterproof. I've seen covers fail after just one heavy rain because someone didn't properly overlap the fabric. Start stapling from one corner and work your way across, pulling the fabric taut but not so tight it distorts. The overlap creates a double layer that prevents water from seeping through.
Seasonal Testing is Critical: Don't skip that 24-hour test in Step 5 before your first frost. This is when you'll catch any gaps or weak spots that could let in cold air or rain. I always test my cover during a mild day first—this way I can make adjustments before the real weather hits. Pay special attention to how the cover handles when temperatures drop below 40°F, as that's when most materials start to behave differently. This simple test can save you from having to rebuild your cover mid-season.
Pro Tips for Diy Garden Cover
- A few simple strategies can make all the difference in creating a garden cover that lasts through every season.
- Precision in Step 1 Pays Off: When measuring your 4-foot by 6-foot frame, take an extra 5 minutes to verify the diagonals are equal.
- Hoop Spacing Matters: In Step 2, those 2-foot hoop supports should be evenly spaced along the entire length of your frame.
Frequently asked questions
Got questions about DIY garden covers?
Here are answers to the most common ones—so you can protect your plants like a pro!
What’s the best material for a weatherproof garden cover?
A durable, breathable fabric like frost cloth (30–50% shade) or row cover works best. For heavier protection, use polypropylene or burlap. Avoid plastic sheets—unless you’re covering for extreme frost, as they trap moisture and can harm plants.
How do I know when to use a garden cover?
Use covers for:
- Frost protection: Cover plants before temperatures drop below 28°F (-2°C).
- Pest control: Deploy at dawn or dusk when bugs are most active.
- Heatwaves: Provide shade during peak sun (10 AM–4 PM) to prevent wilting.
Can I make a garden cover without buying fabric?
Try these DIY alternatives:
- Old bedsheets or towels: Lightweight and breathable (best for pests).
- Cardboard boxes: Cut to size for small plants (remove before rain!).
- Plastic milk jugs: Cut off the bottom, invert over seedlings for frost.
Why are my plants wilting under the cover?
Overheating or trapped moisture are likely culprits. Fix it by:
- Lifting edges for ventilation during sunny days.
- Using stakes or hoops to create airflow space.
- Watering before covering to reduce condensation.
How long can I leave a garden cover on my plants?
Short-term use (hours to days) is safest. For frost, remove covers by 10 AM to avoid heat buildup. For pests, leave them on until the threat passes (usually 1–2 weeks). Monitor plants daily—yellowing leaves or mold mean it’s time to adjust!
Wrapping up and next steps
Creating your own DIY garden cover is a game-changer for protecting your plants year-round—whether you're shielding them from frost, scorching sun, or pesky pests! With just a few budget-friendly materials and a little creativity, you can craft a durable, weatherproof shield that saves money and extends your gardening season. 🌱
Now that you’re equipped with the know-how, roll up those sleeves and get building! Start small with a single bed or section, test your design, and refine as you go.
Before you know it, your garden will be thriving all year long—no more guesswork, just happy plants and a greener thumb. 🌟