Tools
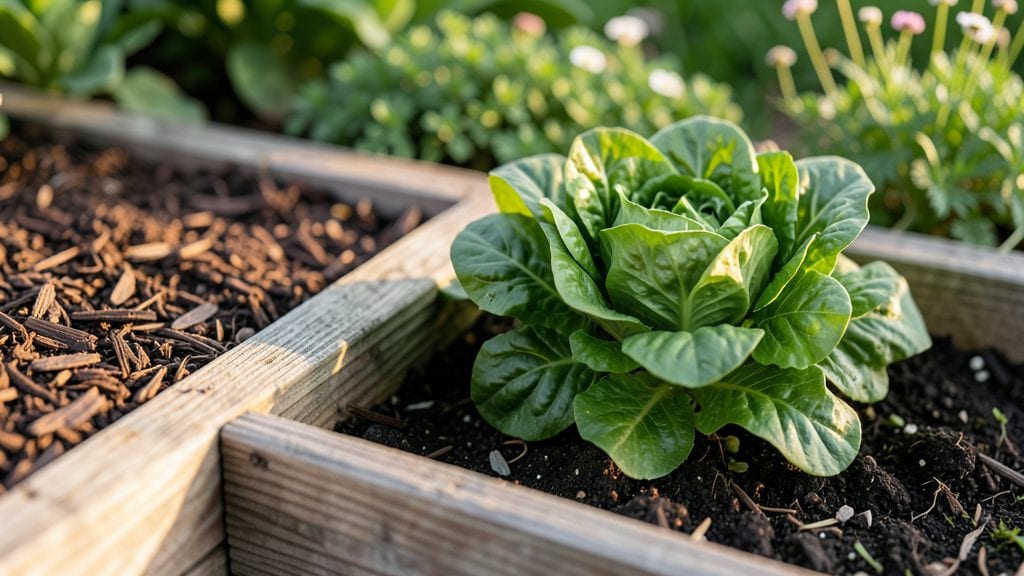
An elevated box garden turns tiny balconies into lush harvest zones. 🌱 Last summer, I grew enough basil, peppers, and strawberries in a 4x4-foot raised bed to feed my family for months—without taking up yard space.
The secret isn’t just the height; it’s how the design maximizes sunlight, drainage, and plant compatibility in ways flat gardens can’t.
You’ll need sturdy lumber or pre-made planter boxes, landscape fabric for weed control, and a drill for drainage holes. Most urban setups work with 2-3 feet of height, but deeper boxes let you grow root crops like carrots or potatoes.
The key is matching plant needs—leafy greens thrive on top, while tomatoes and peppers get the bottom shelves where they won’t dry out as fast.
By mid-season, you’ll have a vertical garden that’s 30% more productive than ground-level beds. Herbs stay fragrant and within arm’s reach, while vegetables ripen faster in the warm air above pavement.
Plus, no more bending—just step up to harvest. The only downside? You’ll need to water more often, but a simple drip system solves that in minutes.
Works for herbs, veggies, or even small fruit bushes. Whether you’re renting an apartment or just want to reduce yard work, this setup adapts to any space. Let’s get those boxes built—your balcony’s about to get a major upgrade.
📚 In This Guide
- What you need
- Instructions
- Tips and common mistakes
- Wrapping up and next steps
What you need
- ● Wood: Untreated cedar, redwood, or pine (2x6 or 2x8 boards, 8–12 feet long, 4–6 pieces). Avoid pressure-treated wood for edible gardens.
- ● Hardware: Stainless steel or galvanized screws (2–2.5 inches, 20–30 screws) and corner brackets (4–6).
- ● Liner: Heavy-duty landscape fabric (1–2 feet wider than the box) to prevent soil loss.
- ● Soil: High-quality potting mix or raised-bed blend (2–3 cubic feet per square foot of garden space). Avoid garden soil—it compacts!
- ● Drainage: Gravel or landscape fabric (1–2 inches thick) at the box’s base.
- ○ Optional Extras: Wood stain or sealant (for longevity, non-toxic if growing edibles).
- ● Waterproof paint (for aesthetics).
- ● Hinges or removable panels (for easy access).
- ● Drip irrigation kit (for hassle-free watering).
- ● Wheel kit (if mobility is a priority).
- ● Tape measure, pencil, and speed square.
- ● Drill/driver with Phillips and pilot bits.
- ● Circular saw or handsaw (for cutting wood).
- ● Screwdriver or impact driver.
- ● Level (to ensure stability).
- ● Staple gun (for securing landscape fabric).
- ● Work gloves and safety glasses.
- ● Clear, flat, and stable surface (deck, patio, or ground).
- ● Sunlight access (6+ hours/day for most veggies/herbs).
- ● Proximity to a water source (or a portable watering solution).
- ● Basic DIY skills (or a friend to help with assembly!).
Step-by-Step instructions for building an elevated box garden
Turn your balcony or patio into a thriving vertical harvest with this simple, sturdy design.
🪴 Step 1: Build the Garden Box Frame
Start with your 2x4 lumber to construct a rectangular frame measuring 4 feet long x 2 feet wide x 1 foot deep. Cut four 4-foot lengths for the long sides and two 2-foot lengths for the ends. Use a 2x4 corner brace at each joint to reinforce stability—this prevents wobbling when you add soil and plants.
Pre-drill holes to avoid splitting the wood, then secure with 2.5-inch deck screws. For extra durability, add a 1x4 board along the bottom edge as a footing. This keeps the box level and protects it from moisture. I like to line the inside with landscape fabric stapled to the frame—it prevents soil from leaking through gaps and makes cleanup easier.
🌱 Step 2: Add the Bottom and Assemble the Box
Cut a 4x2-foot plywood sheet to serve as the bottom of your box. Drill 1-inch drainage holes every 6 inches along the edges to prevent waterlogging. Slide the plywood into the frame, then add a 2x4 ledge board around the top edge to create a clean planting surface and prevent soil spillage.
Double-check that all corners are square and the box is level before securing the plywood with screws. If your space gets windy, add L-brackets to the sides for extra reinforcement. This is the moment that matters: a sturdy base means your garden lasts seasons, not weeks.
☀️ Step 3: Fill with Soil and Plant
Fill the box with your 2 cubic feet of potting mix, leaving a 1-inch gap at the top for watering. Mix in a handful of slow-release fertilizer to give plants a nutrient boost right away. I like to add a 2-inch layer of compost on top—this improves drainage and feeds roots as it breaks down.
Plant your chosen vegetables or herbs, spacing them according to their mature size. For example, basil and lettuce can share space, but tomatoes need their own corner. Water gently after planting to settle the soil around roots. Here's the thing—don’t overcrowd. Plants compete for light and nutrients, and you’ll end up with stunted growth.
💧 Step 4: Position and Maintain
Place your elevated box where it gets at least 6 hours of sunlight daily. If you’re on a balcony, south-facing works best. Keep the soil consistently moist but not soggy—water when the top 1-2 inches feel dry. I use a drip irrigation kit to automate watering, which saves time and prevents overwatering.
Add a 1-inch layer of mulch to retain moisture and suppress weeds. Check plants weekly for pests or wilting. This is where regular care pays off—consistent watering and light mean you’ll harvest fresh produce all season long.
Tips & tricks for perfect elevated box gardens
Here's what I learned after building and maintaining these gardens for years—details that make all the difference between a flimsy planter and a thriving harvest.
Stability is Everything: In Step 1, when you're securing the 2x4 frame, take an extra 5 minutes to check for wobble by pressing down on each corner. I've seen boxes collapse under heavy soil because corners weren't properly squared. Use a level on the 1x4 footing board to ensure perfect flatness before adding screws—this prevents moisture buildup that can rot your wood over time.
Drainage Done Right: The 1-inch drainage holes in Step 2 should be your top priority. Space them every 6 inches along the edges, but also add a few extra holes in the center if you're using heavy soil mixes. I like to use a step bit drill attachment to make clean, uniform holes that won't splinter the plywood. This prevents waterlogging which is the #1 killer of container plants.
Soil Layering Strategy: When you add your 2 cubic feet of potting mix in Step 3, create a layered system: start with 1 inch of gravel at the bottom for drainage, then add 1 inch of compost, followed by your potting mix. This mimics natural soil layers and gives roots room to grow downward while keeping moisture balanced. The compost layer also acts as a natural fertilizer that releases nutrients slowly.
Plant Spacing Hack: In Step 3, when planting, use the back of a spoon or small trowel to create planting holes that are just slightly larger than your plant's root ball. This prevents overcrowding and makes it easier to adjust spacing as plants grow. For leafy greens, space plants 6-8 inches apart, while tomatoes and peppers need their own dedicated corners with 18-24 inches of space.
Pro Tips for Elevated Box Garden
- Here's what I learned after building and maintaining these gardens for years—details that make all the difference between a flimsy planter and a thriving harvest.
- Stability is Everything: In Step 1, when you're securing the 2x4 frame, take an extra 5 minutes to check for wobble by pressing down on each corner.
- Drainage Done Right: The 1-inch drainage holes in Step 2 should be your top priority.
Frequently asked questions
Got questions about maximizing your elevated box garden? You’re not alone!
Here are answers to the most common queries to help you grow with confidence—whether you’re a beginner or a seasoned green thumb.
What’s the best time of year to start an elevated box garden?
Spring and early summer are ideal for most plants, but timing depends on your climate and crops. Cool-season veggies (like lettuce or spinach) thrive in early spring or fall, while warm-season plants (tomatoes, peppers) need soil temps above 50°F (10°C). Start seeds indoors 4–6 weeks before the last frost for a head start!
How do I keep my elevated garden from drying out too quickly?
Elevated gardens drain faster, so consistent moisture is key. Use self-watering systems, mulch the soil surface, or opt for drought-tolerant plants like succulents or herbs. Water deeply in the morning to reduce evaporation, and check soil moisture daily during heatwaves. Pro tip: Add a layer of hydrogel crystals to retain water!
What are the most common pests in elevated box gardens, and how do I prevent them?
Pests like aphids, slugs, and spider mites love elevated gardens too! Prevent them with:
- Neem oil or insecticidal soap for soft-bodied bugs.
- Row covers to block flying pests.
- Companion planting (e.g., marigolds repel nematodes).
- Regularly inspect leaves and soil for early signs.
If pests strike, act fast—isolate affected plants and treat immediately.
Can I use an elevated box garden on a balcony or patio with no ground space?
Elevated gardens are perfect for balconies or patios. Just ensure your container has drainage holes, stable support (especially in windy areas), and access to sunlight (6+ hours daily). For small spaces, try stackable planters or vertical pockets to maximize greens like herbs and leafy veggies.
My elevated garden’s plants are wilting—what could be wrong?
Wilting usually signals overwatering, underwatering, or root stress. Check:
- Soil moisture: Stick your finger 1–2 inches deep—if dry, water; if soggy, let it dry out.
- Drainage: Ensure excess water escapes (no standing water!).
- Root health: Gently tug plants—if they pull out easily, they’re thirsty or nutrient-deficient.
- Sunlight: Are they getting enough light? Move to a sunnier spot if needed.
Give them a few days to recover, and adjust care accordingly.
Wrapping up and next steps
An elevated box garden isn’t just a space-saver—it’s a game-changer for urban gardeners!
Whether you’re a beginner or a green-thumb pro, these versatile planters help you grow more in less space, reduce back strain, and even improve drainage. 🌱 With the right materials and a little creativity, you can transform any balcony, patio, or rooftop into a thriving harvest hub.
Ready to grow your own food? Start small—pick a spot, gather your supplies, and plant your first seeds or seedlings today! Even a single elevated box can make a big difference in your garden’s productivity and your connection to nature. Happy planting! 🌿