
Vegetables
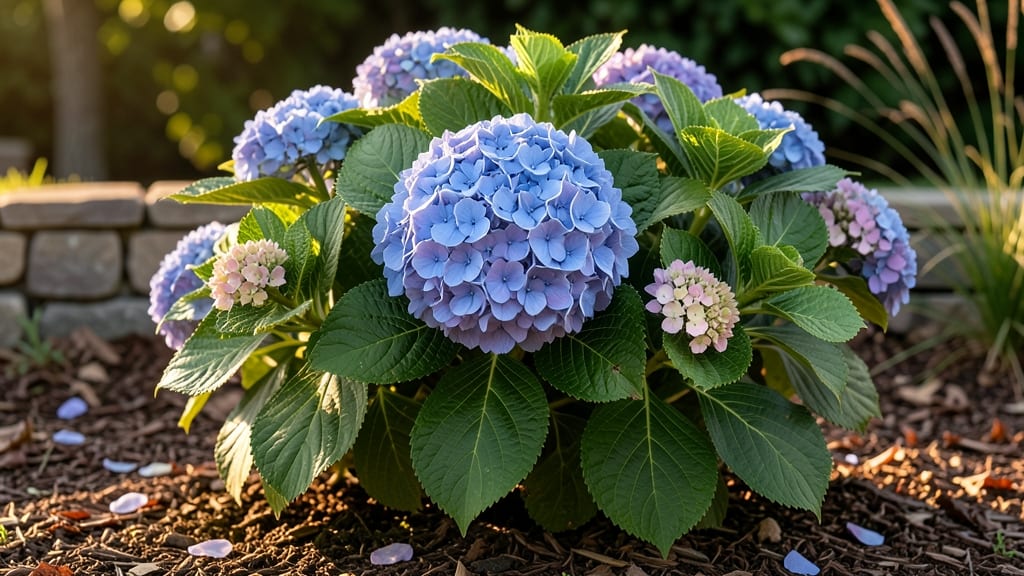
The latest English garden layouts are stealing the show with their lush, layered beauty. 🌿 I fell in love with this style after visiting a cottage garden in the Cotswolds, where every path invited exploration and every corner felt like a postcard.
The trick lies in balancing structure with wild charm—think neatly clipped hedges framing vibrant borders of roses, lavender, and foxgloves.
You don’t need acres to pull this off. Start with a focal point—a stone bench, an arbor draped in clematis, or a small pond reflecting the sky. Then layer in perennials for seasonal color, interspersed with ornamental grasses for movement.
The key is repetition: repeat plants like delphiniums or peonies every few feet to create rhythm, just like the pros do in historic gardens.
What you’ll end up with is a garden that feels both classic and fresh, where every stroll reveals something new. The scent of roses mingling with the crisp snap of lavender, the way sunlight filters through wisteria—these are the little luxuries that make English gardens timeless.
Ready to bring this magic to your space?
Works for small urban yards or sprawling country estates. The principles stay the same: less is more, and every plant should have a purpose—whether it’s color, texture, or fragrance. Let’s make your garden the talk of the neighborhood.
📚 In This Guide
- What you need
- Instructions
- Tips and common mistakes
- Wrapping up and next steps
What you need
- ● Topsoil or Garden Soil: 10–15 cubic yards (depending on garden size) – opt for well-draining, nutrient-rich soil (pH 6.0–7.0).
- ● Mulch: 2–3 bags of organic mulch (e.g., cedar chips or straw) to retain moisture and suppress weeds.
- ● Compost: 5–10 bags (for enriching soil and promoting plant health).
- ● Garden Stones or Gravel: 50–100 lbs (for pathways, borders, or formal designs like herringbone patterns).
- ● Perennials & Shrubs: Boxwood (for hedges or topiary): 12–24 plants.
- ● Lavender (drought-resistant): 6–12 plants.
- ● Roses (classic English variety): 4–8 bushes.
- ● Herbs (thyme, rosemary, sage): 3–6 plants.
- ● Ornamental grasses (e.g., fountain grass): 4–6 clumps.
- ● Annuals for Color: Pansies, marigolds, or hollyhocks (10–20 plants for seasonal bursts).
- ● Basic Hand Tools: Trowel (for planting small items).
- ● Pruners (bypass pruners for clean cuts).
- ● Garden fork (for aerating soil).
- ● Hand weeder (for removing weeds efficiently).
- ● Measuring & Layout Tools: Measuring tape (25–50 ft).
- ● String line & stakes (for marking paths or garden beds).
- ● Level (to ensure even pathways or borders).
- ○ Heavy-Duty Tools (Optional but Helpful): Wheelbarrow (for hauling soil/mulch).
- ● Hedge shears (for shaping boxwood or topiary).
- ● Edging tool (for crisp garden borders).
- ● Garden hose with spray nozzle (for watering).
- ● Site Preparation: Clear the area of weeds, rocks, or debris.
- ● Test soil pH (kits available at garden centers).
- ● Pro Tip: 💡 Sketch your layout first! Use graph paper to plan paths, beds, and plant placements before digging.
- ● Climate Considerations: Choose drought-tolerant plants if in a dry climate (e.g., lavender, sedum).
- ● Add seasonal interest with bulbs (tulips, daffodils) for spring blooms.
- ● Budget-Friendly Swaps: Use recycled bricks or pavers for pathways instead of gravel.
- ● Start with smaller plants and let them grow into your design.
How to design an English-inspired garden layout
Channel classic British charm with these time-tested garden layouts that blend romance and structure.
🪴 Step 1: Plan Your Garden’s Central Focal Point
Every English garden needs a grand centerpiece—whether it's a stone fountain, a flowering shrub, or a small gazebo. I always start by sketching a rough layout on graph paper, marking the focal point first. This creates balance and draws the eye naturally. Choose something that reflects your garden’s scale—a 3-foot-tall topiary works for small spaces, while a 6-foot stone urn anchors larger designs.
Place your focal point slightly off-center (about one-third from the garden’s edge) to create visual interest without overwhelming the space. In classic English gardens, this often means positioning it near a gravel path or flower bed to frame it beautifully. Once you’ve chosen your centerpiece, measure its dimensions and mark its footprint on your plan.
☀️ Step 2: Create Layered Planting Beds with Mixed Heights
English gardens thrive on textured layers—tall, medium, and low plants arranged to guide the eye. Start with tall perennials like delphiniums or hollyhocks along the back of your beds, then add mid-height shrubs such as hydrangeas or lavender, and finish with low-growing flowers like pansies or violets at the front. This creates depth and mimics the natural undulating landscapes of British countryside gardens.
Use gravel or mulch (about 2 inches deep) between plants to suppress weeds and add contrast. I like to group plants in odd-numbered clusters—three roses here, five peonies there—because it feels more organic and inviting. Space taller plants 18-24 inches apart and shorter ones 12-16 inches apart to allow airflow and prevent overcrowding.
🌿 Step 3: Add Arched Pathways and Gravel Walkways
No English garden is complete without meandering paths that invite exploration. Use gravel (about 3 inches deep) for walkways, edged with low stone borders or boxwood hedges. For a classic touch, add arched trellises or wrought-iron gates along pathways to create hidden seating areas or garden "rooms." I often use flagstone steps to lead up to focal points, adding a rustic yet refined feel.
Keep pathways 3 feet wide for comfort—narrower paths feel whimsical, while wider ones suggest formality. If your garden has slopes, incorporate gentle curves into the design; straight lines can feel too rigid for the romantic English style. Test your paths by walking through them to ensure they flow naturally from one area to the next.
✂️ Step 4: Incorporate Topiary and Climbing Plants
English gardens are famous for their manicured topiary and romantic climbers. Train roses, clematis, or jasmine to climb obelisks, arches, or trellises to add vertical interest. For topiary, start with boxwood or yew plants (about 18-24 inches tall) and shape them into cones, spirals, or animals using wire guides. Prune regularly—every 4-6 weeks during the growing season—to maintain their shape.
Place topiary near seating areas or along pathways to frame views. I often pair formal topiary with loose, wildflower borders to balance structure and natural beauty. For climbing plants, choose varieties that bloom at different times—early spring with wisteria, summer with roses, and fall with hops or virgin’s bower—to keep color year-round.
💧 Step 5: Add Water Features and Seating Nooks
Water features—even small ones—bring life to an English garden. A miniature pond (about 4 feet wide) with a stone bridge or a simple bubbling fountain adds tranquility. Place it near seating so you can enjoy the sound of water. For seating, use wrought-iron benches, stone slabs, or hanging chairs tucked under arches. I always include at least one hidden nook where guests can relax without feeling exposed.
Surround water features with moisture-loving plants like astilbe, ferns, or hostas to enhance their natural beauty. Keep seating areas shaded with climbing roses or pergolas to create cozy retreats. The goal is to make every corner of your garden feel like a special place to linger—just like the secret gardens of British literature.
Tips & tricks for perfect English-inspired garden layouts
Creating a classic English garden isn't just about planting flowers—it's about crafting an experience that feels like stepping into a storybook. Here are my go-to strategies to bring that timeless charm to life.
Focal Point Placement: When positioning your central focal point in Step 1, remember that the "one-third rule" isn't just a guideline—it's a visual anchor. I've found that placing your fountain or gazebo about 20-24 inches from the garden's edge (for a 10-foot-wide space) creates that perfect balance between prominence and harmony. This positioning works particularly well when framed by a gravel path or flower bed, which naturally draws the eye toward your centerpiece. Think of it like the golden ratio in gardening—it's all about that satisfying visual flow.
Layering Like a Pro: In Step 2, the magic happens in the layers. I always start with my tallest plants (like delphiniums) about 12 inches from the back edge of the bed, then step back 18 inches for mid-height shrubs, and finish with low-growing flowers just 6 inches from the front. This creates that signature English depth while keeping everything accessible. Pro tip: Use a small wooden stake to mark your planting lines before digging—it saves time and ensures perfect spacing every time. And remember, odd-numbered clusters (3, 5, or 7 plants) feel more natural than even groupings.
Pathway Design Secrets: For Step 3, the 3-inch gravel depth isn't arbitrary—it's the sweet spot that provides good drainage while still feeling substantial underfoot. I've learned the hard way that shallower gravel (less than 2 inches) can look skimpy and compact too easily. When creating curves in your pathways, use a garden hose to gently bend the edges—it gives you a perfect, organic shape without the guesswork. And if you're working with slopes, consider adding subtle terraces with stone edges to prevent erosion while maintaining that romantic meander.
Topiary Timing: The 4-6 week pruning schedule in Step 4 might seem frequent, but it's what keeps your topiary looking like a masterpiece all season. I recommend pruning boxwood every 5 weeks and yew every 6 weeks—they respond differently to shearing. For that perfect cone shape, start with a wire frame dipped in soapy water (so it doesn't rust) and gently weave it through the branches as you shape. Remove the wire after 6-8 weeks when the plant has taken the form. And here's a secret: Prune just after flowering for the cleanest look.
Pro Tips for English Gardens Latest
- Creating a classic English garden isn't just about planting flowers—it's about crafting an experience that feels like stepping into a storybook.
- Focal Point Placement: When positioning your central focal point in Step 1, remember that the "one-third rule" isn't just a guideline—it's a visual anchor.
- Layering Like a Pro: In Step 2, the magic happens in the layers.
Frequently asked questions
Got questions about creating your own English garden inspired by Britain’s legendary layouts? Here are some of the most common inquiries—plus quick answers to help you plan with confidence!
What are the key features of a classic English garden?
A true English garden blends romantic charm with practical beauty. Look for layered planting (tall shrubs, mid-height perennials, and low ground covers), winding paths (often gravel or brick), ornamental arches or trellises, and mixed borders with roses, lavender, and seasonal blooms. Don’t forget water features—even a small pond or bubbling stone fountain adds that quintessential British touch!
When is the best time to plant an English garden layout?
For perennials and shrubs, aim for early spring (March–April) or fall (September–October) when soil is workable but not frozen. Bulbs (like tulips or daffodils) go in fall, while roses and climbers thrive when planted in late winter or early spring. Pro tip: If you’re starting from seeds, many herbs and veggies (like thyme or parsley) can go in late spring after the last frost!
How much does it cost to create an English-style garden?
Costs vary widely! A small backyard project (10’x10’) might run $500–$2,000 for plants, soil, and basic hardscaping (like stepping stones). Larger designs with custom paths, trellises, or water features can climb to $5,000–$15,000+. Save money by sourcing local nurseries, using mulch for weed control, and DIY-ing simple brick or gravel paths.
Can I mix vegetables into an English garden design?
Kitchen gardens
were a staple in historic English estates. Try tucking herbs (rosemary, thyme, sage) near the house, edible flowers (nasturtiums, pansies) in borders, or vegetable patches behind shrubs for a hidden harvest. Stick to low-maintenance crops like lettuce, peas, or strawberries—they blend seamlessly with ornamental plants. Bonus: Lavender and rosemary repel pests naturally!
What’s the biggest mistake beginners make with English gardens?
Overcrowding plants! English gardens rely on natural, slightly wild layers, but too many plants competing for space leads to poor growth and pests. Rule of thumb: Leave 12–18 inches between mature plants (check tags for spacing needs). Also, avoid over-pruning hedges—English gardens love textured, slightly unkempt edges. Fix it: Thin out crowded areas in early spring before new growth starts.
How do I maintain an English garden with minimal effort?
English gardens are supposed to look effortless! Mulch heavily (3–4 inches) to suppress weeds, group plants by water needs, and prune only when necessary (deadhead spent blooms, trim leggy growth in late winter). Gravel paths reduce mud, and perennial ground covers (like creeping thyme) choke out weeds. Pro move: Install a drip irrigation system to save time—and keep your garden lush even during dry spells!
Wrapping up and next steps
From the rolling lawns of Kew Gardens to the cozy charm of cottage-style plots, English gardens prove that timeless beauty thrives in thoughtful design. Whether you’re drawn to formal symmetry, wildflower meadows, or herbaceous borders, these layouts offer inspiration for any space—big or small. 🌿
Ready to bring a touch of British elegance to your garden? Start by sketching your vision—pick one signature element (like a topiary hedge or a stone path) and build from there. With the right materials and a dash of creativity, your garden could be the next masterpiece!
- Pro Tip: Visit local botanical gardens for hands-on inspiration!
- Next Step: Gather your tools and dive into planting season.