
Tools
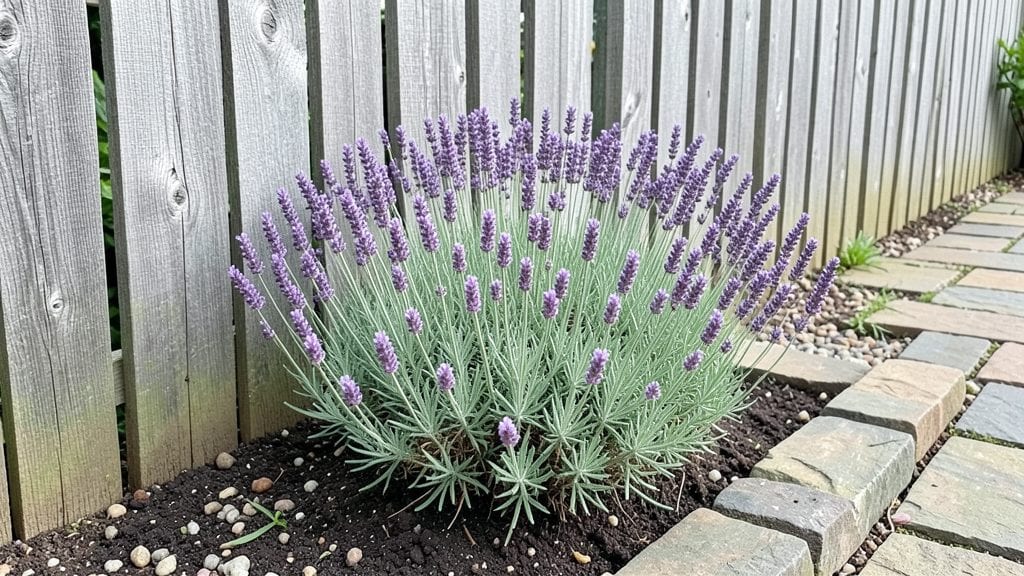
A fenced garden plan that finally gives you the privacy you crave—without sacrificing sunlight or space for your plants. 🌿 I designed mine after years of struggling with nosy neighbors and stray pets ruining my carefully tended rows.
The right fence doesn’t just block views; it creates a microclimate where your soil stays moist longer, weeds stay out, and your veggies grow like they’re in a greenhouse.
Start with your fence material: cedar resists rot and smells amazing, metal offers durability, or go living with fast-growing evergreens like arborvitae. Then map your layout—raised beds along the fence maximize space, while gravel paths keep mud out of your garden shoes.
My 6-foot cedar fence cost less than I expected and paid for itself in saved produce.
Once installed, you’ll notice the difference immediately—fewer pests, easier watering, and plants that thrive without constant attention. The fence itself becomes part of the garden: trellises for climbing beans, hanging baskets for herbs, and even a small gate for easy access.
By summer’s end, your neighbors will be asking for your secret.
Works for any yard size, from tiny urban plots to sprawling countryside gardens. The key is balancing height, material, and plant placement so your fence feels like an extension of your growing space—not just a barrier. Let’s get your perfect fenced garden planned!
📚 In This Guide
- What you need
- Instructions
- Tips and common mistakes
- Wrapping up and next steps
What you need
- ● Fencing material: Choose from: Wood (e.g., cedar, redwood, or pine) – 6-8 ft tall, 4x4 or 6x6 posts
- ● Vinyl – Low-maintenance, 6-8 ft panels
- ● Metal (e.g., wrought iron or aluminum) – Durable, 6-8 ft sections
- ● Composite – Blends wood/plastic, weather-resistant
- ● Posts: 4x4 or 6x6 pressure-treated lumber – 1 post every 6-8 ft (calculate based on garden perimeter)
- ● Concrete: Quick-setting mix (60 lb bags) – 1 bag per 2 posts (for securing post footings)
- ● Gate hardware: Gate (6-8 ft tall, matching fencing material)
- ● Hinges (3 per gate, heavy-duty)
- ● Latch or deadbolt (for security)
- ○ Optional: Self-closing hinge (💡 Pro tip: Adds convenience and security!)
- ○ Privacy enhancements (optional but fun!): Lattice panels (for climbing plants like roses or ivy)
- ● Decorative trellises (adds vertical interest)
- ● Post hole digger or auger (Manual or powered)
- ● Circular saw or miter saw (For cutting fence panels/posts)
- ● Level (4-ft for accuracy)
- ● Tape measure (25+ ft for precise measurements)
- ● Drill/driver (With masonry bit for concrete)
- ● Staple gun (For attaching lattice or trim)
- ● Wheelbarrow (For mixing concrete)
- ● Safety gear: Gloves, goggles, ear protection, and steel-toe boots
- ● Check local building codes – Height restrictions, setback rules, or permit requirements may apply! (💡 Pro tip: Call your city’s planning department to avoid surprises.)
- ● Survey your space – Mark boundaries, utility lines, and slope changes.
- ● Clear the area – Remove debris, rocks, or vegetation from the fence line.
- ● Gather neighbors’ approval – If your fence borders shared property, a quick chat avoids future headaches!
Step-by-Step guide to designing a privacy-perfect fenced garden
Here’s how to craft a secure, year-round retreat that blends function with beauty—no shortcuts, just proven layouts.
🪴 Step 1: Define Your Garden’s Core Purpose and Dimensions
Measure your space first. Sketch a rough outline of your yard, marking existing structures like trees, patios, or utility lines. A 10x12-foot plot is ideal for a small family garden, while larger areas can accommodate raised beds, seating nooks, or even a small greenhouse. I always add 2 extra feet to each side for pathways—trust me, you’ll thank yourself later when you’re not stepping on plants.
Decide how you’ll use the space: Will it be a vegetable sanctuary, a flower-filled retreat, or a mix? Privacy fences work best when they’re part of the design, not an afterthought. For example, a 6-foot tall fence with lattice panels adds height while allowing light and air to flow. Jot down your must-haves—like a trellis for climbing roses or a bench tucked into a corner—and sketch them in.
☀️ Step 2: Choose Fencing Materials and Privacy Enhancements
Wooden privacy fences are classic, but vinyl or metal options last longer with less maintenance. If you’re going with wood, 6x6 cedar posts spaced 8 feet apart create a sturdy frame. For extra privacy, add horizontal lattice slats or bamboo screens—these let light through while blocking views. I’ve found that 3-foot tall lattice panels on the top half of a fence soften the look while keeping neighbors at bay.
For a softer, living barrier, integrate evergreen shrubs like arborvitae or boxwood along the fence line. These grow 3-5 feet tall and fill gaps beautifully. Plant them 12 inches from the fence to avoid root competition. If you’re in a windy area, secure the fence with galvanized screws and add diagonal braces for extra stability—nothing ruins a perfect fence faster than sagging panels.
🌿 Step 3: Plan Pathways and Functional Zones
Designate 3 key zones: growing space, seating area, and storage. A 4-foot wide pathway of gravel or mulch keeps soil clean and prevents muddy shoes. For a cozy touch, line pathways with stepping stones or flagstone. I like to curve pathways slightly—they guide movement naturally and add visual interest.
Place raised beds or in-ground plots where they get 6+ hours of sunlight daily. If your yard has shady spots, opt for hostas, ferns, or impatiens instead of sun-lovers like tomatoes. Leave 18 inches of clearance between beds and the fence for easy access. For seating, a 4x6-foot bench or small table tucked into a corner creates a quiet spot without overwhelming the space.
✂️ Step 4: Install Fencing with Precision and Safety in Mind
Start by digging post holes 12 inches deep and 8 inches wide—this ensures stability, especially in clay soil. Set posts in concrete mix (not just dirt) and let them cure for 24 hours before attaching panels. Use a level to keep everything straight—crooked fences scream amateur hour. For gates, add hinges and a latch at 6 feet high for easy access but childproof security.
If you’re adding trellises or arbors, attach them to the fence before installing panels. This prevents drilling into finished wood later. For a polished look, paint or stain the fence after installation—this way, you won’t get drips on your plants. I always wait 48 hours after staining before planting nearby to avoid chemical runoff.
🌱 Step 5: Layer Plants for Year-Round Privacy and Beauty
Start with tall evergreens like emerald green arborvitae (12-15 feet tall) at the back of the fence line. These provide instant privacy and structure. Fill gaps with medium-height shrubs like dwarf lilacs or hydrangeas (3-5 feet tall), and tuck low-growing perennials like ajuga or creeping thyme along the base. This 3-tiered approach ensures coverage all year.
Add climbing plants like clematis or jasmine to trellises for vertical interest. These bloom in summer and die back in winter, revealing the fence’s texture. For winter color, include holly bushes or ornamental grasses—they stay green and add movement even in cold months. Water deeply once a week during the first growing season to help roots establish before the fence casts shade.
Tips & tricks for perfect fenced garden privacy
These proven strategies will help you craft a functional, beautiful retreat that stands the test of time—and looks effortlessly polished.
Layout Precision: In Step 1, when sketching your 10x12-foot plot, use graph paper to scale your design accurately. Mark every element to scale—this prevents costly mistakes during installation. I've found that adding a 1-foot buffer around raised beds helps with weeding and maintenance later. The 2 extra feet for pathways isn't just about aesthetics; it creates a natural flow that makes your garden feel intentional rather than cramped.
Material Selection: For Step 2, if you choose wood, treat it with a waterproof sealant before installation—this prevents warping from moisture. Vinyl fences may cost more upfront but eliminate annual staining. For that 3-foot lattice panel on the top half, consider using cedar slats instead of traditional lattice—they resist rot better and add a rustic charm. Remember, the 6-foot height is ideal for privacy while still allowing light through.
Plant Placement Strategy: In Step 5, when layering plants, place your tall evergreens first—they form the backbone of your privacy screen. I like to stagger the planting of dwarf lilacs and hydrangeas so they bloom at different times, creating continuous color. For the 12-inch spacing from the fence, use a spade to mark planting spots before digging—this keeps everything neat and prevents overcrowding as plants mature.
Installation Insight: During Step 4, when setting those 6x6 cedar posts, use a post level and check at three points—top, middle, and bottom. The 24-hour curing time for concrete is non-negotiable; rushing this step leads to sagging fences. For gates, install self-closing hinges at the 6-foot height—they're a small investment that prevents drafts and adds security. And that 48-hour wait before planting near stained areas? It's worth it to avoid stunted growth from chemical runoff.
Pro Tips for Fenced Garden Plans
- These proven strategies will help you craft a functional, beautiful retreat that stands the test of time—and looks effortlessly polished.
- Layout Precision: In Step 1, when sketching your 10x12-foot plot, use graph paper to scale your design accurately.
- Material Selection: For Step 2, if you choose wood, treat it with a waterproof sealant before installation—this prevents warping from moisture.
Frequently asked questions
Got questions about fenced garden plans?
You’re not alone—planning a secure, private garden involves a few key considerations. Here are answers to the most common queries to help you design with confidence!
What’s the best fencing material for privacy and durability?
For long-lasting privacy, wood (cedar or redwood) or vinyl are top choices—they’re sturdy and resist rot. If you prefer low-maintenance, metal (wrought iron or aluminum) or bamboo screens add style while blocking views. Pro tip: Check local regulations—some areas restrict tall fences or materials.
How long does it take to install a fenced garden?
Installation time varies by size, material, and DIY skill level. A small 5x10 ft garden with simple wood fencing might take 1–2 weekends, while a larger, custom design (e.g., 20x30 ft) could require 2–4 weeks with professional help. Break it into phases if needed—start with one side and add gates later!
Can I use plants instead of a fence for privacy?
Fast-growing shrubs like arborvitae, bamboo, or evergreen hedges (e.g., privet) create natural privacy in 2–5 years. For quicker results, combine plants with a partial fence or trellis. Warning: Some plants (like bamboo) spread aggressively—research varieties before planting!
What tools do I need for a DIY fence project?
Essential tools include:
- Measuring tape and level (for precision)
- Post-hole digger or auger (for concrete footings)
- Circular saw or miter saw (for cutting materials)
- Drill/driver (for screws or nails)
- Staple gun (if using wire mesh or fabric)
How do I fix a fence that’s leaning or sagging?
Start by checking the post anchors—if they’re loose, dig deeper and add more concrete. For sagging panels, tighten screws/nails or replace damaged boards. If the fence is crooked, adjust the posts with a post leveler or brace them temporarily until you reinforce the base. Prevent future issues by installing gravel bases for drainage.
Wrapping up and next steps
Creating a fenced garden that balances privacy, security, and beauty is totally within reach—no green thumb required! Whether you’re enclosing a cozy backyard retreat or a sprawling vegetable patch, the right layout and materials make all the difference.
With thoughtful planning, you’ll enjoy a space that feels like your own sanctuary, year-round. 🌿
Ready to get started? Sketch your dream layout today, gather your supplies, and watch your vision take shape—one post and panel at a time. Happy building!