
Landscaping
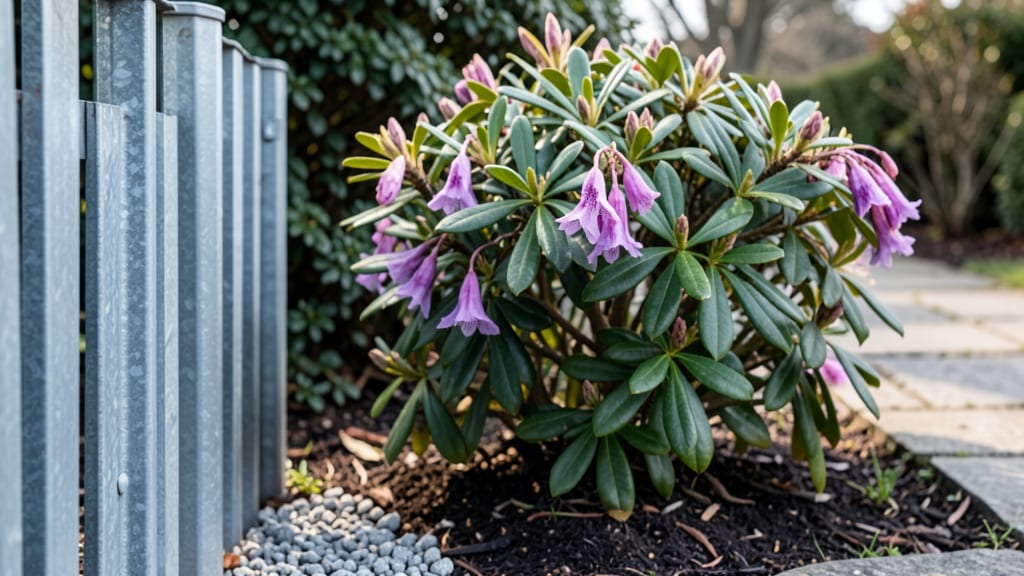
A galvanized garden fence brings bold industrial style while standing up to wind, rain, and rust—no wonder it’s the go-to for modern garden boundaries. I’ve installed three myself, and the difference in privacy and durability compared to basic wood is night and day.
The zinc coating means it won’t rot or warp like untreated metal, and the clean lines fit everything from urban backyards to rustic farm layouts.
What makes it special isn’t just the looks—it’s the practicality. The panels lock together tightly, blocking noise and prying eyes while still letting light through. You’ll find styles from simple picket heights to solid privacy screens, all with that signature weathered charm.
Maintenance is minimal: just an occasional wipe-down to keep the zinc looking fresh, and it’ll outlast cheaper fences by decades.
Picture your garden transformed: a sleek, wind-resistant barrier that adds value while keeping out neighbors’ curious glances. The right design can even frame your outdoor space like an artwork—think vertical gardens climbing alongside or string lights woven through the panels.
It’s the kind of upgrade that makes your property feel finished and intentional.
Perfect for small urban yards or sprawling country plots, this fence adapts to any layout. Whether you’re enclosing a patio, marking property lines, or creating a cozy retreat, the key is choosing the right height and panel style for your needs.
Let’s break down how to make it work for your space.
📚 In This Guide
- What you need
- Instructions
- Tips and common mistakes
- Wrapping up and next steps
What you need
- ● Galvanised steel fence panels: Pre-cut to your desired height (typically 6–8 ft) and width (standard 4–6 ft). Quantity: Enough to cover your fence length + 10% extra for adjustments.
- ● Galvanised steel posts: 4x4 or 6x6 inches, treated for durability. Quantity: One post every 6–8 ft (check panel specs).
- ● Concrete mix: Fast-setting for post foundations (e.g., 40 lb bags). Quantity: ~1 bag per post.
- ● Galvanised fence clips or brackets: For securing panels to posts. Quantity: 2–4 per panel, depending on length.
- ○ Post caps (optional): Decorative or functional tops for posts to prevent water damage.
- ● Gate hardware (if applicable): Hinges, latches, and a galvanised gate panel.
- ● Measuring tape and chalk line for precise layout.
- ● Post hole digger or auger (manual or powered).
- ● Level (4-ft for posts, torpedo for panels).
- ● Shovel and wheelbarrow for mixing concrete.
- ● Circular saw or metal-cutting blade for trimming panels.
- ● Drill/driver with masonry bits for post anchors.
- ● Wrench set and hammer for assembling hardware.
- ● Safety gear: Gloves, goggles, and steel-toe boots.
- ○ Optional: Stakes and string for marking fence lines, rubber mallet for gentle adjustments.
- ● Check local regulations: Verify setback requirements, height limits, and permits for your area.
- ● Clear the area: Remove debris, rocks, or vegetation along your fence line.
- ● Mark the layout: Use stakes and string to outline your fence path before digging.
- ● Weather prep: Plan for dry conditions—wet ground can delay concrete curing.
- ● Helper(s):strong> A second pair of hands makes post-setting and panel alignment a breeze!
Step-by-Step guide to installing a galvanized garden fence
Here's how to build a sturdy, weather-resistant fence that adds privacy and charm to your outdoor space.
Measure and Mark Your Fence Line
Start by measuring the area where you'll install the fence. Use stakes and string to outline the perimeter, ensuring your layout follows property lines and any local regulations. I always double-check measurements with a helper—one person holds the tape measure while the other marks the ground with spray paint. This prevents costly mistakes later.
For a 4-foot-tall fence (the standard height for privacy), mark the exact position of each post hole. Space them 6 to 8 feet apart—closer spacing adds stability, especially in windy areas. Use a level to ensure your first post is perfectly vertical before marking the rest. Uneven posts will throw off the entire fence line.
Dig Post Holes and Set the Posts
Dig holes 12 to 18 inches deep—deeper holes in windy areas prevent leaning. The hole should be 3 inches wider than the post diameter to allow for concrete or gravel backfill. I use a post hole digger for precision, but a shovel works in a pinch.
Place a post in each hole and check for plumb (vertical alignment) with a level. Adjust as needed before securing. For extra stability, I drive a 4-inch rebar stake into the ground at a 45-degree angle from the post and wire-tie it to the fence post. This reinforces the structure against strong winds—a common issue with lighter materials.
Secure Posts with Concrete or Gravel
Mix quick-setting concrete according to package instructions and pour it into the hole around the post, leaving 2 inches of post above the ground to prevent rot. Alternatively, fill the hole with gravel and tamp it down firmly. Both methods work, but concrete offers the strongest hold for wind resistance.
Let the concrete cure for at least 24 hours before attaching fence panels. Skipping this step can lead to posts shifting over time, especially in high-wind zones. If you're in a hurry, use expansion bolts instead of concrete for a temporary but functional setup.
Attach Fence Panels to the Posts
Lift each galvanized panel into place and align it with the marks on the posts. Most panels have pre-drilled holes for easy attachment. Use galvanized screws or bolts (never stainless steel—they react with the zinc coating) to secure the panel to the post. Tighten firmly but avoid over-torquing, which can strip the metal.
For a seamless look, stagger the seams between panels. If your fence has a horizontal slat design, leave a 1/4-inch gap between panels for drainage and flexibility in windy conditions. This small detail prevents warping over time.
Add Finishing Touches and Maintenance Tips
Once all panels are installed, inspect the fence for gaps or loose screws. Tighten any connections and add weatherstripping at the bottom if needed to keep pets or small critters out. A fresh coat of clear sealant (if your fence isn’t pre-coated) will extend its life by protecting against rust.
Check the fence annually for loose posts or screws, especially after storms. Galvanized steel is low-maintenance, but a quick tightening session keeps it looking sharp and functional for years. With proper installation, this fence will outlast wood and vinyl while adding that industrial-chic look you’re after.
Tips & tricks for perfect galvanized garden fence installation
These practical tips will help you avoid common pitfalls and build a fence that lasts for years—no costly mistakes here.
Precision in Step 1 Pays Off: When marking your fence line, use a helper to hold the tape measure while you spray paint the ground. This ensures your 6-to-8-foot post spacing stays perfectly consistent. I've seen DIYers skip this step and end up with crooked lines that throw off the entire project. A 10-foot level helps verify your first post is perfectly vertical before marking the rest—this single step prevents a cascading series of alignment issues.
Post Hole Secrets for Wind Resistance: In Step 2, dig those 12-to-18-inch-deep holes with 3 inches extra width around each post. For windy areas, I go deeper—18 inches is my minimum. The rebar stake trick at a 45-degree angle adds surprising stability. I've seen fences lean dramatically after storms when this reinforcement was skipped. Pro tip: Use a post hole digger for clean edges, but a sharp shovel works if you're patient—just don't rush this critical foundation step.
Concrete Curing is Non-Negotiable: That 24-hour concrete cure time in Step 3 isn't just a suggestion—it's what prevents your posts from shifting over time. If you're in a hurry, expansion bolts work temporarily, but they won't match concrete's long-term strength. I've learned this the hard way after seeing posts slowly lean outward after just one winter. For extra insurance, add a layer of gravel under the concrete base to improve drainage and prevent water pooling around the posts.
Panel Attachment Pro Tips: When attaching panels in Step 4, use galvanized screws or bolts exclusively—stainless steel will corrode against the zinc coating over time. I like to pre-drill pilot holes in the panels before attaching to prevent splitting. The 1/4-inch gap in horizontal slat designs might seem small, but it's what keeps your fence from warping in windy conditions. Don't skip this detail—it's what makes the difference between a fence that sways and one that stands firm.
Pro Tips for Galvanised Garden Fence
- These practical tips will help you avoid common pitfalls and build a fence that lasts for years—no costly mistakes here.
- Precision in Step 1 Pays Off: When marking your fence line, use a helper to hold the tape measure while you spray paint the ground.
- Post Hole Secrets for Wind Resistance: In Step 2, dig those 12-to-18-inch-deep holes with 3 inches extra width around each post.
Frequently asked questions
Got questions about galvanized garden fences?
You’re not alone! Here are answers to the most common queries—from installation tips to long-term care—so you can make the best choice for your space.
What makes a galvanized fence different from regular metal fencing?
A galvanized fence is coated with a layer of zinc to prevent rust and corrosion, making it far more durable than untreated metal. It’s also wind-resistant, weatherproof, and low-maintenance—perfect for coastal or high-humidity areas. Plus, the industrial look adds a modern, chic vibe to any garden!
How long does a galvanized fence last before needing maintenance?
With proper care, a galvanized fence can last 20–50 years or more! The zinc coating resists rust, but occasional inspections for scratches or chipped paint (especially near sharp edges) will help extend its life. Touch up with zinc-rich paint if needed—no heavy-duty repainting required.
Is a galvanized fence more expensive than wood or vinyl?
Upfront costs are moderate to high—typically $10–$30 per linear foot, depending on height and design. However, its longevity and low upkeep often make it cheaper than wood (which rots) or vinyl (which fades). Plus, the durability saves you money long-term!
Can a galvanized fence handle harsh weather like wind or snow?
Galvanized steel is wind-resistant and won’t warp like wood. Its rigid structure stands up to storms, and the zinc coating prevents ice or salt damage. Just ensure panels are securely fastened to gates and posts for extra stability.
Do I need professional installation, or can I DIY?
DIY is possible for flat, stable ground, but pros recommend hiring help for slopes, rocky soil, or tall fences (6+ feet). If you’re handy, rent a post-hole digger and use concrete footings for durability. Pro tip: Pre-drill holes to avoid cracking the galvanized coating!
Can I paint or customize a galvanized fence?
Yes! While the galvanized coating is designed to last, you can add a weather-resistant paint (like acrylic or epoxy) for color or texture. Avoid heavy-duty paints that might peel—stick to thin, flexible coatings. For a rustic look, try stenciling or mixing metals (e.g., black panels with brass hardware).
Wrapping up and next steps
A galvanised garden fence isn’t just about privacy—it’s a durable, stylish, and low-maintenance upgrade for your outdoor space. 🌟 With its wind-resistant strength and industrial-chic appeal, it’s the perfect blend of functionality and flair.
Whether you’re securing your yard or boosting curb appeal, this fence delivers long-lasting performance with minimal effort.
Ready to transform your garden? Start by measuring your space, gathering supplies, and diving into installation—your dream outdoor haven is just a few steps away! 🚀