Landscaping
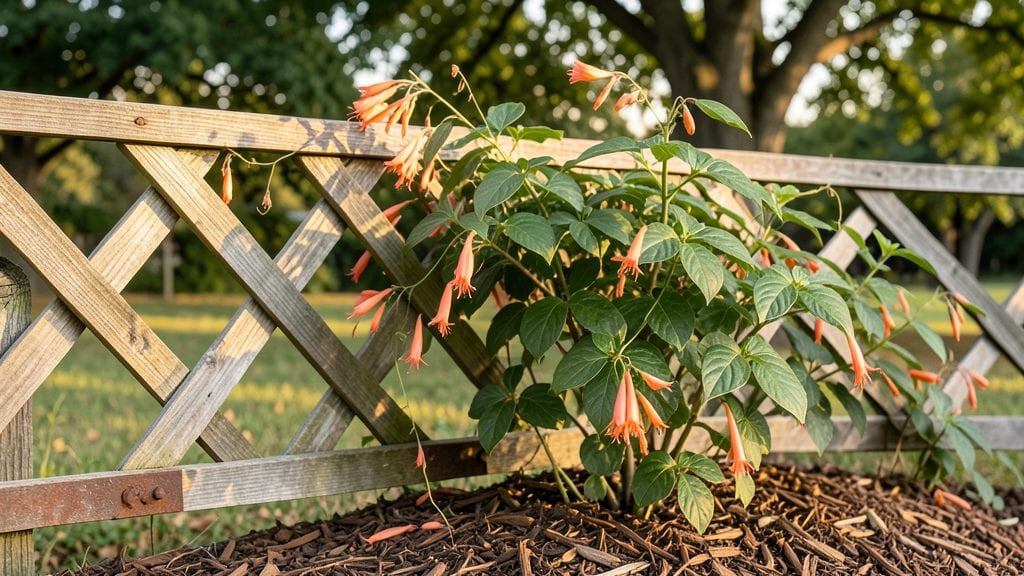
A garden against fence doesn’t mean sacrificing space—it means turning a narrow strip into a lush, private retreat. 🌿 I transformed my own 2-foot-wide yard into a thriving vertical oasis that blocks nosy neighbors while adding beauty year-round.
The key? Smart plant choices, structural support, and a layout that plays to the fence’s strengths.
You’ll need lightweight materials like trellises or wire mesh to support climbing plants, plus a mix of evergreens for privacy and seasonal bloomers for color. My setup uses a simple wooden frame covered in ivy and holly, with annuals tucked into pockets along the base.
It costs less than $100 and takes just a weekend to assemble—no digging required.
By summer, you’ll have a wall of fragrant roses and lush foliage that feels like a secret garden. In winter, the evergreens stay dense, and the structure itself becomes a textured backdrop for snow. The best part? You’ll reclaim privacy without losing sunlight or growing space.
Works for any fence height or yard width—even urban balconies. Here’s how to make it happen without the usual headaches of root intrusion or overcrowding.
📚 In This Guide
- What you need
- Instructions
- Tips and common mistakes
- Wrapping up and next steps
What you need
- ● Soil & Amendments: Topsoil (1–2 cubic yards, depending on fence length and depth)
- ● Compost or organic matter (1–2 bags, for nutrient-rich soil)
- ○ Optional: Perlite or vermiculite (1 bag, for drainage)
- ● Plants: Privacy plants (e.g., bamboo, boxwood, or evergreen shrubs—check local climate suitability)
- ● Herbs or small veggies (e.g., basil, thyme, or lettuce—if growing edibles)
- ● Flowering plants (e.g., impatiens or ferns, for color and texture)
- ● Mulch: Shredded bark or wood chips (2–3 bags, to retain moisture)
- ● Garden shovel or spade (for digging)
- ● Garden trowel (for planting smaller items)
- ● Wheelbarrow (to haul soil and mulch)
- ● Measuring tape (to plan spacing)
- ● Gloves (to protect your hands!)
- ○ Optional: String line (for marking straight rows) or knee pads (for comfort)
- ● Check local regulations—some areas restrict fence-adjacent planting heights.
- ● Test your soil (pH levels) to pick the right plants.
- ● Plan for sunlight/shade exposure in your space.
How to create a lush garden against a fence
Here's how to transform that narrow strip into a thriving, private green space that looks intentional—not cramped.
🌱 Step 1: Prepare the Space Against the Fence
Start by clearing any weeds or debris from the area along the fence. Use a garden rake to loosen the soil to a depth of 6 inches, breaking up any compacted layers. This ensures roots can penetrate easily, especially for plants that will grow vertically. I like to mark the planting area with a 2-foot wide strip (measured from the fence), giving you room for taller plants in the back and shorter ones in front.
If your fence is made of wood or chain link, check for gaps where roots might escape. For wooden fences, apply a 1-inch layer of landscape fabric along the fence line before planting. This keeps roots contained and prevents them from lifting the fence over time. For chain link, no fabric is needed—just focus on soil prep.
🪴 Step 2: Layer Plants for Height and Seasonal Interest
Begin with the tallest plants closest to the fence to create an instant privacy screen. Use evergreen shrubs like boxwood or holly (they stay green year-round) or ornamental grasses like maiden grass for movement and texture. These should be spaced 12-18 inches apart to allow room for growth without overcrowding.
In the middle layer, add medium-height perennials like lavender, salvia, or Russian sage for color and fragrance. These thrive in narrow spaces and provide blooms from early summer through fall. Finally, fill the front edge with low-growing ground covers like creeping thyme or ajuga to suppress weeds and add a lush, carpet-like finish.
☀️ Step 3: Water and Mulch for Long-Term Success
After planting, water deeply to settle the soil around roots. Use a soaker hose or drip irrigation to deliver moisture slowly and evenly—this prevents runoff and ensures roots get hydrated without washing away. Water until the soil is 6 inches deep and moist, but not soggy. You’ll know it’s right when water drains through but doesn’t pool on the surface.
Spread a 2-inch layer of mulch (like shredded bark or pine needles) over the soil, keeping it 2 inches away from plant stems to avoid rot. Mulch conserves moisture, regulates soil temperature, and keeps weeds at bay. Replenish it annually or as it breaks down—this is the secret to a low-maintenance garden.
✂️ Step 4: Prune and Maintain for Year-Round Appeal
Check your plants every 4-6 weeks for signs of overgrowth or legginess. Trim back any branches that grow too close to the fence or block sunlight from reaching lower plants. Use clean, sharp pruners to make cuts just above a leaf node or bud—this encourages bushier growth. For evergreens, a light pruning in early spring keeps them dense and tidy.
Fertilize lightly in early spring with a balanced, slow-release fertilizer (like 10-10-10) to support new growth. Avoid over-fertilizing—too much can lead to weak stems or excessive foliage that blocks sunlight. Instead, focus on regular pruning and mulching to keep your garden healthy and vibrant.
⏰ Step 5: Plan for Seasonal Changes
Adjust your garden’s appearance by swapping out seasonal plants. In spring, add bulbs like daffodils or tulips for early color. In fall, incorporate mums or ornamental kale for late-season interest. These temporary plants fill gaps and keep your garden dynamic without requiring permanent changes.
Watch for pests like aphids or spider mites, which love crowded spaces. Spray plants with neem oil (a natural pesticide) if you spot them, or introduce beneficial insects like ladybugs to keep populations in check. A healthy garden against a fence should feel lush, not like a battleground.
Tips & tricks for perfect garden privacy against a fence
Here's what I've learned from years of transforming narrow spaces into lush, private gardens that actually look intentional.
Soil Prep Secret: In Step 1, don't just loosen the top layer—dig down to that full 6 inches even if it feels like overkill. Compacted soil is the #1 reason plants struggle in narrow spaces. I like to mix in a handful of compost at this stage too—it gives roots a nutrient boost right from the start. For clay-heavy soil, add some coarse sand to improve drainage.
Plant Spacing Game-Changer: When placing your evergreens in Step 2, give them a little more room than the 12-18 inch guideline if your space is particularly tight. Crowded plants compete for sunlight and nutrients, which leads to leggy, weak growth. I often space mine 18-24 inches apart—the extra room pays off in fuller plants over time.
Watering Wisdom: That 6 inches deep and moist watering in Step 3 is crucial, but here's the trick: water in the morning so foliage has time to dry before evening. Wet leaves overnight invite fungal problems, especially in crowded spaces. I use a simple test—stick your finger in the soil after watering. If it's damp but not soggy, you're golden.
Mulch Maintenance: The 2-inch layer of mulch in Step 3 works wonders, but don't let it pile up against plant stems. Keep that 2-inch clearance to prevent rot. I also recommend checking mulch thickness every few months—it breaks down faster than you'd think, especially in hot sun. A quick top-up keeps weeds at bay without smothering your plants.
Pro Tips for Garden Against Fence
- Here's what I've learned from years of transforming narrow spaces into lush, private gardens that actually look intentional.
- Soil Prep Secret: In Step 1, don't just loosen the top layer—dig down to that full 6 inches even if it feels like overkill.
- Plant Spacing Game-Changer: When placing your evergreens in Step 2, give them a little more room than the 12-18 inch guideline if your space is particularly tight.
Frequently asked questions
Got questions about creating a lush, private garden against a fence?
You’re not alone! Here are answers to the most common concerns—from planning to maintenance—so you can get started with confidence.
What’s the best type of fence for a garden against it?
A sturdy, weather-resistant fence (like cedar, vinyl, or metal) works best for structural support and privacy. Avoid chain-link or flimsy wood—these won’t hold up to climbing plants or heavy trellises. If your fence is already in place, focus on vertical gardening (e.g., trellises, espalier trees) to maximize space.
When is the ideal time to plant against a fence?
Spring or early fall is perfect for most plants. Cool soil temps reduce stress on roots, and you’ll avoid summer heatwaves or winter freezes. Evergreens (like boxwood or ivy) can be planted year-round in mild climates, but wait until dormancy for deciduous plants to minimize shock.
Can I use this design with a small or narrow space?
Opt for tiered planters, vertical gardens, or espalier fruit trees to save space. Dwarf varieties of shrubs (e.g., ‘Blue Rug’ juniper) and climbing vines (like clematis) thrive in tight areas. Even a 2-foot-wide strip can create a lush, private oasis with the right choices.
How do I keep pests away from plants against a fence?
Prevent pests with these tips:
- Improve airflow: Avoid overcrowding plants—pests love damp, shaded spots.
- Use natural deterrents: Plant pest-repellent herbs (basil, mint) near vulnerable plants.
- Inspect regularly: Check for chewed leaves or webs early to catch infestations.
- Choose resilient plants: Succulents, lavender, and rosemary are tough against pests.
What if my fence is leaning or unstable?
Before planting, reinforce the fence with metal brackets or concrete footings if it’s wobbly. Heavy vines (like wisteria) or large shrubs can stress weak structures. If repairs aren’t possible, stick to lightweight plants (e.g., ornamental grasses, small ferns) or hang planters from above to avoid extra weight.
Pro Tip: Start small!
Test a 3-foot section with a mix of evergreens and seasonal blooms before committing to the whole fence. This lets you adjust spacing, sunlight needs, and watering routines without overhauling your whole garden.
Wrapping up and next steps
A garden against a fence isn’t just about saving space—it’s about transforming a narrow strip into a thriving, private oasis that brings joy year-round. 🌿 Whether you’re planting tall evergreens for privacy, vibrant annuals for color, or a mix of both, the key is to start small, plan thoughtfully, and enjoy the process.
Your fence-side garden can become a serene retreat, a wildlife haven, or even a productive space for herbs and veggies!
Ready to turn that overlooked strip into something special? Pick one plant or section to begin this weekend—your future self (and your neighbors!) will thank you. Happy gardening!