Tools
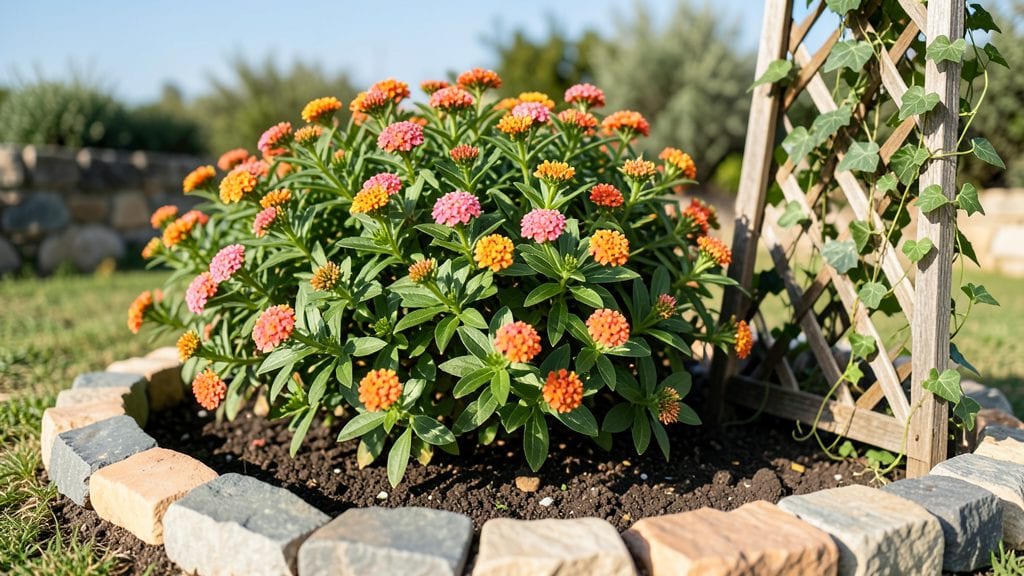
My garden bed decor took a stunning leap when I swapped plain planters for rustic wooden beds with built-in privacy screens—suddenly, my yard felt like a cozy retreat. 🌿 into a serene retreat. My first project used reclaimed cedar planks—durable, rot-resistant, and perfect for that rustic charm without heavy maintenance.
You don’t need fancy materials or complex designs to pull this off. A few basic tools, some weather-resistant wood, and a little creativity are all it takes.
The screens can be as simple as vertical slats or lattice panels, while the planters become the perfect spot for herbs, flowers, or even small shrubs. The best part? You control the height and style to match your space—whether that’s a low border or a tall, room-dividing screen.
By the time you’re done, you’ll have a garden that feels like a private escape, with layers of greenery and wood that soften sightlines while adding texture. The wood ages beautifully over time, developing that perfect silver-gray patina that only adds character.
Plus, the built-in planters mean no more struggling with pots—just easy access to your favorite plants.
This works for any yard style, from cottage gardens to modern minimalist spaces. The key is balancing the wood’s natural tones with your plant choices—think soft greens, purples, or even white flowers to keep it fresh and inviting. Ready to create your own rustic garden oasis?
📚 In This Guide
- What you need
- Instructions
- Tips and common mistakes
- Wrapping up and next steps
What you need
- ● Pressure-treated lumber: 2x4s (20–30 pieces, depending on size) and 1x6s (10–15 pieces) for framing and slats.
- ● Galvanized screws or decking nails: 2.5-inch (60–100 pieces) for assembly.
- ● Wood glue: Exterior-grade (1–2 tubes) for extra reinforcement.
- ● Landscape fabric: 1 roll (to prevent weeds and retain moisture).
- ● Potting soil: 2–4 cubic feet (depending on planter size).
- ○ Outdoor paint or stain: (Optional but recommended for longevity).
- ● Wood preservative: (1 quart) to seal untreated wood.
- ● Circular saw or miter saw (for precise cuts).
- ● Drill/driver (with Phillips and drill bits).
- ● Measuring tape and pencil.
- ● Speed square (for accurate angles).
- ● Clamps (2–4) to hold pieces in place.
- ● Sandpaper (80–120 grit) for smoothing edges.
- ● Paintbrush or roller (if staining/painting).
- ● Level (to ensure even assembly).
- ● Decorative lattice or trellis: For added texture and climbing plants.
- ● Solar-powered string lights: To enhance ambiance.
- ● Weather-resistant hardware: Stainless steel screws or brackets.
- ● Mulch: For a polished, finished look.
Step-by-Step instructions for crafting rustic wooden planters with privacy screens
Transform your garden into a cozy retreat with these charming, functional planters that double as living room dividers.
🪴 Step 1: Select and Prepare Your Wooden Materials
Choose weather-resistant wood like cedar or redwood—these won’t warp or rot quickly, even when exposed to the elements. Cut your boards to the desired dimensions: I like 12-inch wide panels for the planter base and 6-inch tall slats for the privacy screen. Sand all edges and surfaces until smooth to the touch—this prevents splinters and makes assembly easier.
Here’s the thing—skipping the sanding step leads to rough edges that hurt when handling. Use 80-grit sandpaper first to remove any rough spots, then switch to 120-grit for a silky finish. Wipe away all dust with a damp cloth before assembly.
☀️ Step 2: Assemble the Planter Base and Privacy Screen Frame
Lay out your base panels and privacy screen slats in the pattern you’ve chosen. For a classic look, I arrange the privacy screen slats vertically, spaced about 2 inches apart. Use galvanized screws to attach the slats to the base panels—these won’t rust over time, even in damp conditions. Pre-drill holes to prevent the wood from splitting when you tighten the screws.
Double-check your alignment before securing everything. A slight misalignment now will look sloppy later. Once the frame is together, seal all exposed wood with an outdoor-grade stain or paint. I recommend a semi-transparent stain—it lets the wood’s natural grain show while protecting it from moisture and UV rays.
✂️ Step 3: Add Drainage and Planting Layers
Line the bottom of each planter with landscape fabric to prevent soil from washing out through the gaps in the wood. Cut the fabric to fit snugly, leaving a little extra to fold over the edges. Next, add a 2-inch layer of gravel at the bottom—this ensures proper drainage and keeps roots healthy. Fill the remaining space with a high-quality potting mix, leaving about 1 inch from the top for watering.
Don’t skimp on the drainage layer. Roots left sitting in soggy soil will rot, and your plants will wilt even if you water regularly. Pack the gravel and soil lightly—just enough to hold the plants in place without compacting it too tightly.
🌿 Step 4: Plant and Style Your Privacy Planters
Choose plants that thrive in your climate and complement your garden’s aesthetic. For a lush, private look, I plant a mix of tall grasses, ornamental shrubs, and flowering perennials. Water the soil thoroughly before planting to help roots establish quickly. Space plants according to their mature size—crowding them now will lead to competition for nutrients later.
Here’s where it gets fun—arrange your planters in a way that creates a natural barrier while still allowing light and air to flow. Place them along a fence line, near a patio, or even in a row down the center of a garden bed. Add mulch around the base to keep weeds at bay and retain moisture.
💧 Step 5: Maintain and Enjoy Your Rustic Garden Oasis
Water your planters deeply 2-3 times per week, depending on your climate. Check the soil moisture by sticking your finger about 1 inch deep—if it feels dry, it’s time to water. Avoid wetting the leaves to prevent fungal diseases. Feed your plants with a balanced, slow-release fertilizer every 6-8 weeks to keep them thriving.
Every few months, trim back overgrown foliage to maintain the privacy screen’s shape and encourage new growth. If any wood starts to show signs of wear, touch up the stain or sealant to keep it looking fresh. With a little care, your rustic wooden planters will provide years of beauty and privacy!
Tips & tricks for perfect rustic wooden planters
These game-changing tips will help you create stunning, durable planters that stand the test of time—and weather!
Wood Selection Wisdom: While cedar and redwood are my top picks for their natural resistance, don't overlook pressure-treated pine if you're on a budget. Just be sure to seal it thoroughly with an outdoor-grade stain to prevent moisture damage. For a more rustic look, consider using reclaimed wood—just inspect each piece carefully for splinters or rot before assembly.
Alignment is Everything: In Step 2, when arranging your privacy screen slats, use a straightedge or level to ensure perfect vertical alignment. I like to clamp my panels together temporarily before marking screw holes—this prevents misalignment that's nearly impossible to fix later. A slight crookedness now will look sloppy after planting, so take this step seriously!
Drainage Layer Hack: For the 2-inch gravel layer in Step 3, I recommend using small, smooth river rocks instead of construction gravel. The smooth edges prevent soil from washing out through the gaps in your wood, and they look much more attractive peeking through the planter. Plus, they're easier to work with when packing the layer evenly.
Plant Placement Pro Tip: When arranging your plants in Step 4, place taller varieties toward the back of each planter and shorter ones toward the front. This creates a natural tiered effect that enhances your privacy screen's visual impact. For a cohesive look, stick to a color palette of 3-4 complementary shades when selecting your plants and flowers.
Pro Tips for Garden Bed Decor
- These game-changing tips will help you create stunning, durable planters that stand the test of time—and weather!
- Wood Selection Wisdom: While cedar and redwood are my top picks for their natural resistance, don't overlook pressure-treated pine if you're on a budget.
- Alignment is Everything: In Step 2, when arranging your privacy screen slats, use a straightedge or level to ensure perfect vertical alignment.
Frequently asked questions
Got questions about rustic wooden planters with built-in privacy screens?
Here are answers to the most common ones to help you create the perfect garden bed decor!
What’s the best wood type for outdoor garden bed decor that lasts?
For durability, opt for cedar, redwood, or pressure-treated pine. Cedar resists rot and insects naturally, while redwood offers a rich color. Avoid untreated softwoods like pine—they’ll warp or decay faster. If budget is tight, pressure-treated lumber (stabilized with chemicals) is a practical alternative.
How long do these wooden planters typically last before needing replacement?
With proper care, cedar or redwood planters last 10–15 years, while pressure-treated wood may last 7–10 years. To extend their life, seal them annually with outdoor wood stain or linseed oil. Check for cracks or splinters yearly—repair or replace sections as needed to prevent rot.
Can I build a privacy screen into an existing planter, or do I need to plan it from scratch?
You can retrofit a screen into an existing planter, but it’s easier if you design it during construction. For DIYers, attach lattice panels, bamboo slats, or woven willow screens to the sides using galvanized screws. If modifying later, reinforce the wood first to handle extra weight (like vines or trellises).
What plants work best in rustic wooden planters with privacy screens?
Choose trailing plants like ivy, clematis, or sweet potato vine for natural privacy. For height, add sunflowers, tall grasses, or hollyhocks. If you prefer low-maintenance options, boxwood, lavender, or ornamental grasses thrive in wood planters. Avoid heavy rooters (e.g., willows) that can crack the wood over time.
Are there budget-friendly alternatives to solid wood for privacy planters?
Yes! Try these cost-effective options:
- Recycled pallet wood: Sand and seal for a rustic look.
- Composite lumber: Won’t rot but costs more upfront.
- Cinder blocks or bricks: Stack with plants like pothos or boston ferns for a screen effect.
- Metal troughs: Paint them to match wood and fill with drought-resistant plants.
How do I prevent pests (like termites or beetles) from damaging my wooden planter?
Start with cedar or treated wood—naturally resistant to pests. Elevate planters off the ground with bricks or gravel to deter burrowing insects. Apply borax-based wood preservatives or neem oil spray annually. Avoid planting near wood-boring beetle favorites like willows or poplars.
Wrapping up and next steps
Transforming your garden with rustic wooden planters and built-in privacy screens is a rewarding project that blends functionality and beauty. Whether you're enhancing curb appeal, creating a cozy retreat, or simply adding charm to your outdoor space, these DIY solutions offer endless creativity.
Start small—pick one planter or screen to build—and let your green thumb shine! 🌿✨
Ready to get started? Gather your tools, sketch a design, and dive in! Your future garden oasis awaits—one rustic touch at a time.