Propagation
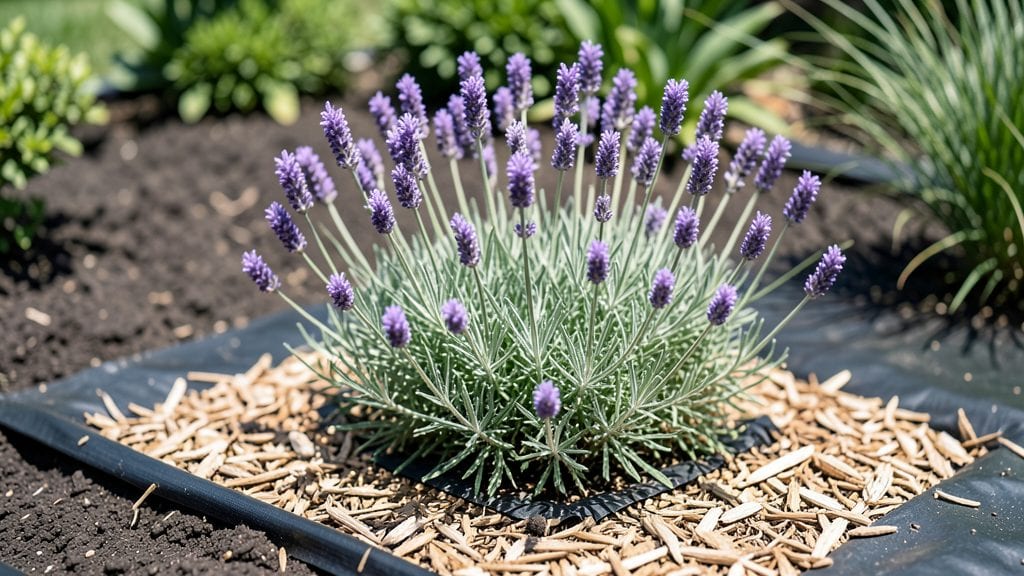
Learn how to prevent weeds from growing in your garden before they steal its spotlight.
I’ve spent years perfecting organic barriers that smother them without harsh chemicals—because nothing beats the satisfaction of a weed-free patch that thrives naturally. 🌱 The key isn’t brute force; it’s outsmarting them with layered protection that works silently while your plants grow.
Start with thick mulch—straw, wood chips, or even cardboard—to block sunlight, then add living ground covers like clover or creeping thyme that crowd out weeds before they sprout.
This combo cuts weed seeds off at the pass while improving soil over time. No more digging or spraying; just let nature do the heavy lifting.
By summer’s end, you’ll have a garden where weeds barely dare show their faces, and your vegetables and flowers flourish without competition. The best part? This method keeps working year after year, turning your garden into a low-maintenance paradise. Ready to reclaim your space?
Works for vegetable beds, flower borders, or even between patio stones—just adjust the mulch thickness based on your biggest weed troublemakers. Let’s get started with the right tools and techniques for your specific challenges.
📚 In This Guide
- What you need
- Instructions
- Tips and common mistakes
- Wrapping up and next steps
What you need
- ● Cardboard or thick paper: 2-3 sheets per 4' x 8' area (unbleached and free of glossy coatings).
- ● Newspaper or junk mail: 4-6 sheets per 4' x 8' area (avoid colored or glossy paper).
- ● Compost or well-aged manure: 2-3 inches (5-7.5 cm) per area, spread evenly.
- ● Mulch (organic options): Straw: 3-4 inches (7.5-10 cm) depth.
- ● Wood chips or bark: 2-3 inches (5-7.5 cm) depth.
- ● Leaves or grass clippings: 2-3 inches (5-7.5 cm) depth.
- ○ Shredded leaves or pine needles: Optional but great for finer coverage.
- ○ Landscape fabric (optional but helpful): Biodegradable or woven fabric (e.g., coconut coir) for areas with heavy weed pressure.
- ● Garden gloves: 1 pair (to protect your hands from debris and sharp edges).
- ● Scissors or box cutter: For trimming cardboard/paper to fit your garden beds.
- ● Garden rake or hoe: To level the soil and remove existing weeds.
- ● Shovel or spade: For digging and adjusting soil if needed.
- ● Wheelbarrow or bucket: To haul mulch and compost easily.
- ○ Watering can or hose: To dampen layers before adding mulch (optional but recommended).
- ● 🌡️ Check moisture: Water your soil lightly before laying down barriers to help them stick in place.
- ● ✨ Layer like a lasagna: Overlap cardboard/paper by at least 6 inches to block all light.
- ● 🎯 Avoid plastic: Non-biodegradable materials can harm soil health over time.
Step-by-Step organic barriers to smother weeds naturally
Here’s my go-to method for keeping weeds at bay without chemicals—using what you already have.
🪴 Step 1: Choose Your Barrier Material
Pick one of these organic options: cardboard, newspaper, or thick layers of leaves. Cardboard works best because it blocks light completely and breaks down slowly. If using newspaper, opt for black-and-white pages only—glossy ink can leach into the soil. Lay the material flat, overlapping edges by 2-3 inches to seal gaps.
I like to use cardboard from delivery boxes—it’s sturdy and free. Just remove any tape or staples first. Place it directly on the soil surface, leaving a 1-inch border around the edges of your planting area. This prevents weeds from sneaking in along the sides.
🌿 Step 2: Layer for Maximum Suppression
For best results, double up your barrier. Start with a 4-inch layer of cardboard, then top it with 2-3 inches of mulch—either straw, wood chips, or shredded leaves. Mulch keeps the barrier in place and adds nutrients as it decomposes. Press down lightly to eliminate air pockets, which weeds exploit to push through.
Real talk: If you skip the mulch layer, wind or rain will shift the cardboard, leaving gaps where weeds pop up. I’ve learned this the hard way—always secure that top layer. For extra protection, add a thin layer of compost on top of the mulch to feed your plants while keeping weeds at bay.
💧 Step 3: Keep It Moist (But Not Soggy)
Water the barrier lightly after installing it—just enough to settle the layers. Overwatering can cause the cardboard to swell and buckle, creating weak spots. Aim for moist but not drenched soil underneath. You’ll know it’s right when water runs through the mulch but doesn’t pool on top.
Check the barrier weekly for dry spots or gaps. If you see cracks, fluff the mulch or add a fresh layer. Weeds thrive in dry, disturbed soil, so consistency is key. This method works best in shady or partially sunny areas—full sun can dry out the barrier faster, requiring more frequent checks.
✂️ Step 4: Maintain and Refresh as Needed
After 4-6 weeks, your barrier will start breaking down. That’s when weeds get sneaky. Refresh it by adding another 1-2 inches of mulch or replacing any degraded sections. I like to pull back the mulch, check for weeds, and smother them with fresh cardboard before re-layering. This keeps your garden weed-free without digging.
For perennial beds, this barrier lasts 1-2 seasons. For annual veggie gardens, plan to refresh it every 3-4 months. The key is staying ahead—weeds grow fast, but so does your barrier’s effectiveness if you keep it intact.
Tips & tricks for effective organic weed barriers
Between us, the secret to weed-free gardens isn't just about what you put down—it's about how you do it. These small adjustments make all the difference between temporary suppression and long-term weed control.
Layer Like a Pro: The 4-inch cardboard base in Step 2 is non-negotiable for blocking light completely, but here's what nobody tells you—fold the edges of your cardboard downward along the planting area's perimeter. This creates a natural barrier that prevents weeds from creeping in from the sides, which is where they always find their way through. Think of it as building a moat around your garden fortress.
Mulch Selection Matters: Not all mulches work equally well. Straw breaks down fastest and needs refreshing every 2-3 months, while wood chips last longer but can compact over time. I've found that shredded leaves work best for me—they decompose slowly while still allowing water to penetrate. If using wood chips, choose untreated varieties to avoid introducing chemicals to your soil.
Compost Top Layer Hack: That thin layer of compost in Step 2 isn't just for feeding your plants—it's your early warning system. When you add compost, mix in a few handfuls of fine sand or perlite. This creates tiny air pockets that let you see when water penetrates through. If water pools on top instead of running through, you've got air gaps that weeds will exploit.
Seasonal Adjustments: In summer's intense heat, you'll need to check your barrier every 5-7 days instead of weekly. The mulch layer dries out faster, creating cracks where weeds sprout. I keep a small bag of extra mulch handy during growing season—it's the quickest way to patch any gaps before they become weed highways. For winter, you can actually use this method to protect soil from erosion while smothering weeds that try to push through.
Pro Tips for Prevent Weeds From Growing In Garden
- Between us, the secret to weed-free gardens isn't just about what you put down—it's about how you do it. These small ...
- Layer Like a Pro: The 4-inch cardboard base in Step 2 is non-negotiable for blocking light completely, but here's wha...
- Mulch Selection Matters: Not all mulches work equally well. Straw breaks down fastest and needs refreshing every 2-3 ...
Frequently asked questions
Got questions about keeping weeds at bay without harsh chemicals? You’re not alone! Here are some of the most common concerns—and straightforward answers to help you garden with confidence.
What’s the best time of year to install weed barriers?
The ideal time is early spring or fall when weeds are less aggressive. Avoid installing during peak summer heat or winter frost, as extreme conditions can damage materials like cardboard or mulch. If you’re working in late spring/summer, water the area first to reduce stress on plants and barriers.
Can I reuse old newspaper or cardboard as weed barriers?
Ink-free, unglossy newspaper or plain cardboard works great. Just avoid colored or shiny paper (it may contain chemicals). Lay sheets in overlapping layers (2–3 inches thick), soak them with water, and top with mulch or compost. Pro tip: Remove staples or tape to prevent poking through soil.
What if weeds keep growing through my barrier?
If weeds poke through, your barrier might be too thin or improperly layered. Double-check coverage—aim for at least 4–6 inches of mulch or 3+ layers of cardboard. For stubborn spots, add a pre-emergent herbicide (organic options like corn gluten meal) or hand-pull weeds before they seed. Persistent invaders? Try a landscape fabric under mulch for extra defense.
Are there any plants that naturally suppress weeds?
Yes! Ground covers like clover, creeping thyme, or mint (in contained areas) outcompete weeds by spreading densely. For veggie gardens, try living mulches like alyssum or lettuce between rows. Just ensure they’re non-invasive for your climate. Bonus: They often attract pollinators!
What’s the most budget-friendly weed prevention method?
The cheapest (and eco-friendly!) options are mulch + cardboard. Collect free cardboard from stores, layer it with grass clippings or leaves, and top with straw or wood chips ($5–$10 per bag). For larger areas, sheet mulching (aka "lasagna gardening") uses free yard waste like leaves or grass. Win-win: It enriches soil too!
Will weed barriers work under trees or shrubs?
Yes, but with adjustments! Use organic mulch (wood chips, pine straw) in a 3-inch ring around trunks to prevent rot. Avoid piling mulch against bark—leave a 6-inch gap. For heavy weed pressure, combine mulch with landscape fabric (cut slits for plant stems) or a living mulch like wintercreeper.
Wrapping up and next steps
Keeping weeds at bay doesn’t have to mean harsh chemicals or endless labor—organic barriers like cardboard, mulch, and landscape fabric are simple, eco-friendly solutions that work wonders!
By combining these natural methods with a little consistency, you’ll reclaim your garden space and enjoy a thriving, weed-free haven. Now’s the perfect time to roll up your sleeves and try one (or all!) of these techniques—your future self (and your plants) will thank you!
🌱 Next Steps:
- Pick one barrier method to test this weekend—start small and scale up!
- Check your local garden center for organic mulch or recycled materials.
- Share your progress (or weed-worthy wins!) with fellow gardeners for extra motivation.