
Tools
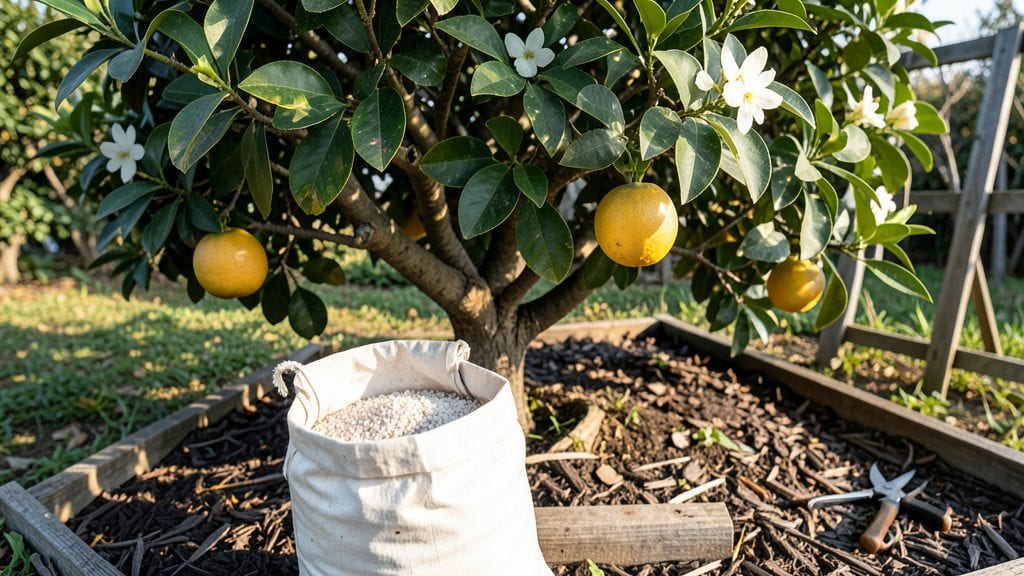
When your tomatoes develop blossom-end rot or your roses show weak stems, a garden calcium supplement can turn those problems around. 🌱 I’ve seen calcium transform struggling plants into vigorous growers, and the best part is you don’t need expensive products to do it—simple household items or natural amendments work just as well.
Calcium strengthens cell walls, prevents blossom-end rot, and helps plants absorb nutrients more efficiently. The signs of deficiency—crispy leaf edges, stunted growth, or weak stems—often appear when soil lacks this essential mineral.
My go-to methods include crushed eggshells, agricultural lime, or even gypsum, all of which release calcium slowly over time.
By adding just a handful of crushed eggshells to planting holes or mixing lime into the soil, you’ll see stronger roots, healthier blooms, and fewer common deficiencies. Plants like tomatoes, peppers, and brassicas respond especially well, but nearly any garden will benefit from this simple boost.
Whether you’re dealing with acidic soil or just want to give your plants a preventive edge, this approach is foolproof and budget-friendly. Let’s get your garden growing stronger, one calcium-rich amendment at a time.
📚 In This Guide
- What you need
- Instructions
- Tips and common mistakes
- Wrapping up and next steps
What you need
- ● Calcium source (choose one): Crushed eggshells (dried and ground) – ~1 cup per 5 sq ft of garden
- ● Gypsum (calcium sulfate) – ~2 lbs per 100 sq ft
- ● Lime (calcium carbonate) – ~1 lb per 100 sq ft (use sparingly—test soil first!)
- ● Soil test kit – To check current pH and calcium levels before applying supplements.
- ● Garden gloves – For safe handling of materials like lime or gypsum.
- ● Garden trowel or spade – For mixing supplements into soil.
- ○ Food processor or mortar & pestle – To grind eggshells into a fine powder (optional but recommended).
- ● Measuring cups/spoons – For precise application of supplements.
- ● Watering can or hose – To hydrate soil after application.
- ● Wheelbarrow or bucket – For mixing larger quantities of supplements.
- ● Know your soil’s current pH and calcium levels (test 2-3 weeks before applying).
- ● Choose plants that benefit from calcium (e.g., tomatoes, peppers, leafy greens).
- ● Work on a dry, mild day to avoid clumping or runoff.
Step-by-step instructions for creating a homemade garden calcium supplement
This simple blend strengthens cell walls and prevents blossom-end rot organically.
🪴 Step 1: Gather and Measure Your Calcium Sources
Start by combining 1 cup of crushed eggshells (the most bioavailable calcium source) with ½ cup of powdered milk (contains calcium carbonate) in a clean bowl. I like to bake the eggshells at 350°F for 10 minutes first to sterilize them—this kills any bacteria hiding in the porous material. Let them cool completely before crushing into a fine powder with a mortar and pestle or coffee grinder. The finer the particles, the faster they dissolve in soil.
Next, add 1 tablespoon of wood ash (from untreated hardwood fires only) to the mix. Wood ash raises pH slightly while adding calcium, but use sparingly—too much can make soil alkaline. I sift it through a fine mesh strainer to remove any large chunks that won’t break down quickly. Store all components in an airtight container until ready to mix.
💧 Step 2: Create the Liquid Calcium Solution
In a 1-gallon container, combine 1 cup of the crushed eggshell powder with 1 gallon of warm (not hot) water. Stir vigorously for 2 minutes until fully dissolved—you’ll see a cloudy, chalky solution. Let it sit for 12 hours to ensure maximum extraction. Meanwhile, prepare a separate 1-gallon batch of compost tea using 1 cup of finished compost steeped in warm water for 24 hours. This adds beneficial microbes that help the plant absorb calcium more efficiently.
After 12 hours, strain the eggshell solution through a fine cheesecloth or coffee filter. Discard the solids—they’ve given up their calcium. Pour the strained liquid into a clean spray bottle or watering can. The resulting solution should look clear with no visible particles. This makes enough for 4 standard-sized plants (like tomatoes or peppers) or 1 large garden bed.
☀️ Step 3: Apply to Soil and Foliar Spray
For soil application, water the base of your plants with the eggshell solution until the top 6 inches of soil are thoroughly moistened. I like to do this once every 2 weeks during the growing season, especially when plants show signs of calcium deficiency—yellowing between leaf veins or small, deformed new growth. The compost tea can be applied simultaneously to boost microbial activity in the root zone.
For foliar feeding, mix 1 part eggshell solution with 3 parts water in a spray bottle. Apply to the undersides of leaves in the early morning or late afternoon to prevent leaf burn. You’ll see results within 7-10 days—stronger stems, improved flower set, and fewer blossom-end rot issues on tomatoes. Reapply every 10-14 days during peak growth or stress periods (like extreme heat).
⏰ Step 4: Monitor and Adjust for Best Results
Watch for visual improvements like thicker cell walls (leaves feel firmer to the touch) and reduced blossom-end rot on fruiting plants. If you notice new growth still looks weak after 3 applications, your soil may need additional organic matter—work in 1 inch of compost to improve calcium availability. I also recommend testing your soil’s pH every 3 months—calcium uptake is most efficient at a pH of 6.0-7.0. If your soil runs alkaline, reduce wood ash and focus on the eggshell solution.
For long-term prevention, incorporate ½ cup of the dry eggshell powder into the soil at planting time. This creates a slow-release calcium reserve that plants can access as needed. Avoid applying calcium supplements when soil is waterlogged—excess moisture can leach it away before roots can absorb it. Always water in the solution after applying to help it penetrate the root zone effectively.
Tips & tricks for perfect garden calcium supplement
Here's what I've learned after perfecting this supplement for years—these little details make all the difference for your plants.
Sterilization Secret: The 10-minute bake at 350°F isn't just about sterilization—it's about creating a finer powder. After baking, let the eggshells cool completely before grinding. I use a coffee grinder set to pulse mode to avoid overheating the powder, which can reduce calcium availability. The finer the powder, the faster it dissolves in water and soil, giving your plants calcium when they need it most.
Wood Ash Precision: When measuring the 1 tablespoon of wood ash, use a level teaspoon and sift it through a fine mesh strainer to remove any large particles. Too much ash can raise your soil's pH beyond the ideal 6.0-7.0 range, locking out calcium absorption. I like to store the ash in a small glass jar with a tight lid to prevent moisture absorption, which can reduce its effectiveness. Remember, a little goes a long way—start with the full tablespoon only if you're treating a large garden bed.
Stirring Technique: The 2 minutes of vigorous stirring in Step 2 are crucial for complete dissolution. Use a whisk or rubber spatula to scrape the bottom of the container continuously—this prevents calcium deposits from forming. I've found that stirring by hand gives better results than using an electric mixer, which can create too much heat and potentially reduce calcium solubility. The cloudy appearance during stirring confirms you're extracting maximum calcium from the eggshells.
Compost Tea Timing: While the eggshell solution sits for 12 hours, use that time to prepare your compost tea. The 24-hour steeping time for compost tea is non-negotiable—it's what activates the beneficial microbes that help plants absorb calcium. I like to use a breathable bag (like an old pillowcase) to steep the compost, which allows for better microbial activity than a sealed container. This microbial boost is what transforms your calcium supplement from good to exceptional.
Pro Tips for Garden Calcium Supplement
- Here's what I've learned after perfecting this supplement for years—these little details make all the difference for your plants.
- Sterilization Secret: The 10-minute bake at 350°F isn't just about sterilization—it's about creating a finer powder.
- Wood Ash Precision: When measuring the 1 tablespoon of wood ash, use a level teaspoon and sift it through a fine mesh strainer to remove any large particles.
Frequently asked questions
Got questions about using garden calcium supplements?
Here are answers to the most common ones—so you can boost your soil and plants with confidence!
What’s the best time of year to add calcium to my garden?
Add calcium supplements in early spring (before planting) or late summer (after harvest) for best results. Avoid applying during active blooming or fruiting, as excess calcium can disrupt nutrient uptake. For vegetables like tomatoes, work it into the soil 4–6 weeks before transplanting.
Can I use crushed eggshells instead of a store-bought calcium supplement?
Crushed eggshells are a natural, free alternative rich in calcium carbonate. Just bake them at 200°F (93°C) for 10 minutes to sterilize, grind into a fine powder, and mix into the soil. For faster results, combine with a commercial supplement like gypsum or lime.
How do I know if my plants need more calcium?
Watch for these signs: blossom-end rot (black spots on tomatoes/peppers), yellowing leaves with brown edges, or stunted growth. Test your soil’s pH (ideal: 6.0–7.0) and calcium levels with a kit. If pH is too high (<6.0), calcium becomes less available—adjust with a balanced supplement.
Will calcium supplements raise my soil’s pH too much?
Not if used correctly! Pure calcium (like eggshells) is neutral, but products like lime (calcium carbonate) can raise pH. Use gypsum (calcium sulfate) if you need calcium without changing pH. Always test soil before and after applying to monitor changes.
How often should I reapply calcium to my garden?
For most gardens, once a year is sufficient, but heavy feeders (like tomatoes or peppers) may need a light top-up every 6 months. Organic matter (compost) replenishes calcium slowly, so amend annually. If you notice deficiency symptoms, reapply every 3 months with a balanced supplement.
Wrapping up and next steps
Boosting your garden’s calcium levels doesn’t have to be complicated—just a few simple ingredients can transform your soil into a thriving ecosystem! 🌱 Whether you’re battling blossom end rot, weak stems, or stunted growth, this DIY calcium supplement is your secret weapon for healthier, happier plants.
Start small, experiment with your green thumb, and watch your garden flourish with strength and vitality.
Ready to take the next step? Test your soil’s pH first to confirm calcium needs, then whip up your supplement and apply it with confidence. Your plants will thank you—one lush leaf at a time! 🌿✨