
Tools
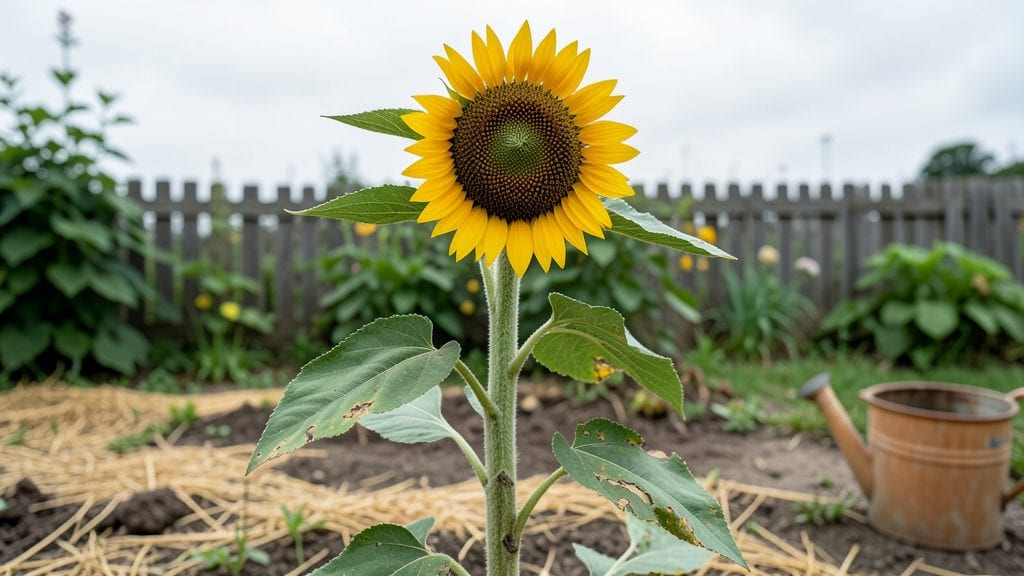
A children's garden isn't just dirt and plants—it's a place where little hands discover the magic of growing things. ✨ I designed mine with my nephew in mind, blending edible flowers, bug hotels, and textured paths that invite exploration.
The key is making every element safe, engaging, and educational without feeling like a lesson.
Start with plants that spark curiosity: sunflowers for climbing, lavender for touching, and nasturtiums for tasting. Add a bug hotel from hollowed logs and pinecones—kids love watching bees and ladybugs move in. A small raised bed with easy-to-grow herbs lets them plant, water, and harvest their own snacks.
By the end, you'll have a space where kids dig in the soil, count petals, and learn where food comes from—all while having fun. The best part? They'll beg to visit, and you'll get to watch their faces light up when they pick their first flower or spot a butterfly.
Works for backyards, schoolyards, or even balcony planters. The layout scales with space, and the activities adapt to ages from toddlers to teens. Here's how to bring it to life without stress or mess.
📚 In This Guide
- What you need
- Instructions
- Tips and common mistakes
- Wrapping up and next steps
What you need
- ● Soil & Planting Medium: 1–2 cubic yards of well-draining potting mix (or garden soil amended with compost)
- ● 1 bag of organic compost (for nutrient-rich soil)
- ● 1 bag of mulch (pine straw or wood chips, 2–3 cubic feet)
- ● Edible Flowers & Plants: 5–10 edible flower seeds/seedlings (e.g., nasturtiums, pansies, marigolds, or violets)
- ● 3–5 easy-to-grow herbs (basil, mint, or chamomile—kids love these!)
- ● 1–2 berry bushes (strawberries or raspberries, dwarf varieties for small spaces)
- ● Bug Hotel Components: 1–2 hollow bamboo stakes (for solitary bees)
- ● 1 roll of burlap or untreated wood shingles (for insects to hide in)
- ● 1 bag of pine cones, twigs, or hollow stems (collect these for free!)
- ● 1 small wooden crate or plastic container (for assembly)
- ● Sensory & Play Elements: 1–2 sand-filled sensory bins (with scoops and small toys)
- ● 3–5 textured plants (e.g., lamb’s ear, fuzzy moss, or succulents)
- ● 1 small water feature (birdbath or shallow dish for puddling)
- ● Tools: 1 garden trowel (kid-sized for little helpers!)
- ● 1 hand pruners (for safe trimming)
- ● 1 watering can (with a rose nozzle for gentle spraying)
- ● 1 measuring tape (to plan spacing)
- ● Painted rocks or stepping stones (let kids decorate them!)
- ● Mini garden markers (with pictures instead of words for little ones)
- ● Solar-powered garden lights (for magical evening play)
- ● DIY bug viewers (magnifying glasses or clear jars with holes)
- ● Kid-friendly gloves (to protect tiny hands)
Step-by-Step instructions for creating a sensory garden playground
Turn your backyard into a lively, educational space where kids can explore nature while growing their own edible flowers.
🌱 Step 1: Plan Your Sensory Zones
Divide your space into four distinct areas: a flower bed for edible blooms, a bug hotel nook, a textured path, and a shaded seating area. I like to sketch a simple layout first—kids love helping mark spots with sticks or chalk. Place the flower bed where it gets 6+ hours of sunlight, as most edible flowers thrive there. The bug hotel should be near bushes or trees where insects naturally gather.
Keep pathways wide enough for little feet—2 feet minimum—and use materials like smooth river rocks or mulch for tactile contrast. The seating area should have a small table or stump where kids can sit and observe their garden. This layout ensures every child can engage with multiple senses at once: sight, touch, and sound from buzzing bees.
💧 Step 2: Prepare the Soil and Plant Edible Flowers
Loosen the top 6 inches of soil in the flower bed area to create a soft, inviting space for roots. Mix in 2 cups of compost per square foot to give plants the nutrients they need to thrive. I like to let kids help with this part—they love digging and turning the soil with small hand tools.
Plant a mix of nasturtiums, calendula, and pansies—these are easy to grow, colorful, and safe for kids to touch. Space them 8-12 inches apart so they have room to grow without crowding. Water gently right after planting to help the soil settle around the roots. Kids can help with watering too, using a small watering can to give them a sense of responsibility.
☀️ Step 3: Build a Bug Hotel
Create a simple bug hotel using a wooden crate or stack of logs. Fill it with natural materials like pinecones, hollow stems, and bark to attract beneficial insects. I like to let kids collect these items during a nature walk—it makes the project feel like an adventure. Place the bug hotel in a shady spot near the flower bed so insects can easily find shelter and pollinate the blooms.
Leave one side open so kids can peek inside and observe the tiny residents. Over time, they’ll see ladybugs, bees, and even spiders moving in. This teaches them about the importance of insects in the garden ecosystem. Just remind them to admire from a distance—no touching!
🪴 Step 4: Add Textures and Interactive Elements
Incorporate different textures into the garden to engage little hands. Plant lavender for soft stems, sunflowers for tall, sturdy stalks, and moss for a spongy feel. Add a small sand pit or a patch of smooth pebbles where kids can dig and explore. These elements make the garden a true sensory playground.
Hang a bird feeder or wind chime nearby to add sound to the experience. Kids will love listening to the rustling leaves and chirping birds. Place a small chalkboard or whiteboard on the seating area so they can draw what they discover in the garden. This keeps them engaged and encourages creativity.
⏰ Step 5: Maintain and Explore Together
Water the garden early in the morning or late in the evening to keep the soil moist but not soggy. Kids can help with watering using a small watering can—just supervise to make sure they don’t overdo it. Teach them to check the soil by touching it; if it feels dry 1 inch below the surface, it’s time to water.
Encourage them to observe the garden daily. Ask questions like, "What new colors do you see today?" or "Can you spot any bugs in the hotel?" This turns gardening into a learning experience. Over time, they’ll develop a sense of pride and connection to nature—plus, they’ll have a delicious snack garden with edible flowers to enjoy!
Tips & tricks for perfect sensory garden playgrounds
Creating a sensory garden that engages kids' curiosity takes a few thoughtful touches that make all the difference.
Sunlight Strategy: When planning your flower bed in Step 1, remember that 6+ hours of sunlight is non-negotiable for edible flowers like nasturtiums and calendula. I've seen pansies struggle in less light, so mark your sunniest spot with a stake or chalk outline before digging. Trust me, this small step prevents disappointment later when plants don't thrive.
Soil Prep Hack: In Step 2, don't just loosen the top 6 inches of soil—break up any large clumps with your hands or a small garden fork. Kids love this part! The goal is to create a fluffy, inviting space for roots. Mixing in 2 cups of compost per square foot gives plants the nutrients they need, but also makes the soil easier for little hands to work with during planting.
Bug Hotel Adventure: For Step 3, turn the bug hotel collection into an expedition. Have kids search for pinecones and hollow stems during a nature walk—they'll be more invested in the project when they've collected the materials themselves. Place the hotel near the flower bed so beneficial insects can easily move between shelter and food sources. This connection between plants and bugs is what makes the garden truly come alive!
Texture Planning: When adding textures in Step 4, think about how kids will interact with each element. The smooth pebbles should be arranged in a shallow tray or bordered area to prevent them from being scattered. For the lavender and sunflowers, plant them where kids can easily reach the stems—this encourages them to explore different textures safely. The chalkboard should be positioned where they can sit comfortably while drawing their discoveries.
Pro Tips for Garden For Children'S
- Creating a sensory garden that engages kids' curiosity takes a few thoughtful touches that make all the difference.
- Sunlight Strategy: When planning your flower bed in Step 1, remember that 6+ hours of sunlight is non-negotiable for edible flowers like nasturtiums and calendula.
- Soil Prep Hack: In Step 2, don't just loosen the top 6 inches of soil—break up any large clumps with your hands or a small garden fork.
Frequently asked questions
Got questions about creating a magical garden for kids?
Here are some of the most common ones—and their easy, practical answers to help you get started!
What’s the best age to start a garden with kids?
Kids as young as 2-3 years old can enjoy sensory gardens with safe plants, like edible flowers or herbs. For planting and maintaining, ages 4-6 are ideal—they can handle small tools and tasks with supervision. Older kids (7+) can take on more responsibility, like watering schedules or bug-hotel building!
How do I keep bugs out of my child’s garden without harming them?
Bugs are essential for a healthy garden! Use natural deterrents like companion planting (e.g., marigolds repel pests) or physical barriers (row covers for delicate plants). Introduce bug hotels to encourage beneficial insects like ladybugs and lacewings—they’ll eat pests for you! Avoid chemicals; kids and wildlife will thank you.
What are the safest edible flowers for young children?
Stick to non-toxic, mild-tasting flowers like nasturtiums, pansies, or calendula. Always supervise kids when they’re tasting new plants—some (like foxgloves) can be dangerous. Start with herbs like chamomile or borage for a gentle introduction to edible gardening. Pro tip: Grow in containers to limit access to curious pets or toddlers!
When is the best time to plant a kids’ garden?
Timing depends on your climate! In cool seasons, plant spring (March–May) or fall (September–November) for mild weather. In warm zones, aim for early spring or late summer to avoid peak heat. Fast-growing plants (like radishes or lettuce) are perfect for impatient little gardeners—harvest in weeks!
Can I make a kids’ garden on a budget?
Start with repurposed containers (old buckets, yogurt cups) or free seeds from veggie scraps (like regrowing green onions). Use cardboard for mulch or newspaper as weed barriers. Thrift stores often have cheap tools, and local plant swaps can help you build a garden without breaking the bank. Think small, think creative!
What tools are safe for little hands?
Skip sharp tools—opt for plastic trowels, kid-sized rakes, and bendable watering cans. Dull, rounded scissors work for harvesting, and gloves with Velcro straps keep tiny fingers safe. Pro tip: Let kids decorate their tools with paint or stickers to make gardening even more fun!
Wrapping up and next steps
A children’s garden isn’t just about dirt and plants—it’s a magical sensory playground that sparks curiosity, creativity, and a love for nature. 🌱 By blending edible flowers, bug hotels, and hands-on activities, you’ve created a space where little hands can explore, learn, and grow (literally!).
Now that you’re armed with the how-tos and answers to common questions, it’s time to roll up your sleeves and let the fun begin! Start small—plant a few flowers, build a tiny bug hotel, or let your kids dig in the soil.
Watch their faces light up as they discover the wonders of the outdoors. Happy gardening!