Tools
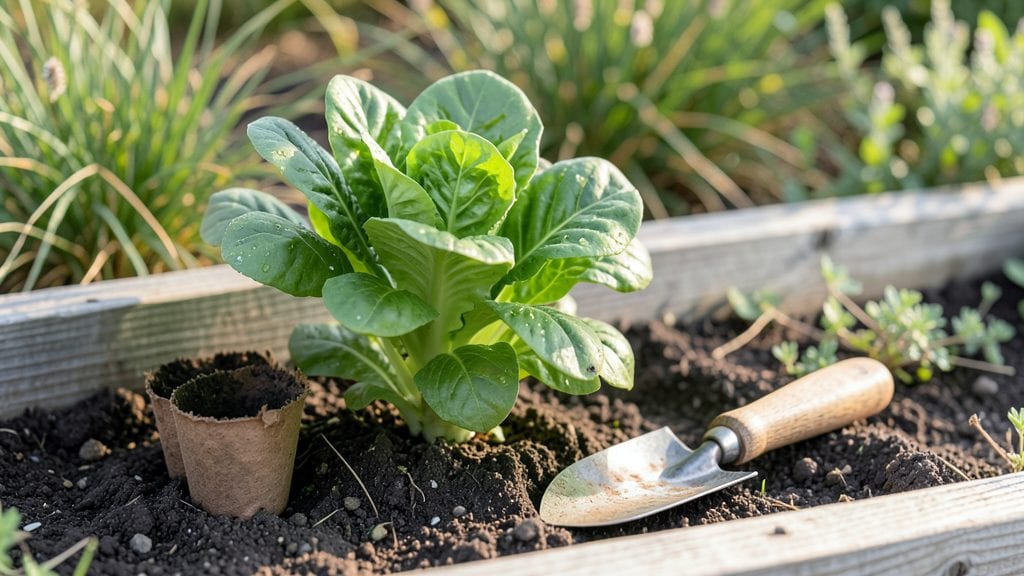
A kindergarten garden turns tiny hands into explorers and little fingers into gardeners. 🌱 I designed mine around what excites kids most—bright colors, soft textures, and plants they can touch, smell, and even taste (safely).
The key is making every plant an adventure: sunflowers they can measure, herbs they can sniff, and veggies they can pull from the soil.
Start with a small, fenced-off area where kids can move freely without tripping over roots. Use raised beds with smooth edges (no sharp corners!) and fill them with lightweight soil that’s easy for little hands to dig.
Plant sunflowers for height, lavender for scent, and cherry tomatoes they can pick when ripe. Add a watering station with a long spout so they can fill their own cups—messy but magical.
By the end of the first week, they’ll be identifying leaves by touch, counting flower petals, and understanding where food comes from. The garden becomes a classroom where learning happens through dirt, bugs, and the joy of watching something grow.
You’ll see their excitement when they realize they helped create something alive.
This works for any outdoor space—backyard, schoolyard, or even large containers on a patio. The only rule? Let them lead. Their curiosity is the real lesson.
📚 In This Guide
- What you need
- Instructions
- Tips and common mistakes
- Wrapping up and next steps
What you need
- ● Potting soil: 10–15 lbs of lightweight, organic potting mix (avoid garden soil—it’s too heavy!). Look for a blend labeled "seed starting mix" for best results.
- ● Containers: 5–10 small pots (4–6 inches wide) for individual plants.
- ● 1–2 large shallow trays (12x16 inches) for group planting (e.g., sunflowers or herbs).
- ○ Optional: Decorative planters (like painted milk cartons or terracotta pots) for creative flair!
- ● Seeds: Choose fast-growing, kid-friendly options like: Sunflower seeds (giant varieties like 'Mammoth' for easy handling).
- ● Bean seeds (e.g., 'Blue Lake' or 'Scarlet Runner'—fun shapes and colors!).
- ● Herbs (basil, mint, or chives—great for sensory smells and tasting!).
- ● Marigolds or nasturtiums (bright colors and edible flowers!).
- ● Watering tools: 1 small watering can with a narrow spout (for precision).
- ● 5–10 spray bottles (for misting seeds or rinsing hands).
- ● Planting tools: 1 child-safe trowel (plastic or wooden, 6–8 inches long).
- ● 1 small hand fork (for turning soil gently).
- ○ Optional: Magnifying glasses (for inspecting seeds/bugs) or tweezers (for delicate planting).
- ● Safety & organization: 1 roll of biodegradable twine (for labeling plants with tags).
- ● Kid-safe gloves (nitrile or cotton, cut fingerless for dexterity).
- ● 1 small bucket or tray (for collecting leaves, rocks, or "garden treasures").
- ● Learning aids: Printed plant labels (with pictures and names) or a simple chart for tracking growth.
- ○ Optional: A whiteboard or chalkboard to log daily observations (e.g., "Day 3: Beans sprouted!").
- ● A sunny spot: Aim for 4–6 hours of direct sunlight daily (a windowsill, patio, or shaded porch works too!).
- ● Access to water: A sink or hose nearby for easy refills.
- ● Supervision: Always have an adult nearby—especially when handling soil, seeds, or tools!
- ○ Optional: A timer or weather app to track sunlight and watering schedules.
Step-by-step instructions for creating a kindergarten garden
Here's how to design a fun, educational garden where little hands can explore nature safely.
🌱 Step 1: Choose a Sunny, Accessible Spot
Pick a location with at least 4-6 hours of sunlight daily—a patch near the playground or classroom works perfectly. I always look for a flat area with good drainage, away from tree shade that can block light. Test the spot by observing it for a week to confirm sunlight patterns before planting.
If your space has uneven ground, use the 4 bags of mulch to create gentle mounds where needed. This keeps plants at a comfortable height for little hands to reach. A 6-foot by 6-foot area gives enough room for 4 distinct planting zones while keeping everything manageable.
🪴 Step 2: Prepare the Soil with Simple Amendments
Spread the 3 gallons of potting mix evenly across the garden area, mixing it lightly with the top 2 inches of existing soil. This adds nutrients without overwhelming young plants. Use a small rake to blend it in—kids can help with this step under supervision!
Add the 1 cup of compost to the center of each planting zone and mix it in. Compost introduces beneficial microbes that help plants grow strong. Water the area lightly after mixing to settle everything. This prep ensures roots can spread easily, and the soil stays loose for little fingers to dig in.
🌿 Step 3: Plant Easy, Sensory-Friendly Crops
Divide the garden into 4 sections and plant 1 packet of sunflower seeds in one corner, 1 packet of marigold seeds in another, and 4 basil plants spaced evenly. Sunflowers grow tall and fast, teaching kids about plant growth stages, while marigolds add bright colors and repel pests naturally.
Place the 4 basil plants near the edge so children can brush against the leaves and smell the herbs. Basil grows quickly and has large leaves perfect for little hands to handle. Press each plant gently into the soil, covering roots completely but leaving the top of the stem exposed.
💧 Step 4: Set Up a Kid-Friendly Watering System
Fill the 1-gallon watering can with water and let kids take turns watering the plants. A small can gives them control without overwhelming the soil. Teach them to water at the base of the plants, not the leaves, to prevent disease. I always say, "Water like a gentle rain—just enough to make the soil happy!"
Place the 4 colorful plant markers near each type of plant so kids can identify what they're growing. Markers with pictures work best for little ones still learning to read. Water the garden every 2-3 days or when the top 1 inch of soil feels dry to the touch—this keeps everything thriving without overwatering.
⏰ Step 5: Add Interactive Learning Elements
Use the 1 roll of twine to create a simple trellis for the sunflowers by tying it between two stakes. Kids can watch the plants climb and learn about plant support systems. Add the 4 ladybug figurines (or real ones if available) to teach about garden helpers and pollinators.
Include a small notebook and crayons in the garden area so children can draw what they see and track plant growth. Label each drawing with the plant name and date—this turns gardening into a science lesson! Check the garden daily with the kids to observe changes in leaf size, flower colors, and plant heights.
Tips & tricks for perfect kindergarten garden planning
Creating a garden that engages young minds requires a little extra thought—here's how to make it both fun and educational.
Sunlight Strategy: The 4-6 hours of sunlight requirement is non-negotiable for your plants to thrive. I recommend testing your spot for a week before planting by observing shadows at different times of day. Morning sun (before 10am) is gentler on young plants than harsh afternoon rays, so position sunflowers and marigolds where they'll get morning sunlight if possible. This prevents wilting while still giving them enough light to grow strong.
Soil Prep for Little Hands: When mixing the 3 gallons of potting mix with existing soil in Step 2, add a handful of sand to improve drainage if your soil feels heavy or clay-like. This makes it easier for kids to dig and plant without compacting the soil too much. You can even let the children help mix it—they'll love feeling the different textures!
Plant Selection for Sensory Learning: The sunflowers and marigolds are perfect choices, but consider adding a few optional sensory elements like mint (for smell) or snap peas (for touch) if you want to expand the experience. Just make sure to keep the garden simple enough that kids can understand which plant is which. The basil's large leaves are ideal for little fingers to handle, but you might want to secure them with small stakes if your garden gets windy.
Watering Routine: The 2-3 day watering schedule works well, but teach kids to check the soil moisture by touching it first—if it feels dry just below the surface, that's when it's time to water. I've found that using a spray bottle for misting leaves (when watering basil) adds another sensory experience for the children. Just remind them to always water at the base, not the leaves, to keep the plants healthy.
Pro Tips for Garden For Kindergarten
- Creating a garden that engages young minds requires a little extra thought—here's how to make it both fun and educational.
- Sunlight Strategy: The 4-6 hours of sunlight requirement is non-negotiable for your plants to thrive.
- Soil Prep for Little Hands: When mixing the 3 gallons of potting mix with existing soil in Step 2, add a handful of sand to improve drainage if your soil feels heavy or clay-like.
Frequently asked questions
Got questions about creating a kindergarten garden? Here are some of the most common ones—and their practical answers—to help you get started with confidence!
What’s the best time of year to start a kindergarten garden?
The ideal time depends on your climate! In most regions, spring (after the last frost) is perfect for planting seeds or seedlings. If you’re in a warmer zone, fall can also work. For container gardens, you can start anytime—just adjust sunlight and watering. Pro tip: Involve kids in planting during school breaks for extra excitement!
How much does a kindergarten garden cost to set up?
Costs vary widely! A basic garden (pots, soil, and a few seeds) can cost $20–$50, while a full outdoor plot with raised beds and tools might run $100–$300. Check for grants, school partnerships, or donated supplies to cut costs. Pro tip: Repurpose items like milk jugs or old tires as planters to save money!
How do I keep young kids safe around plants and soil?
Safety first! Avoid toxic plants like foxglove or oleander—stick to kid-friendly options like sunflowers, beans, or herbs. Use gloves and wash hands after play, and supervise digging to prevent falls. Pro tip: Teach kids to sniff (not taste!) flowers and avoid mouthing soil.
What if we don’t have outdoor space for a garden?
No outdoor space? No problem! Try a windowsill herb garden, indoor hydroponics, or a classroom “garden in a jar” with fast-growing seeds like radishes. Even a balcony or rooftop can work with containers. Pro tip: Use grow lights for low-light areas!
What do I do if pests or weeds take over?
Pests and weeds are normal—don’t stress! Use natural remedies like neem oil (for bugs) or hand-pulling weeds. Teach kids to spot ladybugs (they eat pests!) or use row covers for protection. Pro tip: Turn pest control into a science lesson—kids love “bug detectives”!
Can I make this garden a year-round activity?
Plan seasonal rotations—grow cold-hardy veggies (like kale) in winter and heat-loving plants (like tomatoes) in summer. Keep a seed journal with kids to track growth. Pro tip: Preserve harvests (drying herbs, making jam) to extend learning!
Wrapping up and next steps
A garden for kindergarten isn’t just about dirt and seeds—it’s a vibrant playground for little hands and curious minds! 🌱 From sensory exploration to hands-on learning, these green spaces spark creativity, patience, and a love for nature.
Whether you’re a teacher, parent, or caregiver, starting small with simple plants and tools can make a big difference in early childhood development.
Ready to grow? Take the first step today! Pick a corner of your yard, balcony, or even a sunny windowsill, and let the little ones dig in—literally. Watch their excitement bloom as they learn, play, and connect with the world around them. Happy gardening! 🌟