Planting
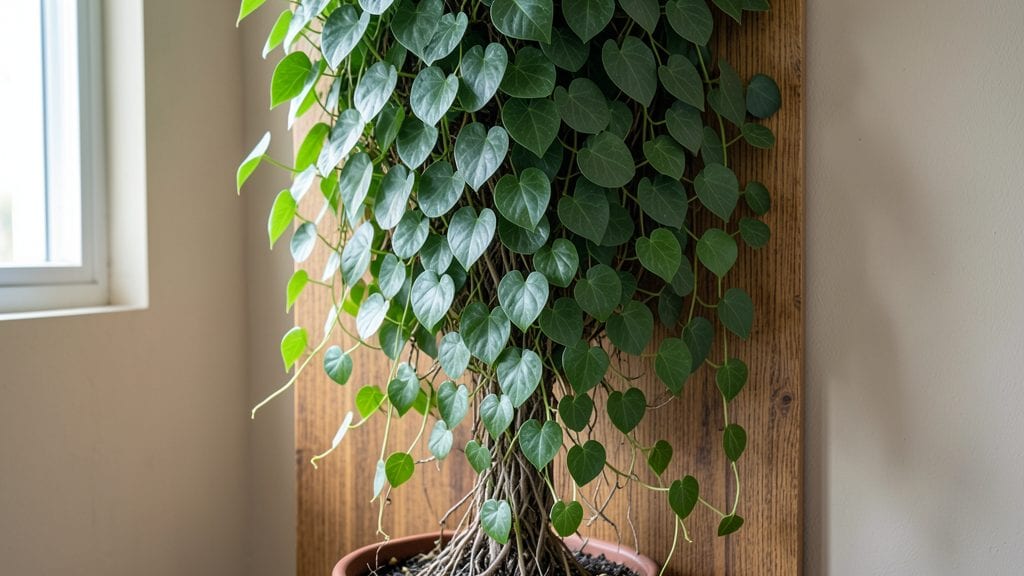
A garden plant wall turns blank walls into living tapestries that hum with life. 🌿 I remember the first time I saw one—a lush curtain of ivy and roses climbing a trellis—and I knew my small patio would never look the same.
The best part? It doesn’t need a yard. Even a 6-foot wall or balcony railing can become a thriving vertical garden with the right plants and setup.
You’ll need sturdy support (trellises, modular pockets, or even repurposed pallets), fast-growing vines like morning glories or clematis, and a watering system that reaches every layer. My setup uses a drip irrigation line hidden behind the plants—no more guessing if the top leaves are thirsty.
The payoff? A living wall that blooms all summer, attracts pollinators, and blocks unsightly views.
By late June, your wall will be a riot of color and texture, with tendrils weaving through every nook. The scent of jasmine at dusk or the rustle of leaves in a breeze makes it more than decoration—it’s a sensory experience.
Maintenance is easy: trim back leggy growth in spring, fertilize monthly, and watch it transform from bare wall to green escape.
Works for sun-drenched patios, shady corners, or even indoors near bright windows. The key is matching plants to light and space—whether you go bold with climbing roses or subtle with ferns. Let’s make that wall grow!
📚 In This Guide
- What you need
- Instructions
- Tips and common mistakes
- Wrapping up and next steps
What you need
- ● Wall Structure: Wooden lattice panels (4’ x 8’ or custom size) – 2-4 panels (depending on wall height and width)
- ● OR PVC pipes (½" diameter) – 10-20 ft (for a modular look)
- ● OR metal trellis grid – 1-2 sheets (for durability)
- ● Fasteners: Heavy-duty screws (2"–3") – 50-100 (for securing panels to the wall)
- ● L-brackets or wall anchors – 10-20 (if mounting to drywall or brick)
- ● Zipties or garden twine – 50+ (for securing vines to the structure)
- ● Plants & Soil: Climbing vines (e.g., ivy, jasmine, clematis, or morning glories) – 5-10 plants (spaced 12–24" apart)
- ● Potting mix (well-draining) – 10-20 gallons (or coconut coir for eco-friendly option)
- ● Grow bags or fabric pots – 5-10 (with drainage holes)
- ○ Slow-release fertilizer – 1-2 bags (optional but recommended)
- ● Tools: Drill & drill bits (for screws/wall anchors)
- ● Level – 1 (to ensure panels are straight)
- ● Measuring tape – 1 (for precision)
- ● Pruning shears – 1 (for trimming vines)
- ● Gloves – 1 pair (to protect your hands)
- ● Drip irrigation kit – 1 (for hassle-free watering)
- ● Moss or succulents – small quantities (for mixed-texture walls)
- ● Solar-powered LED lights – 2-4 (to highlight your wall at night)
- ● Waterproof sealant – 1 can (if using wood outdoors)
- ● Decorative pebbles or mulch – 5-10 lbs (for a polished look)
Step-by-step instructions for building a garden plant wall
Here's how to create a sturdy, lush vertical garden that transforms any wall into a thriving green space.
🪴 Step 1: Prepare the Wall Surface and Install the Framework
Start by cleaning the wall thoroughly to remove dirt, loose paint, or debris. I like to use a wire brush to rough up smooth surfaces slightly—this helps the mounting brackets grip better. Measure and mark where you'll attach the vertical framework, typically 12-18 inches apart horizontally and 16-24 inches apart vertically, depending on your chosen trellis spacing.
Use a level to ensure your first bracket is perfectly straight, then attach it securely with heavy-duty screws or masonry anchors. For wooden frames, pre-drill holes to prevent splitting. I recommend using a 2x4 or 1x3 lumber for the horizontal supports, as they provide enough stability for most climbing plants without being too bulky.
🌱 Step 2: Assemble the Trellis or Pocket System
If using a trellis design, attach horizontal slats or netting to the vertical framework. For a pocket-style wall, cut 12-inch deep pockets from landscape fabric or plastic mesh, spacing them 6-8 inches apart. Secure the pockets with zip ties or staples, leaving the top open for easy planting.
Here's the thing—if you're using a trellis, space the horizontal supports 12-18 inches apart vertically to give vines plenty of room to climb. For pocket walls, ensure the fabric is sturdy enough to hold moisture without tearing. I've found that heavy-duty landscape fabric works best, especially if you plan to grow heavier vines like jasmine or clematis.
💧 Step 3: Install Irrigation and Add Growing Medium
Run a drip irrigation line along the top of the wall, spacing emitters 12-18 inches apart to ensure even watering. Connect the line to a timer for consistency—I set mine for 10-15 minutes every other day during dry spells. If you're not using irrigation, plan to water from the top, letting moisture trickle down naturally.
Fill the pockets or spaces between trellis supports with a lightweight potting mix blended with perlite or coconut coir. Avoid garden soil—it's too heavy and compacts easily. I like to mix in a slow-release fertilizer to give plants a nutrient boost right from the start. Leave about 1 inch of space at the top of each pocket to prevent overflow when watering.
☀️ Step 4: Plant Your Climbing Vines
Choose vines that thrive in your climate, such as morning glories, sweet peas, or ivy for quick coverage. Dig a hole slightly larger than the root ball and place the plant gently into the pocket or against the trellis. For trellis systems, tie the vine loosely to the support with soft plant ties or strips of old fabric to prevent damage as it grows.
Water deeply right after planting to settle the soil and encourage root growth. You'll see new leaves emerge within 1-2 weeks—that's your signal everything is working. Space plants 6-12 inches apart, depending on their mature size. If you're planting a mix of vines, place faster growers at the bottom so they don't shade out slower varieties.
✂️ Step 5: Maintain and Prune for Healthy Growth
Check the wall weekly for signs of pests or disease. I like to spray plants with neem oil every 2-4 weeks** as a preventive measure—it keeps aphids and spider mites at bay without harming the plants. Water in the morning to allow foliage to dry quickly, reducing the risk of fungal issues.
Prune vines regularly to encourage bushier growth and prevent them from becoming too heavy. Trim back leggy stems to just above a leaf node, and remove any dead or yellowing leaves immediately. This keeps the wall looking neat and promotes stronger growth. In late fall, cut back vines that die annually, but leave evergreens like ivy intact for winter interest.
Tips & tricks for building a perfect garden plant wall
Building a vertical garden isn't just about aesthetics—it's about creating a thriving ecosystem. Here are my go-to tricks that'll make your plant wall not just functional, but absolutely stunning.
Framework Stability: Don't skimp on the mounting brackets! I've seen too many walls sag under the weight of climbing vines. For extra security, use L-brackets instead of simple screws—they distribute weight better and prevent the frame from pulling away from the wall. If you're mounting on brick or concrete, use masonry anchors rated for at least 50 pounds each, especially if you're growing heavier vines like wisteria or clematis.
Pocket Design Pro: When creating those 12-inch deep pockets from landscape fabric, reinforce the bottoms with a layer of plastic mesh or even an old window screen. This prevents the fabric from tearing under the weight of wet soil, especially after watering. I cut my pockets slightly oversized (about 1/2 inch larger than needed) so they're easier to fill and don't require force-fitting plants.
Irrigation Intelligence: That 10-15 minute irrigation cycle is perfect, but here's the trick: bury the emitters just slightly below the soil surface. This prevents water from splashing plants and creating fungal issues. I also like to add a small layer of mulch (like shredded bark) on top of the soil—it helps retain moisture and keeps the roots cooler during hot days. For pocket walls, consider adding a wicking fabric wick from the bottom of each pocket to the reservoir at the top for even distribution.
Plant Placement Strategy: In Step 4, when spacing your plants 6-12 inches apart, think vertically too. Place your fastest-growing vines at the bottom and slowest at the top. This creates a natural gradient where sunlight reaches all plants. Pro tip: If you're using a trellis, weave in some horizontal twine between the main supports—it gives vines extra handholds to climb without needing to tie each one individually.
Pro Tips for Garden Plant Wall
- Building a vertical garden isn't just about aesthetics—it's about creating a thriving ecosystem. Here are my go-to tr...
- Framework Stability: Don't skimp on the mounting brackets! I've seen too many walls sag under the weight of climbing ...
- Pocket Design Pro: When creating those 12-inch deep pockets from landscape fabric, reinforce the bottoms with a layer...
Frequently asked questions
Got questions about creating your own garden plant wall? You’re not alone! Here are some of the most common queries—plus quick, practical answers to help you build with confidence.
What’s the best time of year to install a plant wall?
The ideal time is early spring (just before the growing season kicks off) or late fall (after the first frost). This gives plants time to establish roots before extreme heat or cold. If you’re in a mild climate, spring is your best bet—just avoid planting during drought or extreme temperatures!
How often should I water a vertical garden?
Frequency depends on your setup, but most plant walls need daily watering for the first 2–3 weeks to help roots take hold. After that, aim for every 2–3 days (or more often in hot/dry conditions). Self-watering systems or hydroponic setups reduce maintenance—just check soil moisture regularly!
What if pests or mold start attacking my plant wall?
Prevention is key! Use organic neem oil or insecticidal soap for pests like aphids or spider mites. For mold (common in humid climates), improve airflow by spacing plants properly and pruning overgrowth. Copper tape around the base can deter slugs—nature’s pest control!
Can I mix edible plants with ornamental ones in a plant wall?
Pair herbs (basil, thyme, mint) with flowers (nasturtiums, marigolds) or veggies (cherry tomatoes, strawberries) for a functional and beautiful wall. Just ensure they have similar light and water needs—group sun-lovers together and shade-tolerant plants separately.
Are there budget-friendly alternatives to pre-made plant wall kits?
Yes! Try these DIY options:
- Pallet walls: Sand and seal wooden pallets, then attach pockets or mesh for plants.
- Cinder blocks: Stack blocks with landscape fabric between layers for a sturdy, low-cost frame.
- Recycled materials: Use old gutters, plastic bottles, or even hanging shoe organizers for small-scale setups.
Just ensure your materials are weather-resistant and secure!
Wrapping up and next steps
A garden plant wall isn’t just a stylish addition—it’s a game-changer for small spaces, offering lush greenery without sacrificing square footage. Whether you’re drawn to climbing vines, cascading flowers, or fragrant herbs, this vertical haven transforms dull walls into thriving ecosystems. 🌿
Ready to bring your vision to life? Start small—pick a corner, gather your supplies, and let nature do the rest. Your green oasis awaits!
- Next step: Sketch your design, choose your plants, and dive in!