Tools
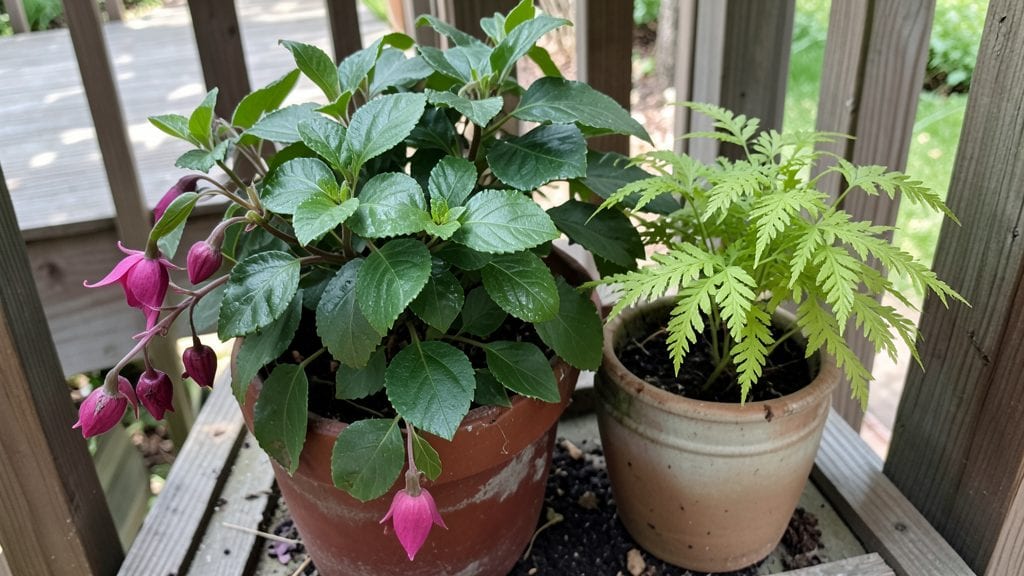
Creating a thriving garden under your deck turns wasted space into a lush, productive oasis. 🌿 I’ve turned my own shady deck corner into a year-round herb and leafy green factory—no fancy setup required. The key is choosing the right plants and containers that thrive where others fail.
Start with shallow containers for greens like lettuce and spinach, and hanging pots for herbs such as parsley or cilantro. Drainage is non-negotiable—add a layer of gravel or use self-watering planters to prevent soggy roots.
A simple drip irrigation line or watering can with a fine rose keeps moisture consistent without overwatering.
Within weeks, you’ll harvest crisp greens and fragrant herbs that outperform anything store-bought. The shade keeps them tender longer, and the vertical space lets you grow more without taking up floor room. Even my black thumb can’t kill these plants once they’re set up right.
Works for decks with partial shade or full shade—just adjust plant choices. Here’s how to make it happen without the common pitfalls that sink most under-deck gardens.
📚 In This Guide
- What you need
- Instructions
- Tips and common mistakes
- Wrapping up and next steps
What you need
- ● Containers: 5–10 shallow, wide pots (10–12 inches in diameter) or a long raised bed (at least 6 inches deep) for optimal drainage.
- ● Potting Mix: 1–2 bags of high-quality, well-draining organic potting soil (avoid garden soil—it compacts easily!).
- ● Shade-Tolerant Plants: 3–5 herb plants (e.g., parsley, cilantro, mint, or chives—all thrive in low light!).
- ● 4–6 leafy greens (e.g., lettuce, spinach, or Swiss chard).
- ○ Optional: 1–2 trailing plants (like strawberries or nasturtiums) for a pop of color.
- ● Watering Can or Hose with Spray Nozzle: For gentle, even watering (overhead works best for leafy greens!).
- ● Drainage Tray or Saucer: To catch excess water and prevent soggy roots.
- ● Pruning Shears: Small, sharp pair for trimming herbs and greens.
- ● Gloves: A pair of gardening gloves to protect your hands from dirt and prickly stems.
- ● Grow Lights: LED clip-on lights (10,000–20,000 lux) for decks with very minimal sunlight.
- ● Mulch: A thin layer of straw or shredded leaves to retain moisture.
- ● Decorative Stones or Pebbles: For a polished, low-maintenance look.
- ● Self-Watering System: A wicking mat or drip irrigation kit for busy gardeners.
- ● Labels & Markers: To keep track of your herbs and greens (trust us, you’ll forget which is which!).
Step-by-Step instructions for creating a thriving garden under deck
Turn that unused deck space into a lush, productive garden with these simple steps.
🪴 Step 1: Choose the Right Containers and Location
Start by selecting containers that fit your deck space and drainage needs. I recommend using 12-inch deep pots or planters for herbs and greens—they give roots enough room while keeping the garden compact. Place them in a spot where they’ll get at least 4-6 hours of indirect light daily, like near the deck’s edge where dappled sunlight filters through.
If your deck has a railing, lean containers against it for a vertical look. Just make sure they’re stable—wind can catch lightweight pots and tip them over. I like to use self-watering planters with 1-2 gallon capacity each for consistent moisture without overwatering.
🌱 Step 2: Prepare Soil and Plant Shade-Tolerant Herbs
Fill your containers with well-draining potting mix—never garden soil, as it compacts and suffocates roots in confined spaces. Mix in a handful of compost or worm castings for nutrients, and avoid heavy fertilizers that can burn tender seedlings. Moisten the mix until it’s damp like a wrung-out sponge.
For shade-loving plants, I start with parsley, cilantro, mint, and chives—they thrive where others struggle. Plant seeds ¼ inch deep, spacing them 1-2 inches apart in rows. If using transplants, space them 4-6 inches apart to allow airflow and prevent disease. Water gently after planting to settle the soil.
💧 Step 3: Water and Maintain Consistent Moisture
Water deeply every 2-3 days, checking the top inch of soil—it should feel damp but not soggy. Shade gardens dry out slower, but containers lose moisture fast. I use a watering can with a narrow spout to direct water to the soil, not the leaves, which prevents fungal issues.
Mulch the surface with ½ inch of shredded bark or straw to retain moisture and suppress weeds. This is especially helpful if your deck gets afternoon shade, where evaporation happens faster. Watch for wilting leaves—this is your cue to water before the soil dries completely.
☀️ Step 4: Rotate and Prune for Even Growth
Turn your containers a quarter turn weekly so plants grow straight toward the light, not lopsided. You’ll notice stems leaning toward the deck’s edge? That’s your sign to rotate them. Prune leggy growth by pinching back the tips to encourage bushier, healthier plants.
Harvest leaves as soon as they reach 3-4 inches tall—this keeps plants compact and encourages new growth. For herbs like mint, which spreads aggressively, trim back ⅓ of the plant every few weeks to control size. This also prevents them from taking over your containers!
✂️ Step 5: Protect and Refresh Seasonally
As summer heats up, move containers to shadier spots if possible—direct afternoon sun can scorch leaves even in partial shade. If pests like aphids appear, spray with neem oil or insecticidal soap (mix 1 tsp per quart of water). Always apply in the evening to avoid burning tender foliage.
In fall, replace spent herbs with winter greens like kale or spinach, which tolerate cooler temps. Drain and store containers if not in use, or keep them outside with lightweight frost cloth to protect plants through light frosts. You’ll be amazed how much life thrives under that deck!
Tips & tricks for perfect garden under deck design
Here's what nobody tells you about making the most of that shady deck space—these tricks will help you grow a thriving garden where others give up.
Container Stability is Key: I learned this the hard way after watching a windstorm topple my carefully arranged pots. Secure containers to the deck railing with soft straps or use heavy ceramic planters that won't blow over. For lightweight plastic pots, add a small weight like a smooth stone in the bottom. This simple step prevents your hard work from becoming a deck-side disaster.
Light Matters More Than You Think: The 4-6 hours of indirect light mentioned in Step 1 can vary dramatically depending on your deck's orientation. If your garden isn't thriving after a few weeks, move containers to test different spots—even a few inches can make a difference. South-facing decks get more light than north-facing ones, so adjust your expectations accordingly.
Soil Prep Secret: When mixing your well-draining potting mix in Step 2, add a handful of perlite or vermiculite to improve aeration. I also like to sprinkle a thin layer of horticultural charcoal on top of the soil—it helps prevent fungal issues while keeping the mix loose. This small addition makes a world of difference for container-grown herbs.
Harvesting Hack: Don't wait until your herbs reach the full 3-4 inches mentioned in Step 4 to harvest. Start snipping leaves when they're about 2 inches tall—this encourages bushier growth and prevents leggy plants. For parsley and cilantro, you can actually harvest up to ⅔ of the plant without harming it, as long as you leave some leaves for regrowth.
Pro Tips for Garden Under Deck
- Here's what nobody tells you about making the most of that shady deck space—these tricks will help you grow a thriving garden where others give up.
- Container Stability is Key: I learned this the hard way after watching a windstorm topple my carefully arranged pots.
- Light Matters More Than You Think: The 4-6 hours of indirect light mentioned in Step 1 can vary dramatically depending on your deck's orientation.
Frequently asked questions
What are the best shade-tolerant plants for a garden under a deck?
Aim for low-light champions like parsley, cilantro, spinach, arugula, and chives. Leafy greens (e.g., kale, Swiss chard) and herbs like mint, dill, and lemon balm also thrive in partial shade. Avoid sun-hungry crops like tomatoes or peppers—stick to plants that tolerate 2–6 hours of indirect light daily.
How long does it take to see results in a garden under a deck?
Patience pays off! Leafy greens may sprout in 1–2 weeks and be harvest-ready in 3–4 weeks. Herbs like basil or cilantro might take 4–6 weeks to mature. If growth seems slow, check your light levels—boosting reflectivity with white containers or mirrors can help.
Do I need special soil for a garden under a deck?
Yes! Use a well-draining, organic-rich potting mix (avoid garden soil—it compacts under containers). Add perlite or compost to improve aeration and moisture retention. For containers, ensure drainage holes prevent root rot. Self-watering planters are a game-changer for consistency.
What if my deck doesn’t get enough natural light?
No problem! Grow lights (LED or fluorescent) can supplement light for 12–16 hours/day. Place them 6–12 inches above plants and use reflective surfaces (like aluminum foil) to maximize efficiency. Microgreens and sprouts grow well under lights with minimal natural light.
How do I keep pests away from my under-deck garden?
Prevention is key! Neem oil or insecticidal soap deter common pests like aphids. Row covers or fine mesh protect delicate greens. Encourage beneficial insects (like ladybugs) by planting marigolds or basil nearby. Avoid overwatering—damp soil attracts slugs.
Can I reuse containers or soil from last year’s garden?
Reuse containers? Yes! Scrub them with soapy water and disinfect with a 10% bleach solution (rinse well). For soil, refresh it—mix in fresh compost or repot entirely to avoid disease buildup. Sterilizing soil (baking at 200°F for 30 mins) kills pathogens if you’re reusing old mix.
Wrapping up and next steps
Creating a garden under deck is a fantastic way to grow thriving shade-loving herbs and greens without sacrificing precious outdoor space! 🌿 With the right design, materials, and care, you’ll enjoy fresh, homegrown produce year-round—even in low-light areas.
Whether you’re a seasoned gardener or just starting out, this setup is simple, cost-effective, and perfect for small spaces.
Ready to get growing? Start by sketching your layout and gathering supplies—then watch your little oasis transform into a lush, productive garden. Happy planting! 🌱