Tools
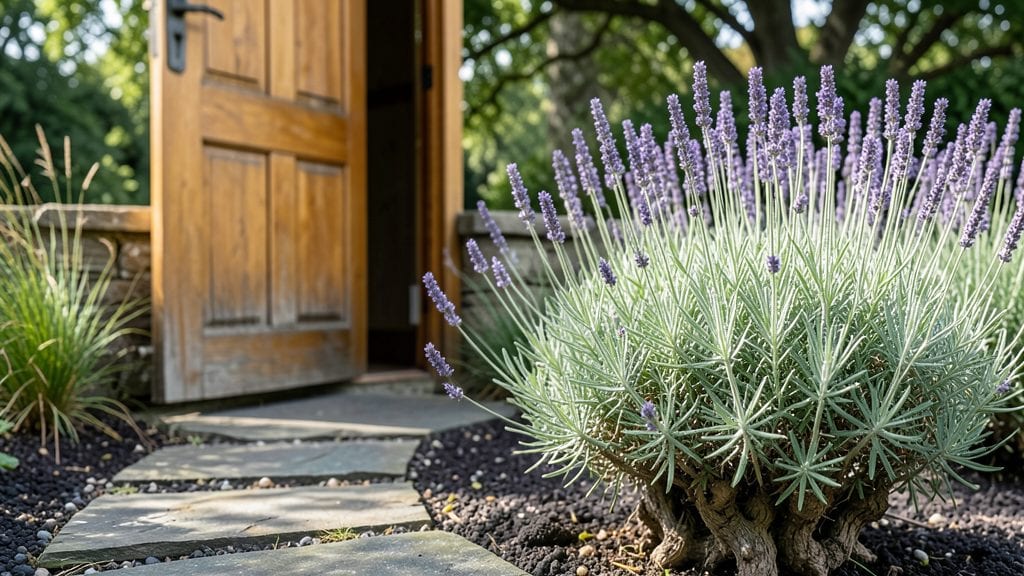
A garden with door transforms your backyard into a private retreat where neighbors become a distant thought. 🌿 I stumbled upon this idea after years of struggling with nosy neighbors peering over my fence—until I installed a simple wooden door as a privacy screen.
It wasn’t just a barrier; it became the centerpiece of my garden’s charm.
You don’t need fancy materials or complex designs to pull this off. A repurposed door—whether rustic, modern, or even a vintage find—works perfectly. Pair it with climbing vines or lattice for extra coverage, and suddenly, your space feels secluded yet inviting.
The best part? It costs a fraction of what privacy fences do.
Imagine stepping into your garden and feeling instantly shielded from prying eyes, while still enjoying the beauty of your plants. The door adds character, whether you lean into cottagecore with floral paint or keep it sleek with natural wood.
Plus, it’s a great spot to hang a small sign or lantern for extra ambiance.
Works for any yard size, from cozy urban patios to sprawling backyards. Ready to turn your garden into a true sanctuary? Let’s get started with the basics—no construction skills required.
📚 In This Guide
- What you need
- Instructions
- Tips and common mistakes
- Wrapping up and next steps
What you need
- ● Main Frame: 4x4-inch pressure-treated posts (4–6, depending on size) – for sturdy support
- ● 2x4-inch lumber (quantity varies by design; ~10–15 pieces for a 6-foot-wide screen)
- ● Privacy Panels: Bamboo rolls, lattice panels, or wooden slats (pre-cut or DIY; ~10–15 sq. ft. per section)
- ○ Optional: Plywood or composite boards for a solid look
- ● Door Components: Pre-hung door (30–36 inches wide, depending on access needs) or flat panel for a custom build
- ● Hinges (2–3, heavy-duty for outdoor use)
- ● Latch or handle (weather-resistant)
- ● Extras: Outdoor screws/nails (stainless steel or galvanized, 2–3 inches long)
- ● Concrete footings or gravel (for anchoring posts)
- ● Weatherproof sealant or paint (for longevity)
- ● Circular saw or miter saw (for cutting lumber)
- ● Drill/driver (with outdoor-rated bits)
- ● Level (to ensure straight installation)
- ● Tape measure and pencil
- ● Post hole digger or auger (for footings)
- ○ Optional: Staple gun (for attaching lattice or bamboo)
- ● Clear space for installation (measure twice—really!)
- ● Basic carpentry skills (or a willing friend with a drill!)
- ● Check local building codes (permits may be needed for permanent structures)
- ● Pro Tip: Sketch a design first—visualize where the door will swing and how panels will align! 🎨
How to build a functional garden privacy screen with a door
This isn't just a screen—it's a statement piece that adds charm while keeping prying eyes out.
🌿 Step 1: Plan Your Layout and Measure the Space
Start by measuring the area where your garden door will live. I like to sketch a rough design first—this helps visualize how the door will swing open and where the lattice panels will go. Mark the exact location of the door hinge on one post and the latch on the opposite side. Make sure the door has at least 3 feet of clearance when open to avoid obstruction.
For a 4-foot wide opening, I recommend 6-foot tall panels (standard lattice height) with the door centered. If your space is tighter, opt for 3-foot tall panels and a 2-foot wide door—just ensure the door still blocks the view effectively when closed. Use a level to mark post locations, keeping them 12 inches deep below ground for stability.
🪴 Step 2: Install Support Posts and Frame Structure
Dig holes for your posts using the measurements from Step 1. The holes should be 12 inches deep and 8 inches wide to accommodate the post diameter plus 2 bags of concrete mix per hole. Set the posts in place, ensuring they’re perfectly vertical with the level, then pour the concrete. Let it cure for 24 hours before attaching the horizontal lattice frame.
Cut your lattice panels to size—standard 4-foot wide by 6-foot tall sections work well. Attach the top and bottom horizontal lattice pieces to the posts using 3-inch deck screws, pre-drilling holes to prevent splitting. For extra strength, add diagonal braces between the top and bottom lattice pieces. Here’s the thing—if your lattice sags even slightly, the door won’t swing smoothly later.
☀️ Step 3: Attach Lattice Panels and Door Hardware
Secure the lattice panels to the frame using 2-inch exterior screws, spacing them 12 inches apart horizontally and vertically. Leave a 1-inch gap between panels for flexibility in wind. For the door, attach hinges to one post and the latch to the opposite side, ensuring the door swings outward for easy access. Use a 3-inch hinge for stability—smaller hinges wobble over time.
Test the door’s swing before finalizing screws. It should open and close smoothly without binding. If it rubs against the lattice, adjust the hinges slightly. Pro tip: Paint or stain the lattice and door hardware now—it’s easier before plants climb the structure. I like a dark stain for contrast against climbing roses or clematis, but lighter tones blend better with cottage-style gardens.
✂️ Step 4: Add Climbing Plants for Living Privacy
Plant fast-growing vines at the base of the lattice, spacing them 12 inches apart along the bottom. For quick coverage, start with 4-6 plants per panel of climbing roses, clematis, or jasmine. These grow aggressively and fill gaps within 1-2 seasons. Water deeply after planting to encourage root establishment, and mulch with 2 inches of shredded bark to retain moisture.
Train the vines to climb by gently weaving them through the lattice slats as they grow. Avoid tying them tightly—let them find their own path. You’ll see new growth within 4-6 weeks, and by next season, the lattice will be completely obscured. For year-round privacy, add evergreen climbers like ivy or star jasmine to fill gaps when deciduous plants drop leaves.
💧 Step 5: Maintain and Enjoy Your Living Screen
Water the base of the lattice 2-3 times per week during the first growing season, then taper to once weekly once established. Fertilize with a balanced 10-10-10 formula in early spring and again after flowering to encourage lush growth. Prune vines in late winter to remove deadwood and shape the screen—this keeps it looking tidy and promotes airflow.
Here’s the best part: Your "door" isn’t just functional—it’s a focal point. Open it to reveal a hidden garden nook, or leave it closed for a secluded retreat. I’ve seen neighbors turn these into cozy reading spots or even mini herb gardens behind the lattice. The key is to let the plants do the work while you enjoy the privacy and charm.
Tips & tricks for perfect garden privacy screens
A few quick tricks that'll make all the difference in creating a sturdy, beautiful privacy screen that actually works.
The Foundation Factor: Don't rush the concrete curing in Step 2. That 24-hour wait is crucial for maximum stability—skipping it risks posts shifting when you attach the lattice. I've seen screens wobble after just a few months when people cut corners here. If you're in a hurry, consider using quick-setting concrete mix, but still let it cure fully before proceeding.
Door Swing Secret: When attaching hinges in Step 3, position them slightly lower than center on the door. This creates a natural downward swing that prevents the door from binding against the lattice when open. I learned this the hard way after struggling with a door that wouldn't close properly—now my doors swing smoothly and stay open effortlessly.
Plant Placement Strategy: For quickest coverage in Step 4, plant your fastest-growing vines (like jasmine) on the sides of the lattice where you want immediate privacy. Place slower-growing climbers (like roses) in the center—they'll fill in beautifully after the first season. This creates instant visual impact while building long-term structure.
Maintenance Hack: Mark your watering schedule with colored stakes at the base of each panel. This simple visual reminder prevents overwatering (which causes root rot) and ensures consistent moisture for your climbers. I use different colors for each season to adjust my watering frequency as plants mature.
Pro Tips for Garden With Door
- A few quick tricks that'll make all the difference in creating a sturdy, beautiful privacy screen that actually works.
- The Foundation Factor: Don't rush the concrete curing in Step 2.
- Door Swing Secret: When attaching hinges in Step 3, position them slightly lower than center on the door.
Frequently asked questions
Got questions about creating a garden with door privacy screen?
Here are answers to the most common ones to help you plan like a pro!
What’s the best material for a sturdy, long-lasting privacy screen?
A garden with door screen thrives with weather-resistant materials like cedar (naturally rot-resistant), composite wood (low-maintenance), or bamboo (eco-friendly). For durability, opt for treated lumber or metal frames. If you want a rustic look, lattice or trellis panels work too—just ensure they’re sealed against moisture.
How long does it take to build a privacy screen with a door?
For a DIYer with basic tools, expect 4–8 hours for a small-to-medium screen (6–10 ft long). Factor in drying time for paint/stain (24–48 hours) and assembly adjustments. Pro tip: Pre-cut materials and work in dry weather to speed up progress!
Can I add a door to any existing fence or screen?
Yes, but check your fence’s structural integrity first. A garden with door screen typically requires a sturdy frame (e.g., 2x4 posts) to support the door’s weight. If your fence is flimsy, reinforce it with additional posts or metal brackets. For retrofits, a sliding barn door or hinged panel often works best.
How do I match the door to my garden’s aesthetic?
Blend the door with your screen’s material and color palette! A rustic look? Choose a wooden door with a natural stain. Prefer modern? Opt for a sleek metal door with a black or matte finish. Don’t forget hardware—brass knobs add charm, while black iron feels industrial. Paint a sample swatch first to test colors in your space!
What’s the trickiest part of installing a door in a privacy screen?
The hinges and alignment are the biggest challenges! Use three hinges (not two) for heavy doors to prevent sagging. Mark hinge placement precisely before drilling, and Pre-assemble the door off-frame to test the swing before final installation. If the door rubs, sand the edges or adjust hinge screws slightly.
Wrapping up and next steps
A garden with door isn’t just about privacy—it’s about transforming your outdoor space into a serene, stylish retreat. Whether you’re using lattice panels, bamboo screens, or a cozy garden door, the key is blending function with charm.
The right materials and a little creativity can turn a simple idea into a stunning focal point.
Ready to take the next step? Start small—pick a section of your garden, gather your supplies, and let your imagination lead the way! 🌿✨ Your private oasis awaits—happy building!