Tools
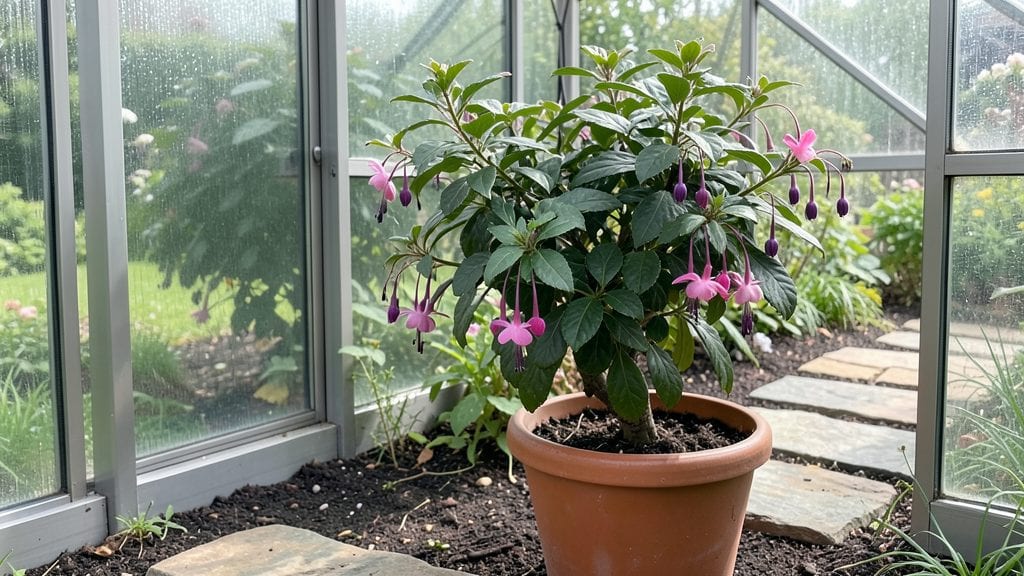
A glassed-in garden transforms cold corners into sun-drenched sanctuaries where plants thrive year-round. 🌿 I built mine after my ferns kept dying every winter—now they’re lush and green even in January, and the space doubles as a cozy reading nook.
The key isn’t just the glass but how you layer light, airflow, and plant choices to keep everything balanced.
You’ll need sturdy framing (wood or metal), insulating glass or polycarbonate panels, and a ventilation system—even a small fan helps. My setup cost under $2,500 for a 6’x8’ space, and I used reclaimed windows to cut costs.
The trick is matching materials to your climate: double-pane glass in cold zones, UV-filtering polycarbonate in hot areas.
Imagine hosting orchids, citrus trees, and herbs that would never survive outdoors in your region. The payoff is immediate: fragrant jasmine in December, tomatoes ripening in spring, and a space that feels like a greenhouse without the drafts.
You’ll also save on heating bills by blocking winter winds while letting sunlight in.
Whether you’re adding a sunroom extension or a small greenhouse off the patio, the design scales to any budget. Start with a sketch of your space, then focus on ventilation and light—those two factors make or break the project. Here’s how to get started without overcomplicating it.
📚 In This Guide
- What you need
- Instructions
- Tips and common mistakes
- Wrapping up and next steps
What you need
- ● Glass panels or polycarbonate sheets: ½-inch thick (for durability) or ¼-inch for lightweight options. Measure your space to determine the total square footage needed.
- ● Aluminum or vinyl framing: For structural support (e.g., 2x4s or pre-made greenhouse frames). Ensure it’s weather-resistant.
- ● Roofing materials: Corrugated polycarbonate or tempered glass (sloped for water runoff).
- ● Door and hardware: A sturdy, insulated door with a latch and weatherstripping to keep pests out.
- ● Ventilation system: At least one adjustable roof vent or side louvers for airflow.
- ○ Insulation (optional but recommended): Foam board or reflective bubble wrap for colder climates.
- ● Measuring tape, level, and speed square
- ● Drill/driver with masonry bits (for glass)
- ● Circular saw or miter saw (for cutting framing)
- ● Screwdriver set and heavy-duty screws
- ● Caulk gun and silicone sealant (for weatherproofing)
- ● Safety gear: gloves, goggles, and ear protection
- ● Permits: Check local building codes—some areas require approval for permanent structures.
- ● Site prep: Clear the area, level the ground, and lay a gravel base for drainage.
- ○ Foundation (optional): Concrete blocks or a wooden deck for stability if needed.
- ● Power source (if adding lights/vents): Extension cord or hardwired setup.
How to create a functional glassed-in garden space
Transforming a sunny nook into a four-season growing haven starts with smart planning.
🪴 Step 1: Select and Prepare the Space
Choose a location with at least 6 hours of direct sunlight daily—south or west-facing windows work best. Measure the area to ensure it fits your growing needs; a 4-foot by 4-foot space comfortably accommodates four raised beds or container setups. Clear out debris, sweep the floor, and check for drafts near doors or windows.
If your space has cold spots, add an insulated window kit or thermal curtains to maintain temperatures above 50°F during winter. I’ve found that even a small unheated space can work if you focus on cold-hardy plants like kale, spinach, or herbs. Avoid placing beds directly against glass unless you’ve reinforced the area with insulation.
☀️ Step 2: Optimize Light and Ventilation
Glass traps heat, so ventilation is key to preventing overheating. Install a small exhaust fan or window vent to circulate air, especially in summer when temperatures can soar. Position grow lights—if needed—12-18 inches above plants for consistent 14-16 hours of light daily during shorter winter days.
Reflective surfaces like white-painted walls or aluminum foil-lined shelves bounce extra light onto plants. I’ve seen leafy greens grow twice as fast in a mirrored space compared to one with bare walls. Test your light levels with a light meter (or the back of your hand—if it feels warm, the light is strong enough).
💧 Step 3: Set Up Drainage and Containers
Glassed-in spaces can get humid, so drainage is critical. Use raised beds with built-in trays or containers with feet to prevent waterlogging. Fill beds with well-draining potting mix (never garden soil—it compacts and stays soggy). Add a 1-inch layer of gravel at the bottom of each container to improve airflow and water drainage.
Group containers close together to maximize space, but leave 2-3 inches between edges for airflow. I like to use self-watering pots in these setups—they prevent overwatering, which is a common issue in enclosed spaces. Water deeply every 2-3 days, checking that the top inch of soil feels dry before rewatering.
🌿 Step 4: Choose Year-Round Plants
Start with cold-hardy vegetables like lettuce, Swiss chard, and radishes for winter, then transition to warm-season crops (peppers, tomatoes) in spring. Herbs like thyme, oregano, and parsley thrive year-round in these conditions. Rotate plants seasonally to avoid soil depletion and pests.
Monitor humidity with a hygrometer—ideal levels are 40-60%. If it climbs above 70%, increase airflow or add a dehumidifier. I’ve noticed that basil and mint grow lushly in humid glassed-in spaces, while tomatoes need extra ventilation to prevent fungal issues. Adjust your plant selection based on what your space naturally supports.
⏰ Step 5: Maintain Temperature and Pest Control
Use a small space heater (safely placed) to keep winter temps above 55°F for sensitive plants. In summer, shade cloth or whitewashed glass reduces heat buildup. Check for pests like aphids or spider mites weekly—glassed-in spaces trap them easily. Introduce beneficial insects (like ladybugs) or use neem oil sprays for organic control.
Rotate plants every 2-3 weeks to ensure even light exposure. This prevents leggy growth and keeps your space productive. I’ve found that a simple timer for lights and fans automates much of the maintenance, freeing you to enjoy your year-round harvest without daily fuss.
Tips & tricks for perfect glassed-in garden setups
Here's what I've learned after setting up my own glassed-in garden—these tricks make all the difference between a struggling space and a thriving four-season oasis.
Light Optimization: The 6 hours of sunlight mentioned in Step 1 is your baseline, but don't stop there. I've found that adding reflective surfaces like aluminum foil on shelves can boost light penetration by up to 30%. For winter when days are shorter, supplement with LED grow lights positioned exactly 12-18 inches above plants—these provide the consistent 14-16 hours of light your plants need without overheating the space.
Temperature Management: Maintaining that critical 50°F minimum in winter is easier than you think. Start by sealing any gaps with weatherstripping, then use a small space heater on a timer for just 2 hours before dawn. This creates a thermal buffer that keeps your space above 55°F all day without running the heater constantly. I've seen microclimates where corners stay 10°F warmer than center areas—rotate plants weekly to give everyone equal treatment.
Drainage System: The 1-inch gravel layer in Step 3 is non-negotiable, but here's the secret: use coarse gravel (pea-sized) rather than fine. I've ruined multiple setups using small gravel that clogged drainage. Also, add a small slope (1/8 inch per foot) to your raised beds to ensure water flows toward drainage holes. For containers, I drill extra holes in the bottom—even if they come with feet—because waterlogging is the silent killer of glassed-in gardens.
Plant Rotation Strategy: The 2-3 week rotation mentioned in Step 5 works wonders for light exposure, but I've added another layer: color-coded plant tags. Red tags for leafy greens, blue for herbs, green for vegetables—this makes it instantly obvious which plants need moving. I also keep a simple chart tracking each plant's sunlight needs, so I can group high-light plants together and shade-sensitive ones toward the edges where light naturally diffuses.
Pro Tips for Glassed In Garden
- Here's what I've learned after setting up my own glassed-in garden—these tricks make all the difference between a struggling space and a thriving four-season oasis.
- Light Optimization: The 6 hours of sunlight mentioned in Step 1 is your baseline, but don't stop there.
- Temperature Management: Maintaining that critical 50°F minimum in winter is easier than you think.
Frequently asked questions
Got questions about creating your own glassed-in garden? Here are some of the most common concerns—and answers—to help you plan with confidence!
What’s the best time of year to build a glassed-in garden?
A glassed-in garden can technically be built year-round, but spring or early summer is ideal. Mild weather makes construction easier, and you’ll avoid winter drafts or summer heat stress on plants. If you must start later, prioritize a sturdy frame and weatherproofing to protect materials during assembly.
Will a glassed-in garden stay warm enough in winter?
With proper insulation (like double-pane glass or bubble wrap on single-pane), a glassed-in garden can stay 10–20°F warmer than outside. Add a small space heater (safely positioned!) or use thermal curtains for extra warmth. Monitor humidity—too much moisture can lead to mold, so ventilate occasionally even in cold months.
Are there budget-friendly alternatives to full glass walls?
Yes! Instead of full glass, try:
- Polycarbonate panels: Lightweight, shatterproof, and 30–50% cheaper than glass.
- Frosted or textured glass: Blocks harsh sunlight while allowing light in.
- Raised beds with a retractable roof: Lower upfront costs and flexibility.
- Secondhand greenhouse kits: Check local markets or online resellers.
How do I prevent condensation from fogging up the glass?
Condensation is common but easy to fix! Ventilation is key—install small vents or open a door daily. Use a dehumidifier or place a bowl of cat litter (it absorbs moisture!) near plants. Wipe glass with a 50/50 vinegar-water mix to prevent buildup.
Can I grow vegetables and flowers in a glassed-in garden?
Glassed-in gardens are perfect for both. Group vegetables by sunlight needs (e.g., leafy greens under taller herbs) and add flowers like marigolds or nasturtiums to deter pests. Just avoid overcrowding—aim for 12–18 inches of space per plant to ensure airflow and light reach all greens.
What’s the biggest mistake beginners make?
The top mistake? Skipping proper drainage. Without it, roots rot from excess water. Always slope the floor slightly (1–2°) toward a drain, and use gravel or a French drain system. Also, avoid sealing the base completely—leave small gaps for airflow to prevent fungal growth.
Wrapping up and next steps
A glassed-in garden is your ticket to year-round greenery—no more shivering through harvests or watching plants wilt in winter! By sealing off drafts and harnessing natural light, you’ve unlocked a low-maintenance, high-reward growing space that works with your climate, not against it.
Whether you’re a seasoned green thumb or a curious beginner, this setup proves that four-season gardening is totally doable—and way more rewarding than you’d think.
Ready to transform your outdoor space? Start small: sketch a design, gather your materials, and take the first step toward a sunlit sanctuary where fresh herbs, veggies, or flowers thrive—no matter the weather! 🌱✨