Size
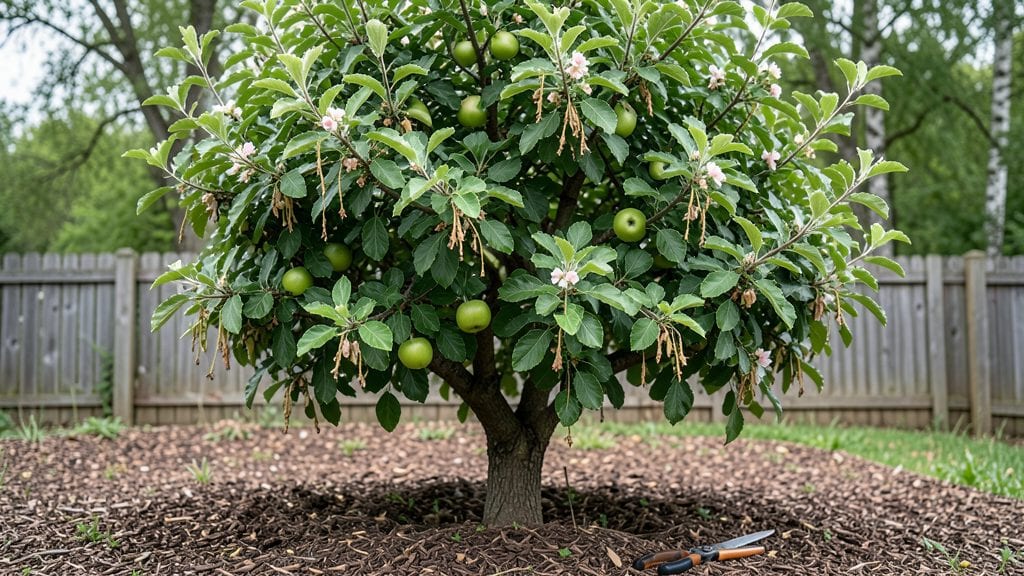
Growing a green apple tree in a garden isn’t just about planting a seed—it’s about creating a tiny orchard that gives you crisp, sweet apples year after year, even in small spaces. 🌱 I learned the hard way that not all apple varieties thrive in tight yards, but the right dwarf tree can produce a harvest in just a few years with minimal fuss.
The secret lies in choosing compact varieties like 'Columnar' or 'Liberty,' which stay small enough for patios but still pack a flavorful punch.
Start with well-draining soil mixed with compost, and pick a spot that gets at least 6-8 hours of sunlight daily—no shady corners here. Water deeply once a week (more in summer), and mulch around the base to keep roots cool and moist.
Pruning in late winter keeps the tree manageable and encourages better fruit production, while a light spray of neem oil in spring wards off pests before they become a problem.
By year three, you’ll be picking apples straight from the tree, and with proper care, these trees can live for decades. The best part? You’ll have fresh fruit for pies, snacks, or selling at local markets—all without needing a full backyard.
Let’s get those roots in the ground and start harvesting!
Works for containers too—just use a 15-gallon pot for dwarf varieties and keep it near a sunny wall. The key is patience and consistency, but the payoff is worth every drop of water. Ready to grow your own green gold?
📚 In This Guide
- What you need
- Instructions
- Tips and common mistakes
- Wrapping up and next steps
What you need
- ● Green apple tree sapling or bare-root plant: Choose a dwarf variety (e.g., Malus domestica ‘Granny Smith’ or ‘Evercrisp’) for small spaces.
- ● Quantity: 1-2 plants (for pollination, pick two different varieties if possible).
- ● Well-draining potting mix or garden soil: For containers: 10-15 gallons of a mix with 50% potting soil, 30% compost, and 20% perlite/sand.
- ● For in-ground: Amend soil with 3-4 inches of compost and a slow-release fertilizer (10-10-10 ratio).
- ● Container (if applicable): Minimum 15-gallon pot (20+ gallons for mature trees).
- ● Ensure pots have drainage holes and are made of terracotta or fabric.
- ● Organic mulch: Shredded bark, straw, or wood chips (2-3 inches around the base).
- ● Watering can or hose with a gentle spray nozzle.
- ● Pruning shears or small hand saw (for shaping and harvesting).
- ● Trowel or small shovel (for planting and soil prep).
- ● Gloves (to protect your hands from thorns and dirt).
- ○ pH testing kit (optional but helpful—aim for 6.0-7.0).
- ● Epsom salt (magnesium sulfate) for leaf health (1 tbsp per gallon of water, applied monthly).
- ● Apple tree spray (organic neem oil or copper fungicide for pests/diseases).
- ● Cage or trellis for dwarf varieties (to save space and support growth).
- ● Drip irrigation system (for consistent watering in containers).
Step-by-Step guide to growing a green apple tree in small spaces
Here's how to cultivate a thriving apple tree even with limited yard space.
🪴 Step 1: Choose the Right Container and Soil
Select a large container with a 12-inch diameter and 18-inch depth—apple trees need room for roots to spread. I prefer a fabric grow bag because it prevents root circling and allows excess moisture to evaporate. Fill the bottom third with drainage rocks to keep roots from sitting in water.
Use a well-draining potting mix (not garden soil) blended with 20% compost for nutrients. Apple trees love slightly acidic soil, so add a handful of sulfur-based soil acidifier if your mix isn’t naturally acidic. Tap the container gently to settle the soil without compacting it—roots need air to grow.
🌱 Step 2: Plant the Tree and Prune for Shape
Dig a hole in the center of the container twice as wide as the root ball but no deeper. Place your bare-root apple tree (or container-grown sapling) so the graft union sits 2 inches above soil level. This prevents rot and ensures strong regrowth. Backfill with soil, pressing lightly to remove air pockets.
Prune immediately after planting to shape the tree. Remove any dead, crossing, or inward-growing branches with clean sterilized pruners. Leave 3-4 main branches spaced evenly around the trunk—this encourages a balanced shape. Water deeply right after pruning to help the tree recover.
☀️ Step 3: Provide Sunlight and Water Consistently
Apple trees need full sun (6-8 hours daily) to produce fruit, so place your container in the sunniest spot possible. If you’re in a shady area, supplement with a grow light for 12-14 hours a day. You’ll see yellowing leaves if light is insufficient—this is your cue to move the tree closer to a sunny window or add artificial light.
Water deeply every 2-3 days until the top 2 inches of soil feel dry. Apple trees hate soggy roots, so always check moisture before watering. In hot weather, mulch the surface with 2 inches of wood chips to retain moisture and keep roots cool. Avoid overwatering—drooping leaves signal stress, but so does crispy soil.
✂️ Step 4: Fertilize and Pollinate for Fruit Production
Feed your tree once in early spring with a balanced 10-10-10 fertilizer (follow package instructions). Apple trees need cross-pollination to produce fruit, so plant a second variety nearby if your tree isn’t self-pollinating. Bees handle this naturally, but in small spaces, you might need to hand-pollinate with a soft brush in early spring.
Watch for blooms in spring—this means your tree is healthy and ready for fruit. Thin young fruits to 6 inches apart once they’re golf-ball sized to ensure larger, healthier apples. Remove any damaged or misshapen fruit to redirect the tree’s energy. You’ll know you’re on track when branches bend slightly under the weight of maturing fruit.
🍎 Step 5: Harvest and Overwinter for Next Year
Harvest apples when they easily pull from the tree and have a slight give when gently squeezed. Most varieties ripen in late summer to fall, but check your specific type’s timeline. Store harvested apples in a cool, dark place (like a basement) to extend freshness for months.
Before winter, move the container to a sheltered spot (like a garage or against a wall) to protect roots from freezing. Wrap the trunk in burlap if temperatures drop below 20°F—this prevents cracking. Prune again in late winter to remove dead wood and shape the tree for next year’s growth. You’ll see fresh shoots in spring—proof your tree is thriving!
Tips & tricks for perfect green apple tree growth in small spaces
Small spaces don't have to limit your apple tree dreams—here's how to maximize success with these practical tips.
Container Size Matters: That 12-inch diameter and 18-inch depth isn't just a suggestion—it's crucial for root development. I've seen trees in smaller pots struggle with stunted growth. If you're tempted to go bigger, remember that larger containers need more soil volume, which can dry out faster. For every extra 6 inches in diameter, add 2 inches of depth to maintain the proper ratio.
Pruning Precision: When shaping your tree in Step 2, focus on creating an open center rather than just removing problematic branches. This allows sunlight to reach the inner branches, which is especially important for container-grown trees. I aim for a vase-like shape with branches spreading outward—this maximizes fruit production space in your limited container. The 3-4 main branches should be spaced about 6 inches apart at their base.
Lighting Strategy: The 6-8 hours of sunlight requirement is non-negotiable, but I've found that supplementing with a grow light for 12-14 hours during shorter winter days makes a world of difference. Position the light about 6 inches above the tree and adjust as it grows. You'll notice leaves stay darker green and the tree grows more vigorously when it gets that extra light, especially in early spring when natural light is still limited.
Winter Protection: That 20°F threshold for wrapping your trunk is critical—below this temperature, apple tree bark can crack. I've had success using bubble wrap wrapped around burlap for extra insulation. Also, consider moving your container to a spot against an exterior wall where it gets some winter sun—this can make a 10°F difference in temperature protection compared to an open garage.
Pro Tips for Green Apple Tree Grow A Garden
- Small spaces don't have to limit your apple tree dreams—here's how to maximize success with these practical tips.
- Container Size Matters: That 12-inch diameter and 18-inch depth isn't just a suggestion—it's crucial for root development.
- Pruning Precision: When shaping your tree in Step 2, focus on creating an open center rather than just removing problematic branches.
Frequently asked questions
Got questions about growing your own green apple tree in a small garden? You’re not alone! Here are some of the most common queries—and their practical answers—to help you grow confidently, even in limited space.
How long does it take for a green apple tree to bear fruit?
A young green apple tree (like ‘Granny Smith’) typically takes 3–5 years to bear fruit from seed, but grafted trees can produce apples in just 1–2 years. Patience is key—choose dwarf varieties for faster rewards in small gardens!
When is the best time to plant a green apple tree in my climate?
The ideal time depends on your zone:
- Cool climates (Zones 5–7): Plant in early spring (after frost) or fall (6–8 weeks before first frost).
- Warm climates (Zones 8–10): Plant in late fall or winter to avoid summer heat stress.
Can I grow a green apple tree in a pot or small space?
Dwarf varieties (like ‘Columnar’ or ‘Spindle’ types) thrive in 5–15 gallon containers and need only 3–6 feet of space. Ensure the pot has drainage holes and use well-draining soil. Move pots to a sunny spot (6+ hours of light) and rotate them weekly for even growth.
What pests or diseases should I watch for on my green apple tree?
Common issues include:
- Pests: Aphids, codling moths, and apple maggots. Use neem oil or insecticidal soap for mild infestations.
- Diseases: Apple scab or powdery mildew. Prune for airflow and apply copper fungicide preventatively.
How do I know if my green apple tree needs pollination?
Most green apple varieties (like ‘Granny Smith’) are self-pollinating, but fruit set improves with a second tree nearby. If flowers don’t turn into fruit, hand-pollinate with a small brush or plant a compatible variety (e.g., ‘Braeburn’). Bees help too—plant pollinator-friendly flowers nearby!
Wrapping up and next steps
Growing a green apple tree in your garden—even in small spaces—isn’t just possible; it’s a rewarding journey that brings fresh, crisp fruit right to your doorstep. 🌱 Whether you’re planting a dwarf variety in a container or nurturing a young sapling, the key lies in patience, proper care, and a little creativity.
With the right techniques, you’ll enjoy a year-round harvest, from blossoms in spring to apples in fall—and maybe even a few surprises along the way!
Now that you’re armed with tips and tricks, it’s time to roll up your sleeves and get growing!
Start by choosing your spot, gathering your tools, and planting with confidence. Next up? Keep an eye on your tree’s progress, adjust care as needed, and before you know it, you’ll be savoring homegrown green apples—one bite at a time.