
Vegetables
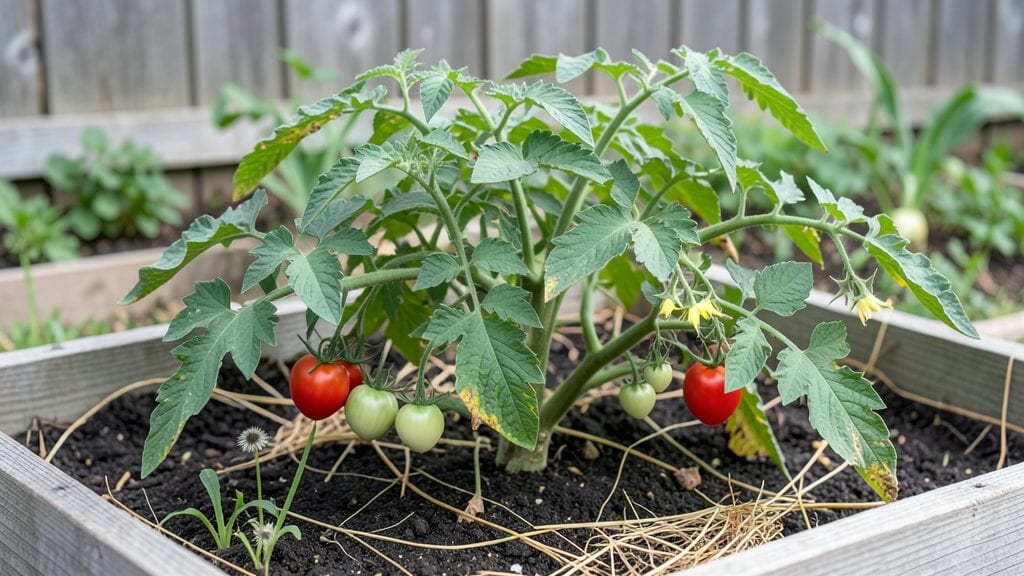
My home vegetable gardens have taught me that fresh tomatoes don’t need a backyard—just the right containers and a little planning. 🌱 The first time I grew cherry tomatoes on my fire escape, I realized how much space-saving tricks could change everything.
Now I’m sharing how to turn even a tiny balcony into a productive growing space that delivers harvests from spring to fall.
You don’t need fancy setups—just containers that match your plants’ needs. A 5-gallon pot works for herbs, while tomatoes and peppers thrive in 10-15 gallon containers.
The key is sunlight: place your setup where it gets at least 6 hours of direct light daily, and you’ll see faster growth and bigger yields than you’d expect. Even in small spaces, the right layout makes all the difference.
By summer’s end, you’ll be snipping basil for homemade pesto, harvesting zucchini straight from the pot, and watching neighbors ask where you got your “store-bought” veggies.
The best part? No weeding, no soil-borne diseases, and no wasted space. This system works for apartments, patios, or even sunny windowsills—no matter where you live.
We’ll cover container sizes, companion planting tricks, and how to rotate crops for continuous harvests. Whether you’re a beginner or a seasoned gardener looking to maximize space, this approach delivers foolproof results without the fuss. Let’s get those containers planted!
📚 In This Guide
- What you need
- Instructions
- Tips and common mistakes
- Wrapping up and next steps
What you need
- ● Containers: 5–10+ containers (5–10 gallons each, with drainage holes). Options: fabric grow bags, plastic pots, or wooden boxes.
- ○ Self-watering planters (optional but handy for busy gardeners!).
- ● Growing Medium: High-quality potting mix (avoid garden soil—it compacts!).
- ● Compost or worm castings (1–2 cups per container for nutrients).
- ○ Perlite or vermiculite (10% mix for aeration, optional but recommended).
- ● Seeds or Seedlings: Choose container-friendly veggies like lettuce, herbs (basil, parsley), cherry tomatoes, peppers, or dwarf varieties of beans/cucumbers.
- ● Seed starting kit (if germinating indoors, includes seed trays and domes).
- ● Tools: Hand trowel or small garden fork.
- ● Pruners (for harvesting/herb trimming).
- ● Watering can with a spout (or a hose with a gentle nozzle).
- ○ pH testing kit (optional but helpful for soil health).
- ● Fertilizers: Slow-release granules or liquid organic fertilizer (like fish emulsion).
- ● Mulch: Straw or shredded leaves to retain moisture.
- ● Grow lights: LED clips or full-spectrum bulbs for indoor setups.
- ● Trellis or stakes: For vining plants (e.g., cucumbers, peas).
- ● Label markers: To track plant varieties and harvest dates!
Step-by-step guide to designing your home vegetable garden in containers
Here's how to create a thriving, space-efficient garden that delivers fresh produce all year.
🪴 Step 1: Choose and Prepare Your Containers
Start with containers that are at least 12 inches deep—deeper for root crops like carrots or potatoes. I recommend using 5-gallon buckets or 18-inch diameter pots for each plant, as they provide enough room for roots to spread. Make sure every container has drainage holes—no exceptions. If your pots don’t, drill them yourself using a 1/4-inch drill bit.
Line the bottom of each container with 2-3 inches of gravel or broken pottery shards. This creates an air gap that prevents root rot, which is especially important in containers where water can pool. For the 4 plants you’re growing, you’ll need at least 4 containers—one per plant—to avoid overcrowding and competition for nutrients.
🌱 Step 2: Fill with the Right Soil Mix
Fill each container with a high-quality potting mix, not garden soil. I mix mine with 20% perlite or vermiculite to improve drainage and aeration. Fill the container to about 1 inch below the rim, leaving space for watering. Press the soil down lightly to remove air pockets, but don’t compact it too tightly—you want it loose enough for roots to penetrate easily.
Water the soil thoroughly before planting. You’ll know it’s ready when water drains freely from the bottom holes and the surface feels evenly moist but not soggy. This step ensures your plants start with consistent moisture, reducing the risk of transplant shock. For the 4 plants, you’ll need about 4 gallons of potting mix total, depending on container size.
☀️ Step 3: Plant Your Vegetables for Year-Round Success
Choose vegetables that thrive in containers and match your climate’s growing seasons. For example, leafy greens like lettuce or spinach grow well in cooler months, while tomatoes and peppers prefer warmer temperatures. Plant seeds or seedlings according to the package instructions—usually 1/4 to 1/2 inch deep—and space them appropriately. For 4 plants, you can start with 4 seed packets or 4 young seedlings.
After planting, water gently but deeply to settle the soil around the roots. Avoid wetting the leaves, as this can cause fungal diseases. Place your containers in a spot that gets at least 6-8 hours of sunlight daily. If you’re growing in a shaded area, opt for shade-tolerant varieties like Swiss chard or kale. Watch for the first signs of new growth—this tells you your plants are established and ready for regular care.
💧 Step 4: Maintain Moisture and Nutrients
Containers dry out faster than in-ground gardens, so check the soil daily during hot weather. Water when the top inch of soil feels dry, and always water deeply until it drains from the bottom. Use a watering can with a narrow spout to direct water to the soil without disturbing the plants. For the 4 plants, you’ll likely water each container every 1-2 days in summer, depending on heat and humidity.
Feed your plants every 2-4 weeks with a balanced, water-soluble fertilizer. I use a 10-10-10 mix diluted to half strength to avoid over-fertilizing. Look for signs of nutrient deficiency, like yellowing leaves or stunted growth, and adjust your feeding schedule as needed. Mulch the soil surface with 1-2 inches of straw or shredded leaves to retain moisture and suppress weeds.
✂️ Step 5: Harvest and Prune for Continuous Growth
Harvest your vegetables regularly to encourage more production. For leafy greens, pick outer leaves as they mature, leaving the inner growth intact. For tomatoes or peppers, harvest when fully ripe to prevent overcrowding and disease. Use clean, sharp scissors or pruners to avoid damaging the plant. For the 4 plants, you’ll likely harvest every 1-2 weeks, depending on the variety.
Prune any dead or yellowing leaves immediately to keep your plants healthy. Pinch back leggy growth to encourage bushier plants, especially for herbs or compact vegetables. If you notice pests like aphids or caterpillars, treat them with neem oil or insecticidal soap. With consistent care, your container garden will produce fresh vegetables for months—even in small spaces.
Tips & tricks for perfect home vegetable gardens in containers
A few key strategies will help you avoid common pitfalls and maximize your container garden's success.
Container Depth Matters: The 12-inch minimum depth is crucial for most vegetables, but root crops like carrots or potatoes need even deeper containers—aim for 18 inches. I've learned the hard way that shallow containers stunt root growth, leading to smaller harvests. For your 4 plants, if you're growing root vegetables, invest in deeper pots or buckets right from the start.
The Drainage Layer Secret: That 2-3 inches of gravel or broken pottery isn't just about drainage—it's about creating an oxygen-rich zone at the bottom. When roots hit this air pocket, they grow stronger and healthier. Pro tip: Use clean river rocks or leftover terracotta shards from broken pots. Just make sure they're sterile to prevent disease.
Soil Mix Science: The 20% perlite or vermiculite isn't arbitrary—it's about creating the perfect balance. This mix prevents compaction while still holding moisture. I like to sift my potting mix before adding it to remove any large clumps that could create air pockets. Also, never use garden soil—it compacts in containers and blocks drainage.
Sunlight Strategy: Those 6-8 hours of sunlight are non-negotiable, but placement matters just as much. South-facing windowsills or balconies get the most light. If you're limited on space, consider reflective surfaces like white walls or mirrors to bounce extra light onto your containers. And remember, leafy greens can tolerate partial shade, but tomatoes and peppers absolutely need full sun.
Pro Tips for Home Vegetable Gardens
- A few key strategies will help you avoid common pitfalls and maximize your container garden's success.
- Container Depth Matters: The 12-inch minimum depth is crucial for most vegetables, but root crops like carrots or potatoes need even deeper containers—aim for 18 inches.
- The Drainage Layer Secret: That 2-3 inches of gravel or broken pottery isn't just about drainage—it's about creating an oxygen-rich zone at the bottom.
Frequently asked questions
Got questions about starting or maintaining a home vegetable garden in containers? You’re not alone! Here are answers to the most common queries to help you grow with confidence.
What’s the easiest vegetable to grow in containers for beginners?
Start with leafy greens like lettuce, spinach, or kale—they thrive in shallow containers and grow quickly. Cherry tomatoes and bush beans are also beginner-friendly! Choose compact varieties labeled "bush" or "dwarf" to save space.
How long does it take to harvest vegetables in containers?
Harvest times vary by plant, but most container veggies are ready in 4–12 weeks. For example:
Containers dry out faster than ground soil, so water daily or every other day in hot weather. Stick your finger 1–2 inches into the soil—if it’s dry, water thoroughly until it drains from the bottom. Morning watering reduces evaporation and fungal risks. Prevent pests with physical barriers like fine mesh over containers or companion planting (e.g., basil with tomatoes). For mild infestations, spray neem oil or introduce beneficial insects like ladybugs. Avoid chemicals—they can harm your plants and pollinators! Yes! Use seasonal adjustments:
Check seed packets for specific timelines—patience pays off with fresh, homegrown flavor!
How often should I water container gardens?
What’s the best way to deal with pests in small-space gardens?
Can I grow vegetables in containers year-round?
Extend growing seasons with row covers or a small greenhouse. Just ensure containers have drainage to prevent root rot in cooler months.
Wrapping up and next steps
Starting a home vegetable garden in containers is more than just a hobby—it’s a rewarding journey to fresher, tastier produce right at your doorstep. Whether you’re a beginner or a seasoned gardener, container gardening makes year-round harvests achievable, no matter your space or climate.
With the right tools, a little patience, and a dash of creativity, you’ll soon be enjoying homegrown veggies that outshine anything from the store! 🌱
Ready to dig in? Start small—pick one or two easy crops like lettuce or herbs, gather your supplies, and take that first step today. Your future self (and your taste buds!) will thank you.