
Tools
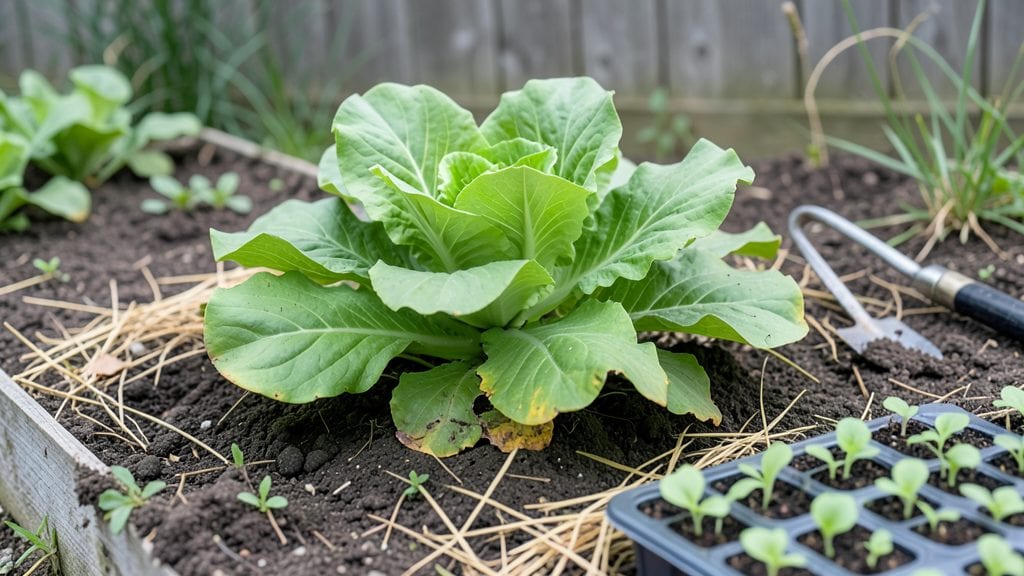
My homemade garden bed transformed my backyard from a patch of dirt to a thriving oasis where tomatoes, herbs, and flowers grow without fighting for nutrients.
The secret isn’t expensive lumber or fancy tools—it’s a layered soil mix that mimics nature’s perfect recipe, keeping plants fed and happy all season long.
You’ll need basic supplies: untreated wood or bricks for borders, cardboard to smother weeds, and a mix of compost, topsoil, and organic matter like leaf mold or aged manure. The whole project takes a few hours for a 4x8-foot bed, and the cost is a fraction of store-bought soil.
I built mine in my driveway first—no yard required—and now it’s the envy of the neighborhood.
What you end up with is a bed that warms up faster in spring, drains well after rain, and holds moisture without wilting plants by noon. My basil stays lush and fragrant all summer, and the strawberries produce twice as much as they did in the ground.
The best part? You can customize layers for heavy feeders like peppers or delicate greens like lettuce.
Works for urban balconies, suburban backyards, or even a sunny windowsill with container adaptations. Let’s get your bed built—and your plants thriving—without breaking the bank or the back.
📚 In This Guide
- What you need
- Instructions
- Tips and common mistakes
- Wrapping up and next steps
What you need
- ● Cardboard or landscape fabric (1-2 sheets, 3-4 ft wide) – Acts as a weed barrier and decomposes naturally.
- ○ Brown cardboard or newspaper (optional but recommended) – For smothering weeds before layering.
- ● Compost or aged manure (2-3 cubic feet per 4x4 ft bed) – The nutrient-rich base for your soil layers.
- ● Leaf mold or shredded leaves (1-2 cubic feet) – Adds organic matter and improves drainage.
- ● Straw or dry grass clippings (1-2 cubic feet) – Helps retain moisture and insulates roots.
- ● Garden soil or topsoil (1-2 cubic feet) – For the final layer where plants will root.
- ○ Wooden planks or bricks (optional for raised beds) – 2x4s or cedar planks (4-6 pieces, 8 ft long) to frame the bed.
- ● Garden twine or burlap strips – For securing layers if needed.
- ● Garden fork or spade – For turning soil and mixing layers.
- ● Wheelbarrow or large bucket – To haul materials easily.
- ● Measuring tape – Ensures your bed dimensions are perfect.
- ● Gloves – Protects your hands from thorns and rough materials.
- ● Watering can or hose – Keeps layers moist during assembly.
- ● Biochar or perlite – Improves aeration and water retention.
- ● Compost tea or worm castings – Boosts microbial activity.
- ● Mulch (straw, wood chips) – Preserves moisture and suppresses weeds.
- ● Drip irrigation kit – For efficient watering once planted.
Step-by-Step instructions for building a layered homemade garden bed
This method transforms any space into a thriving garden with rich, fertile soil that holds moisture and nutrients all season long.
Choose and Prepare Your Garden Site
Select a flat, easily accessible spot with at least 6 hours of sunlight daily for most vegetables and herbs. Clear the area of weeds, rocks, and debris—this prevents competition for nutrients and keeps your layers clean. I like to mark the bed’s dimensions with stakes and string to visualize the space before digging.
If your soil is compacted or clay-heavy, loosen the top 6 inches with a shovel or tiller. This helps roots penetrate the new layered soil more easily. Avoid working the soil when it’s wet—it sticks to tools and compacts further. Instead, wait until it’s dry enough to crumble in your hand.
Build the Raised Bed Frame (If Using One)
For a 4-foot by 8-foot bed, construct a frame using 2x4 lumber or repurposed wood like cinder blocks or bricks. I prefer untreated wood because it lasts longer and won’t leach chemicals into the soil. Assemble the frame with 2.5-inch deck screws or galvanized nails, ensuring the corners are square and sturdy.
Line the bottom of the frame with cardboard to block weeds from invading your layers. Overlap the edges and cut to fit snugly. This step is optional if you’re creating an in-ground bed, but it’s a game-changer for containing soil and reducing maintenance.
Layer the Soil for Optimal Drainage and Fertility
Start with a 4-inch base layer of coarse material—I use wood chips or straw—to improve drainage and prevent compaction. This layer breaks down slowly, adding organic matter over time. Next, add a 2-inch layer of compost to introduce beneficial microbes and nutrients.
Follow with a 6-inch layer of topsoil, mixing in a 1-inch layer of perlite or coarse sand if your soil drains poorly. This ensures roots have plenty of oxygen and water moves freely. Avoid filling the bed completely—leave 2-3 inches at the top for future top-dressing with mulch or compost.
Plant and Mulch for Long-Term Success
Once the layers are in place, fluff the soil with your hands or a rake to create a fine, crumbly texture. Plant your seeds or seedlings according to their spacing needs—most vegetables thrive when spaced 12-18 inches apart. Water gently but thoroughly to settle the soil around the roots.
Top the bed with a 2-inch layer of mulch, like straw or shredded leaves, to retain moisture and suppress weeds. Replenish the mulch every 4-6 weeks or as it breaks down. This keeps the soil consistently fertile and reduces the need for frequent watering.
Maintain and Refresh the Bed Seasonally
Every spring and fall, add a 1-inch layer of compost to the surface and mix it lightly into the top 2 inches of soil. This replenishes nutrients and encourages healthy root growth. If you notice pests or diseases, remove affected plants immediately and replace the soil in that area with fresh compost.
Monitor the soil moisture weekly—stick your finger 1 inch deep into the soil. If it feels dry, water deeply until moisture reaches 6 inches down. Overwatering is just as harmful as underwatering, so let the top layer dry slightly between waterings. With this layered approach, your garden bed will stay productive and vibrant for years.
Tips & tricks for perfect homemade garden beds
Building a thriving garden bed isn't just about throwing dirt in a box—it's about creating a layered ecosystem that works for your plants. Here's what I've learned from years of trial and error to make your layered garden bed truly exceptional.
Site Selection Secret: The 6 hours of sunlight mentioned in Step 1 is crucial, but don't overlook the wind factor. Position your bed where it gets morning sun but has some afternoon shade if you live in a hot climate. This prevents the soil from drying out too quickly while protecting delicate plants from intense afternoon rays. I've found that east-facing beds often perform best year-round.
Layering Technique: When building your soil layers in Step 3, think of it like a lasagna—each layer serves a specific purpose. The 4-inch base of wood chips or straw is particularly important for drainage, but don't use treated wood chips as they can leach chemicals. For the 6-inch topsoil layer, consider mixing in some worm castings if available—they're like liquid gold for plant roots, providing immediate nutrients and beneficial microbes.
Frame Construction: If you're building a raised bed frame as in Step 2, the 2.5-inch deck screws are perfect, but here's a pro tip: pre-drill holes to prevent wood splitting, especially if you're using reclaimed wood. For the cardboard weed barrier, use only plain, non-glossy cardboard—no colored or waxy papers that might contain harmful chemicals. This simple step can save you hours of weeding later.
Maintenance Strategy: The seasonal maintenance in Step 5 is where most gardeners fall short. I've found that keeping a small notebook to track when you last added compost and mulch helps maintain consistency. Also, consider adding a thin layer of coffee grounds to your compost in spring—they're acidic and perfect for plants like blueberries or tomatoes that love slightly acidic soil.
Pro Tips for Homemade Garden Bed
- Building a thriving garden bed isn't just about throwing dirt in a box—it's about creating a layered ecosystem that works for your plants.
- Site Selection Secret: The 6 hours of sunlight mentioned in Step 1 is crucial, but don't overlook the wind factor.
- Layering Technique: When building your soil layers in Step 3, think of it like a lasagna—each layer serves a specific purpose.
Frequently asked questions
Got questions about building your own homemade garden bed? You’re not alone! Here are answers to the most common queries to help you create a thriving, low-maintenance space for your plants.
What’s the best time of year to build a homemade garden bed?
Spring or early fall are ideal! Soil is workable, and you avoid extreme heat or frost. In mild climates, you can build year-round, but avoid waterlogged ground after heavy rains or freezing temperatures. Plan ahead—layering takes time, and letting the bed settle prevents sinking.
Can I use free or cheap materials like grass clippings or leaves?
Grass clippings (dried), leaves, and straw make great brown layers for carbon-rich material. Avoid diseased plants or weeds with deep roots. Balance them with green layers (like kitchen scraps) to avoid mold. Just shred larger materials for faster decomposition—your wallet and worms will thank you!
How do I keep pests out of my homemade garden bed?
Start with a sturdy barrier like hardware cloth (bury it 6–12 inches deep) to deter burrowing critters. Use compost tea or diatomaceous earth for organic pest control. Plant pest-repelling companions like marigolds, basil, or garlic nearby. Avoid overwatering—soggy beds attract slugs and fungi.
Will my homemade bed stay warm enough for cold-weather plants?
Yes! Dark, thick layers (like straw or wood chips) insulate soil, keeping roots warmer in winter and cooler in summer. Add a 3–4 inch mulch layer on top to retain heat. For extra protection, use row covers or cold frames for frost-sensitive plants. Observe your microclimate—beds in full sun warm faster than shaded ones.
What do I do if my homemade bed smells bad or attracts flies?
Bad odors usually mean too much green material (like fresh grass or food scraps) without enough browns. Fluff the layers to aerate, add dry leaves or shredded newspaper, and avoid overwatering. If flies appear, cover the bed with a tarp for a few days to suffocate pests, then re-layer with balanced materials.
How wide should my homemade garden bed be?
Aim for 3–4 feet wide—this lets you reach the center without compacting soil. Wider beds (up to 6 feet) work if you’re okay with stepping on them occasionally. Narrow beds (2 feet) are great for borders or small spaces but may require more frequent watering. Raised beds can be any width, but deeper is better for root crops!
Wrapping up and next steps
Creating your own homemade garden bed is a rewarding project that unlocks the potential for lush, thriving plants all year round—without the hassle of traditional gardening! 🌱 By layering organic materials like compost, straw, and soil, you’re not just building a bed; you’re crafting a nutrient-rich ecosystem that works with nature.
The best part? You’ll save money, reduce waste, and enjoy fresher harvests in no time.
Now that you’re armed with the how-to, it’s time to roll up your sleeves and start digging! Pick a sunny spot, gather your supplies, and let your green thumb shine. Ready to transform your backyard? Start planning your first layer today!