Pests
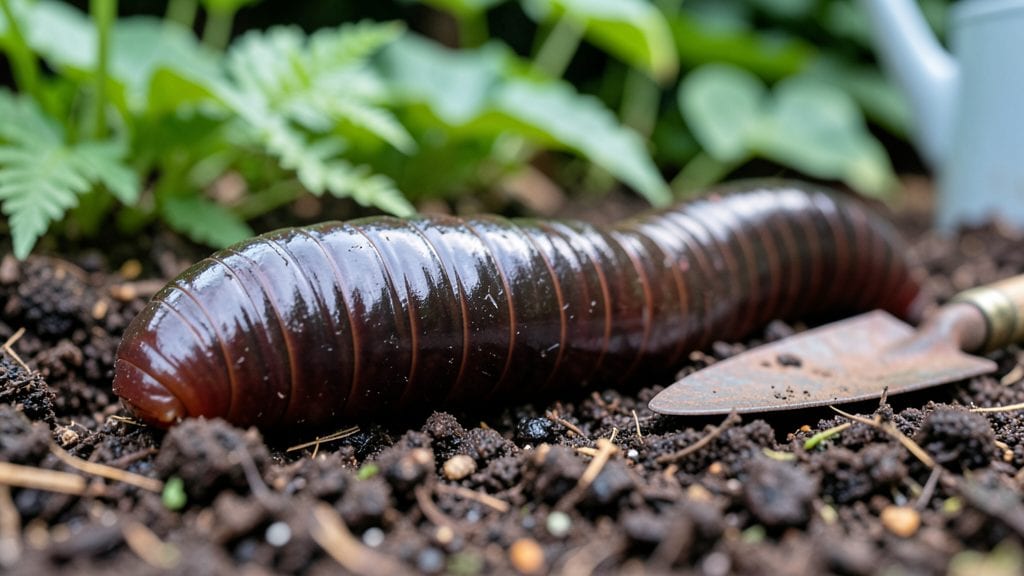
Getting garden worms isn't about digging up dirt—it's about creating the perfect underground hotel. 🌱 I used to think worms were rare until I learned their secret: they thrive where the soil stays moist, rich, and pesticide-free. The right setup turns your yard into a worm paradise.
Start with a compost pile or mulched beds—worms love decaying organic matter. Avoid chemical fertilizers, which repel them, and keep moisture consistent (think damp sponge, not swamp). In 3-6 months, you’ll see their tunnels aerate soil and boost plant growth naturally.
They’re the ultimate garden helpers: breaking down thatch, enriching soil, and reducing water runoff. Once established, they’ll multiply on their own, turning your garden into a self-fertilizing ecosystem. No more buying expensive soil amendments—just let them work their magic.
Works best in spring and fall, when soil temps stay between 50-70°F. For faster results, try worm tea or chop-and-drop mulching—both tricks lure them in like a five-star buffet. Ready to turn your soil into worm heaven?
📚 In This Guide
- What you need
- Instructions
- Tips and common mistakes
- Wrapping up and next steps
What you need
- ● Organic bait: 2–3 cups of fresh fruit or veggie scraps (banana peels, apple cores, or citrus rinds work best—worms love sweet and acidic!).
- ● Moisture source: A small bowl of water or a damp paper towel (to keep bait hydrated overnight).
- ● Container: A shallow, wide-mouthed jar (like a mason jar) or a plastic tub (at least 6 inches deep).
- ● Dark cover: A black plastic bag, aluminum foil, or even a dark-colored cloth (worms avoid light!).
- ● Garden soil or mulch: A handful of loose, slightly damp soil (from your garden or a compost pile).
- ● Patience: Worms are nocturnal—check your setup early morning (before 9 AM) for best results!
- ● A flashlight with a red LED (worms are less sensitive to red light—great for night checks!).
- ● Coffee grounds or crushed eggshells (boosts bait appeal and adds calcium).
- ● A spray bottle (to mist the soil if it’s too dry).
- ● Beer or yeast (a splash in the bait—worms are drawn to fermentation!).
Step-by-Step instructions for humane earthworm attraction
Here’s how to lure earthworms naturally—without traps or harm—using simple garden techniques.
🌱 Step 1: Prepare the Ideal Baiting Environment
Earthworms thrive in moist, organic-rich soil with 60-70% humidity and temperatures between 55-75°F. Start by selecting a shaded, damp spot in your garden—avoid direct sunlight, which dries out the soil too quickly. I like to dig a shallow trench (4-6 inches deep) about 12 inches wide and 2 feet long in a low-traffic area.
Loosen the soil with a garden fork to create air pockets—earthworms need oxygen-rich environments. If your soil is sandy or dry, mix in 1-2 inches of compost from your ingredients list to boost organic matter. Water the trench lightly until the soil feels like a damp sponge, but not soggy. This mimics their natural habitat and signals to worms that it’s a safe place to move.
💧 Step 2: Use Organic Baits Earthworms Can’t Resist
Skip the old banana peel or coffee grounds myths—those attract pests more than worms. Instead, use apple cores, potato peels, or overripe fruit (from your kitchen scraps) as bait. Chop them into ½-inch pieces and bury them 2-3 inches deep in the trench. Earthworms are drawn to these because they’re high in sugars and starches, which decompose quickly and create the perfect microbial buffet.
Add a thin layer of leaves or grass clippings (if available) over the bait—this mimics leaf litter, where worms naturally forage. Avoid meat or dairy; they attract rodents and flies instead. Check the trench every 3-4 days for signs of activity, like tiny holes or castings (worm poop) on the surface. This is your cue that worms are already moving in.
☀️ Step 3: Create a Moisture Retention Barrier
Earthworms avoid dry conditions, so maintaining consistent moisture is key. After baiting, cover the trench with a 6-inch layer of damp cardboard (cut from a flattened box) or newspaper to retain humidity. This barrier also blocks light, which worms dislike—it makes them feel safer to explore. Water the area gently every 2-3 days, ensuring the soil stays damp but not waterlogged. You’ll know it’s right when water beads form on the surface but drains within 10-15 minutes.
If your climate is hot or dry, mulch the trench with 2-3 inches of straw or wood chips (if available) to slow evaporation. Over time, this organic layer breaks down, adding nutrients and encouraging worms to stay. Patience here is critical—it can take 2-4 weeks for a noticeable worm population to establish, but once they arrive, they’ll multiply quickly.
⏰ Step 4: Monitor and Encourage Long-Term Settlement
After 10-14 days, gently sift through the trench with a small hand rake to check for worms. Look for tunnels, castings, or small holes—these are signs of activity. If you find worms, leave them be! Handling them stresses them and can kill them. Instead, add more chopped veggie scraps or coffee grounds (if you have them) to keep them fed and encourage them to stay.
To boost their numbers, introduce 1-2 cups of worm castings (if you have any) into the trench. The existing worms will feed on the castings, reproduce, and create a self-sustaining ecosystem. Over time, they’ll migrate beyond the trench into your garden beds, improving soil structure naturally. This method is humane, chemical-free, and works year-round—even in cooler months.
🌿 Step 5: Expand Their Habitat Naturally
Once you’ve confirmed a thriving worm population in the trench, it’s time to help them spread. Use a garden fork to gently loosen the soil around the trench edges, creating pathways for worms to migrate. Add 1-2 inches of compost to adjacent garden beds to create a nutrient-rich corridor. Earthworms will follow the food and oxygen, gradually repopulating your entire garden.
To speed up the process, plant cover crops like clover or alfalfa (if possible) near the trench. These plants have deep roots that aerate the soil and provide shade, making it even more attractive to worms. Avoid tilling the area—this disrupts their tunnels and drives them deeper, where they’re harder to reach. Within 3-6 months, you’ll have a self-sustaining worm population that enriches your soil effortlessly.
Tips & tricks for perfect earthworm attraction
Transforming your garden into a worm magnet doesn't require fancy tools—just a few strategic tweaks that create an irresistible environment. Here's how to maximize your success with these earthworm-attracting secrets.
Location is Everything: The shaded, damp spot you choose in Step 1 is non-negotiable. Earthworms avoid direct sunlight because it creates temperature fluctuations between 75°F during the day and cooler temps at night. If you're working in a sunny garden, create shade using nearby plants or a temporary shade cloth during peak sun hours (10 AM-4 PM). I've found that spots near existing plantings or under trees work best—they naturally maintain that 55-75°F range worms prefer.
Bait Placement Precision: When burying your apple cores or potato peels 2-3 inches deep in Step 2, think about creating a "worm buffet" rather than random placement. Arrange the bait pieces in a loose circle pattern about 3 inches apart—this mimics natural decomposition patterns and gives worms multiple entry points. The key is to create a food source that's accessible but not immediately obvious, which triggers their foraging instincts.
Moisture Management Mastery: That 10-15 minute drainage test in Step 3 is your golden rule for moisture. If water beads form but drain within that window, you've hit the perfect balance. Too much water creates anaerobic conditions that repel worms, while too little dries out their tunnels. For hot climates, I recommend watering the trench twice daily—once in the early morning and once in the late evening—to maintain consistent humidity without oversaturating.
Patience Pays Off: The 2-4 week timeline in Step 3 might seem long, but this is when the magic happens. Earthworms reproduce slowly (about 1 worm per week under ideal conditions), so giving them time to establish creates a self-sustaining population. I've seen gardens go from zero worms to hundreds in just 8 weeks when following this method precisely. Mark your calendar and check for those telltale signs—tiny holes or castings—every 3-4 days as instructed.
Pro Tips for Get Garden Worms
- Transforming your garden into a worm magnet doesn't require fancy tools—just a few strategic tweaks that create an irresistible environment.
- Location is Everything: The shaded, damp spot you choose in Step 1 is non-negotiable.
- Bait Placement Precision: When burying your apple cores or potato peels 2-3 inches deep in Step 2, think about creating a "worm buffet" rather than random placement.
Frequently asked questions
Got questions about attracting garden worms? You’re not alone! Here are answers to the most common queries—so you can start building your worm population like a pro.
How long does it take to attract worms to my garden?
Patience is key! With the right bait (like coffee grounds, grass clippings, or fruit peels), you may see worms within a few days to a couple of weeks. For deeper soil attraction, give it 4–6 weeks—especially in dry or compacted soil. Consistency matters more than speed!
What if worms don’t come after I set up bait?
Don’t panic! Try these fixes:
- Check moisture: Worms need damp (not soggy) soil—water lightly if the area feels dry.
- Adjust bait placement: Bury organic matter 1–2 inches deep where you’ve seen worms before.
- Avoid chemicals: Pesticides or fertilizers can repel them. Opt for compost tea instead!
- Time it right: Set bait in spring or fall when soil temps are ideal (50–77°F).
Can I dig up worms from elsewhere and relocate them?
Yes! But do it humanely:
- Use a bucket method: Dig a trench, place a bucket at the end, and let worms crawl in overnight.
- Avoid sunlight: Keep them in a cool, damp container (like a cardboard box with moist newspaper) while transporting.
- Release at dusk in your garden’s shady, moist areas for the best survival rate.
Are there alternatives to traditional bait like fruit or veggies?
Worms love these unexpected treats:
- Coffee grounds (used, not fresh—never add salt or sugar!)
- Eggshells (crushed for calcium)
- Manure (well-aged horse or cow manure works best)
- Leaf litter or shredded newspaper (for nesting)
Will attracting worms harm my lawn or garden?
Not at all—worms are eco-friendly helpers! They:
- Aerate soil naturally, reducing compaction.
- Break down organic matter into nutrient-rich castings.
- Support plant roots by creating tunnels for water/air flow.
Wrapping up and next steps
Getting garden worms doesn’t have to be a guessing game—with the right techniques, you’ll soon have a thriving population to boost your soil! Remember, patience, consistency, and humane methods are key.
Whether you’re using apple peels, coffee grounds, or a DIY worm trap, focus on creating an inviting environment that mimics their natural habitat.
Now that you’re armed with these secrets, it’s time to put them into action! Start small—set up a test spot in your garden or compost bin and observe what works best. Soon, you’ll be reaping the rewards of healthier soil and a thriving ecosystem. Happy worm hunting! 🌱✨