How To
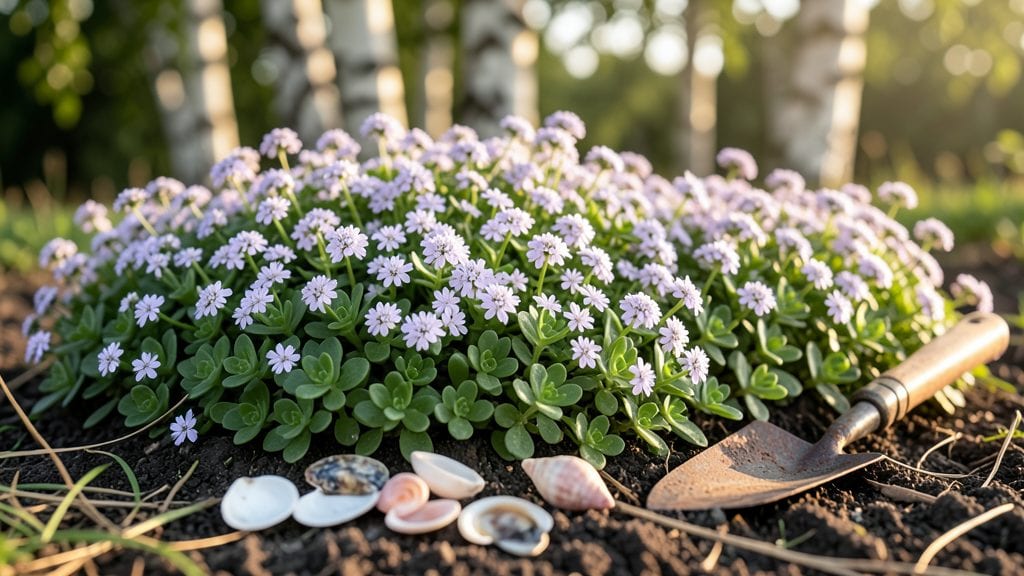
Learn how to use seashells in the garden to turn ordinary spaces into coastal retreats that feel like a walk along the shore—shimmering pathways, elegant mulch, and charming accents await! 🌊 catch the light like tiny mirrors.
The best part? They’re free if you live near the beach, or you can find them washed up after storms.
Start with shells of varying sizes—small ones for mulch or borders, larger ones for pathways or focal points. Rinse them thoroughly to remove salt and debris, then let them dry in the sun.
Avoid shells with sharp edges or those that might harbor pests, and always check local regulations about removing shells from beaches. A little effort upfront makes all the difference in how long they last.
For pathways, crush larger shells into a fine gravel for a smooth, reflective trail, or lay them flat for a mosaic effect. As mulch, they suppress weeds while adding a soft, crunchy texture that contrasts beautifully with plants.
Place a few near seating areas or along garden edges to create a beachy ambiance that invites you to linger. The results are stunning and surprisingly low-maintenance.
Wildlife loves them too—shells provide tiny habitats for beneficial insects and even help with drainage in pots. Just avoid using them in areas where small animals might ingest them. With a little creativity, your garden will feel like a seaside escape without ever leaving home.
📚 In This Guide
- What you need
- Instructions
- Tips and common mistakes
- Wrapping up and next steps
What you need
- ● Seashells: 50–100 medium to large shells (e.g., scallops, conchs, or cowries) for pathways or borders
- ● 20–30 small shells (e.g., clams, winkles) for filling gaps or decorative accents
- ● Tip: Rinse shells thoroughly with water and a mild vinegar solution to remove salt and debris.
- ● Garden Tools: Garden trowel or hand shovel
- ● Garden gloves (to protect your hands from sharp edges)
- ● Measuring tape or string (for marking layouts)
- ● Wheelbarrow or large bucket (for transporting shells)
- ● Adhesives & Fasteners: Outdoor-rated epoxy or waterproof glue (for securing shells to surfaces like rocks or fences)
- ● Stainless steel screws or heavy-duty zip ties (for attaching shells to trellises or pergolas)
- ○ Base Materials (Optional but Helpful): Pebbles, sand, or small rocks (to create a stable base for pathways)
- ● Landscape fabric (to prevent weeds from growing through shell layers)
- ● Solar-powered garden lights (to highlight shell features at night)
- ● Moss or succulents (to pair shells with lush greenery)
- ● Paint or sealant (for weatherproofing shells if used indoors or in high-traffic areas)
- ● Drill with sanding attachment (for smoothing rough edges on shells)
Step-by-Step instructions for using seashells in the garden
Transform your garden into a serene coastal retreat with these simple yet impactful techniques.
🌿 Step 1: Gather and Prepare Your Seashells
Collect shells from clean, safe beach areas—avoid those with sharp edges or broken pieces that could harm pets or children. Rinse them thoroughly with fresh water and a mild vinegar solution to remove salt, sand, and any lingering ocean debris. Soak them for 10-15 minutes to ensure they’re completely clean before drying.
Spread the shells on a baking sheet and let them dry in the sun for 2-3 days. This prevents mold and ensures they’re ready for long-term use. If you find any shells with barnacles or marine growth, scrub them gently with a soft brush before rinsing again.
🪴 Step 2: Create a Coastal Garden Base Layer
Use the shells to define pathways, borders, or garden edges. Arrange them in a 2-3 inch deep layer along garden beds, walkways, or near water features. For a natural look, scatter them loosely—this mimics how shells appear on a beach. If you’re lining a path, press them slightly into the soil so they don’t shift with foot traffic.
Mix shells of varying sizes for visual interest—smaller ones create texture, while larger shells add dramatic focal points. Place a few upright near seating areas or entryways to evoke a beachy welcome. Avoid overcrowding; let the shells breathe so they don’t look cluttered.
☀️ Step 3: Incorporate Shells into Decorative Features
Fill shallow garden pots, hanging baskets, or window boxes with shells to create a coastal-themed display. Layer them with moss, driftwood, or small pebbles for depth. For a whimsical touch, paint a few shells in soft pastels (like seafoam green or sandy beige) and place them among natural ones—this adds a pop of color without overwhelming the space.
Use shells to top tiered plant stands or as accents in vertical gardens. A few strategically placed shells on a shelf or ledge can instantly elevate the look of a garden nook. If you’re near a pond or fountain, arrange shells in a circular pattern around the water’s edge for a tranquil, ocean-inspired vibe.
✂️ Step 4: Maintain and Refresh Your Shell Decor
Check your shell arrangements every 3-4 months to remove any debris, algae, or fallen leaves that may have collected. Rinse them again if they look dull or dirty—this keeps them looking fresh and prevents mold. If shells crack or become damaged, replace them to maintain the aesthetic.
In colder climates, store shells indoors during winter to prevent freezing and thawing cycles, which can weaken them over time. When spring arrives, return them to the garden and rearrange as needed. This simple upkeep ensures your coastal decor remains elegant and inviting year-round.
Tips & tricks for perfect coastal garden decor with seashells
Here's what nobody tells you about transforming your garden into a beachy haven—these little tricks make all the difference.
The Cleaning Secret: That 10-15 minute soak in Step 1 isn't just about removing salt—it's also breaking down any microscopic marine residue that can cause mold later. I learned this the hard way after my shells developed a slimy film after just two weeks. Use a toothbrush for crevices where barnacles or algae might hide, and always pat them completely dry after rinsing.
Layering Like a Pro: When creating that 2-3 inch base layer in Step 2, think of it like building a beach: start with the largest shells at the bottom and work your way up to smaller ones. This creates natural depth and prevents shells from shifting when people walk nearby. For pathways, press the edges slightly into the soil first—they'll hold better and look more intentional.
Color Coordination: If you're painting shells in Step 3, stick to colors that exist naturally along coastlines—soft blues, seafoam greens, and sandy beiges blend beautifully. Pro tip: Use a clear sealant spray after painting to protect the finish and make cleanup easier. I like to paint only 10-20% of my shells to maintain that natural beachy look.
Seasonal Strategy: In colder climates, store your shells in a breathable fabric bag (not plastic) with a silica gel packet to absorb moisture. This prevents them from absorbing odors or developing condensation that could lead to mold. When spring arrives, give them a quick rinse with warm water and mild soap before rearranging—it's like giving them a fresh start!
Pro Tips for Use Seashells In The Garden
- Here's what nobody tells you about transforming your garden into a beachy haven—these little tricks make all the diff...
- The Cleaning Secret: That 10-15 minute soak in Step 1 isn't just about removing salt—it's also breaking down any micr...
- Layering Like a Pro: When creating that 2-3 inch base layer in Step 2, think of it like building a beach: start with ...
Frequently asked questions
Got questions about using seashells in your garden?
Here are answers to some of the most common ones—whether you're just starting or troubleshooting a project.
Can I use any seashells, or do I need to clean them first?
Always rinse shells with fresh water to remove salt, sand, and debris. Avoid shells with barnacles, algae, or a strong ocean smell—these can harbor pests or bacteria. For decorative use, a gentle scrub with a soft brush works wonders! If repurposing for mulch or soil, sterilize them in the oven at 200°F (93°C) for 30 minutes.
How long do seashells last in the garden before they break down?
Seashells used as decor can last years if placed in sheltered spots (like under eaves or in containers). In garden beds, they’ll gradually decompose over 1–3 years, enriching soil with calcium and magnesium. For faster breakdown, crush them into smaller pieces or mix them into compost.
Will seashells attract pests like slugs or rodents?
Seashells themselves don’t attract pests, but decaying organic matter (like algae or trapped food) might. To prevent issues, keep shells clean and dry, and avoid piling them in damp areas. If slugs are a problem, scatter shells around plants—their sharp edges deter them naturally!
What’s the best way to arrange seashells for a cohesive look?
Group shells by size, color, or type (e.g., all cowries together) for a polished vibe. For a natural feel, scatter them asymmetrically along pathways or nest them into crevices of rocks. Pro tip: Use a spray sealant (like polyurethane) to preserve shells if you want them to last longer outdoors.
Are there alternatives to seashells for a similar coastal aesthetic?
Yes! Try these textures:
- Pebbles or river rocks – Smooth and versatile.
- Driftwood or coral branches – Adds organic structure.
- Ceramic or glass "shell" replicas – Low-maintenance and weatherproof.
- Crushed oyster shells – Boosts soil pH without visual clutter.
Wrapping up and next steps
Seashells aren’t just souvenirs—they’re a versatile, budget-friendly way to elevate your garden’s charm while supporting sustainability. Whether you’re crafting pathways, enhancing mulch, or creating whimsical decor, these coastal treasures add texture, color, and a touch of coastal magic to any outdoor space. 🌊✨
Now that you’re inspired, start small: gather shells from a beach walk, raid your own collection, or even repurpose thrifted finds. Your garden’s next masterpiece could be just a seashell away! Happy gardening!