
Tools
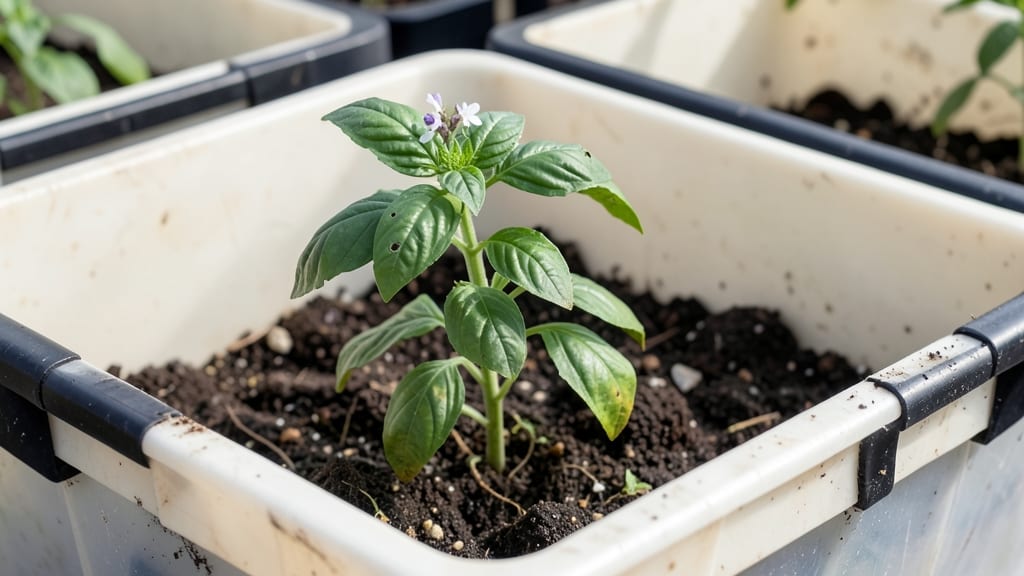
An IBC tote garden turns limited space into a thriving harvest with minimal effort. 🌱 I transformed my cramped patio into a productive garden using repurposed industrial containers—no digging, no weeds, and no wasted space.
The vertical setup maximizes square footage while keeping everything within arm’s reach, perfect for urban gardeners or anyone short on yard. My first harvest included tomatoes, peppers, and herbs that outgrew their pots in neighboring gardens.
You’ll need a clean, food-grade IBC tote (275–330 gallons), basic tools like a drill and saw, and quality potting mix. Drainage is key—cut holes in the bottom and sides, then add a landscape fabric layer to prevent soil loss.
Fill with a mix of compost, perlite, and your favorite topsoil to ensure roots get both nutrients and airflow. The best part? These containers are lightweight enough to move when needed, so you can rotate crops or protect them from harsh weather.
Within weeks, you’ll see lush green growth spilling over the edges, and by midsummer, your vertical garden will be heavy with ripe produce. The deep roots of vegetables like tomatoes and peppers thrive in this setup, while herbs and leafy greens grow faster than in traditional beds.
Plus, the contained space makes pest control easier—just add a row of marigolds or a floating barrier to keep bugs at bay.
This system works year-round with seasonal adjustments: add row covers in early spring or late fall, and swap out waterlogged soil before winter. Whether you’re growing food for your family or just want to experiment with vertical gardening, IBC totes deliver results without the hassle of traditional plots.
Ready to turn your small space into a high-yield garden?
📚 In This Guide
- What you need
- Instructions
- Tips and common mistakes
- Wrapping up and next steps
What you need
- ● 1x 275–330-gallon IBC tote (food-grade, clean, and with a secure lid).
- ● Drill with 1/2" or 3/4" hole saw bit (for drainage holes).
- ● 100–200 ft. of 1/2" or 3/4" PVC piping (for vertical supports, cut into 12–18" sections).
- ● PVC connectors & elbows (to create a sturdy lattice).
- ● Heavy-duty zip ties or wire mesh (to secure plants to the PVC).
- ● Garden fabric or landscape fabric (to cover the tote’s bottom for weed control).
- ● Potting soil (lightweight, well-draining mix—avoid heavy garden soil).
- ○ Slow-release fertilizer (optional but recommended for nutrient boost).
- ● Drainage gravel or pebbles (1–2" layer at the bottom).
- ● Watering can or drip irrigation system (for efficient hydration).
- ● Hanging planters or mesh pockets (for trailing plants like strawberries or lettuce).
- ● LED grow lights (if growing indoors or in low-light areas).
- ● Moisture meter (to track soil hydration).
- ● Decorative paint or stencils (to personalize your tote garden!).
- ● Trellis or netting (for vining plants like cucumbers or peas).
Step-by-Step instructions for building your IBC tote garden
Here's how to transform a simple plastic tote into a thriving vertical garden that maximizes space without sacrificing yield.
🪴 Step 1: Prepare the IBC Tote for Planting
Start by drilling 12-16 drainage holes along the bottom of your IBC tote using a 3/8-inch drill bit. Space them 6-8 inches apart to prevent soil from washing out while allowing excess water to escape. This is critical—poor drainage leads to root rot and stunted growth.
Next, cut 4-6 vertical slits along one side of the tote, about 8-10 inches long and 2-3 inches wide. These will serve as pockets for your plants. I like to make them slightly wider at the top to accommodate mature foliage. Use a utility knife and score the plastic gently before cutting to avoid jagged edges that could damage roots later.
🌱 Step 2: Fill and Layer the Growing Medium
Fill the tote with a mix of 60% potting soil and 40% perlite or coconut coir. This blend ensures proper drainage while retaining enough moisture for roots. Start by adding a 2-inch layer of perlite at the bottom—this prevents compaction and keeps roots aerated. Then, fill the tote to within 4 inches of the top with your soil mix.
For the vertical pockets, add a 1-inch layer of soil to each slit, pressing it lightly to secure it. You’ll want to leave 2-3 inches of space at the top of the tote for watering. Avoid packing the soil too tightly; it should feel like a damp sponge when squeezed. This ensures roots can easily penetrate and establish themselves.
✂️ Step 3: Plant Your Seeds or Seedlings
Choose plants that thrive in vertical gardens, like leafy greens, herbs, or compact vegetables. For seeds, plant them ¼ inch deep in the soil of each pocket, spacing them 2-3 inches apart. If using seedlings, dig a hole twice as wide as the root ball and place them gently, covering the roots with soil. Water immediately after planting to help settle the soil around the roots.
I like to plant 4-6 plants per tote, depending on their mature size. For example, basil and lettuce do well in the pockets, while larger plants like peppers or tomatoes might need a separate tote. Avoid overcrowding—plants compete for nutrients and light, leading to weaker growth. Once planted, give the soil a thorough watering until it’s evenly moist but not soggy.
💧 Step 4: Water and Maintain Your Vertical Garden
Water your IBC tote garden deeply 2-3 times per week, ensuring the soil reaches 6 inches deep. Use a watering can with a long spout to direct water to the base of the plants in the pockets. Overhead watering can cause soil to erode out of the slits, so aim for the roots. You’ll know you’ve watered enough when excess water drains out of the holes at the bottom.
Fertilize every 4-6 weeks with a balanced liquid fertilizer (10-10-10 or similar) diluted to half strength. This keeps your plants healthy without overwhelming them. Watch for signs of nutrient deficiency, like yellowing leaves or stunted growth. If you notice these, adjust your fertilizer or watering routine accordingly. Mulching the top of the soil with 1 inch of straw helps retain moisture and suppresses weeds.
☀️ Step 5: Position and Rotate for Optimal Growth
Place your IBC tote garden in a location that receives 6-8 hours of sunlight daily. South-facing windows or a sunny patio work best. If you’re growing sun-loving plants like tomatoes or peppers, ensure they get full sun exposure. For shade-tolerant plants like lettuce or spinach, partial shade is fine.
Rotate the tote a quarter turn every week to ensure even growth. Plants naturally lean toward the light, so rotating keeps them growing upright and prevents them from becoming lopsided. You’ll see stronger stems and more uniform foliage within a few weeks. If your tote starts to tip or feel unstable, anchor it with stakes or weights to keep it secure, especially in windy conditions.
Tips & tricks for perfect IBC tote gardens
Transforming a simple plastic tote into a productive vertical garden is easier than you think—here are the game-changing tips that'll help you avoid common pitfalls and maximize your harvest.
Drainage is Non-Negotiable: In Step 1, those 12-16 drainage holes aren't just recommended—they're essential. I've seen beginners skip this step because they think the tote is sturdy enough, but within weeks, root rot sets in. Use a 3/8-inch drill bit and space them 6-8 inches apart to prevent soil loss while ensuring proper drainage. Pro tip: Test your holes by filling the tote with water—if it drains completely in under 5 minutes, you're good to go.
Soil Texture Matters More Than You Think: The 60% potting soil to 40% perlite or coconut coir mix in Step 2 isn't just arbitrary—it's the Goldilocks zone for vertical gardens. Too much soil compacts and suffocates roots, while too much perlite dries out too quickly. When adding the 1-inch soil layer to pockets, press it gently but don't pack it down like you're making a brick. Think "damp sponge" texture—roots need air as much as they need water.
Plant Spacing Secrets: The 2-3 inch spacing between seedlings in Step 3 might seem generous, but trust me—crowding is the #1 reason vertical gardens fail. Plants in pockets compete fiercely for nutrients and light. For leafy greens like lettuce, you can push to 2 inches apart, but herbs like basil need their 3 inches to thrive. After planting, give everything a thorough watering until you see moisture emerge from the drainage holes at the bottom.
Watering Wisdom: That 2-3 times per week watering schedule in Step 4 is a guideline, not a rule. In hot climates, you might need daily watering—check by sticking your finger 2 inches deep into the soil. If it's dry, water again. For the pockets, use a watering can with a long spout to direct water right to the roots. I've seen soil erode out of slits when people water from above, so aim for the base of the plants. The 6-inch deep watering ensures roots get properly hydrated without waterlogging.
Pro Tips for Ibc Tote Garden
- Transforming a simple plastic tote into a productive vertical garden is easier than you think—here are the game-changing tips that'll help you avoid common pitfalls and maximize your harvest.
- Drainage is Non-Negotiable: In Step 1, those 12-16 drainage holes aren't just recommended—they're essential.
- Soil Texture Matters More Than You Think: The 60% potting soil to 40% perlite or coconut coir mix in Step 2 isn't just arbitrary—it's the Goldilocks zone for vertical gardens.
Frequently asked questions
What’s the best way to drill drainage holes in an IBC tote?
Use a 3/8-inch or 1/2-inch spade bit (or a hole saw) to drill holes in a grid pattern near the bottom. Space them 4–6 inches apart to prevent soil erosion while allowing excess water to drain. Pro tip: Wear safety goggles and work in a well-ventilated area—plastic shavings can be messy!
How long does it take for plants to grow in an IBC tote garden?
Timing varies by crop! Leafy greens (like lettuce or spinach) may be ready in 4–6 weeks, while tomatoes or peppers take 8–12 weeks to mature. Vertical space speeds up growth by improving airflow and sunlight exposure. Monitor soil moisture—consistency is key!
Can I reuse an IBC tote for multiple growing seasons?
Clean the tote thoroughly between seasons: scrub with soapy water, rinse, and disinfect with a 10% bleach solution (rinse well). Replace old soil to avoid nutrient depletion and pests. Bonus: Rotate crops yearly to prevent soil-borne diseases.
What are some low-maintenance plants for beginners?
Start with hardy, fast-growing plants like:
- Leafy greens (kale, Swiss chard, arugula)
- Herbs (basil, parsley, cilantro)
- Radishes (ready in 3–4 weeks!)
- Bush beans (thrive in vertical space)
Why are my plants wilting or yellowing?
Common culprits:
- Overwatering: Check drainage holes—waterlogged roots suffocate plants.
- Undersoil: Stick your finger 1 inch deep; water if dry.
- Nutrient deficiency: Use a balanced fertilizer (like 10-10-10) every 4–6 weeks.
- Pests: Inspect leaves for aphids or spider mites; spray with neem oil if needed.
Wrapping up and next steps
Transforming your small yard into a thriving garden has never been easier—or more rewarding! The IBC tote garden offers a space-saving, high-yield solution that’s perfect for urban homesteaders, apartment balconies, or tight corners. With minimal upfront effort and endless customization, you’re just steps away from fresh, homegrown abundance. 🌱
Ready to dive in? Start by sketching your design, gathering supplies, and planting your first seeds today—your future harvest (and neighbors!) will thank you. Happy growing! 🌿