
Tools
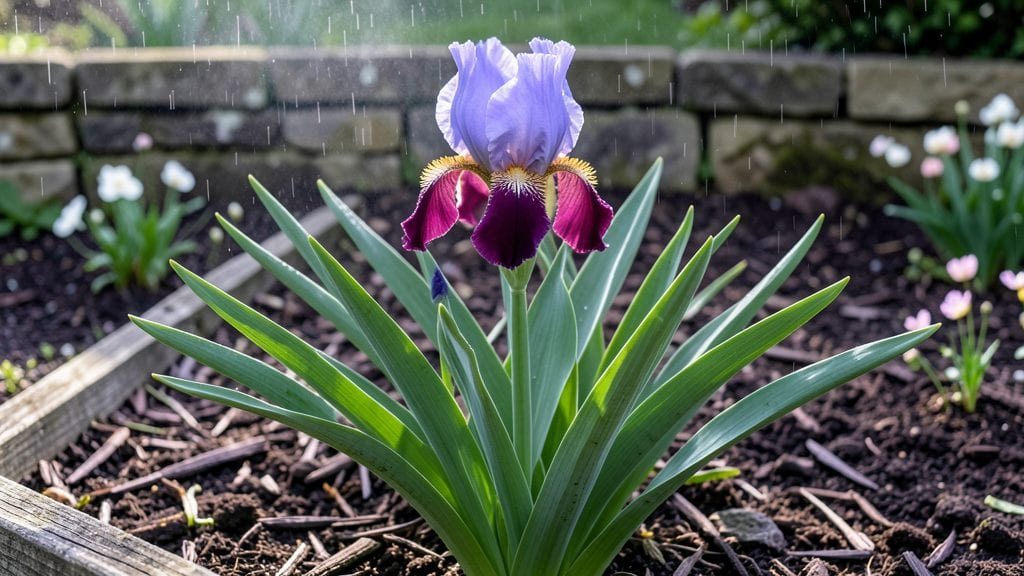
Creating an iris garden transforms your yard into a season-long showstopper with those dramatic, velvety blooms that scream "spring," then linger through summer. 🌸 I’ve designed beds where irises steal the show—whether as a bold border or a woodland garden anchor—while keeping the rest of the season interesting with complementary plants.
The key isn’t just planting irises; it’s arranging them so they feel intentional, not random.
Start with sunlight—irises demand at least 6 hours of direct light daily, though they’ll reward you with bigger blooms in full sun. Space them 12-24 inches apart in clusters of 3-5 for that natural, drifty look, and mix heights to create texture.
Pair bearded irises with ornamental grasses or lavender for contrast, while Siberian irises thrive in woodland settings with ferns and hostas. The trick is layering: let the irises shine in spring, then let other plants take over as their foliage fades.
What you end up with is a garden that feels alive year-round—not just when the irises bloom. The sword-like foliage adds structure in winter, and the right companions ensure color never fades.
Imagine deep purple blooms against silver foliage, or soft yellow irises brightening a shady corner. It’s the little details—like adding a few early-blooming bulbs—that keep the magic going from March to October.
This works for any yard size, from a small city plot to a sprawling countryside garden. The beauty? Irises are low-maintenance once established, so you spend more time admiring than working. Let’s make your garden the talk of the neighborhood—one bold bloom at a time.
📚 In This Guide
- What you need
- Instructions
- Tips and common mistakes
- Wrapping up and next steps
What you need
- ● Iris rhizomes: 10–20 per square foot (choose bearded or sibiritica varieties for best results).
- ● Well-draining soil: Mix 60% native soil with 40% compost or sand (irises hate soggy roots!).
- ● Organic fertilizer: Low-nitrogen (5-10-10) blend, 2–3 lbs per 100 sq ft.
- ● Mulch: 2–3 inches of pine bark or gravel (keeps rhizomes cool and dry).
- ● Garden trowels: 1–2 (for digging rhizome trenches, 4–6" deep).
- ● Pruners: Sharp bypass pruners (for trimming foliage after blooming).
- ● Watering can or hose: With a gentle spray nozzle (irises prefer deep but infrequent watering).
- ○ Garden twine or stakes: (Optional) For supporting tall varieties like Iris germanica.
- ● Decorative rocks: For borders or pathways (adds texture and drainage).
- ● Slow-release fertilizer spikes: For minimal-maintenance nutrition.
- ● Garden gloves: To protect hands while handling rhizomes.
- ● Pest control: Neem oil spray (prevents iris borers and aphids).
- ● Seasonal color boosters: Companion plants like salvia or catmint (pollinator-friendly!).
Step-by-Step iris garden design for season-long color
Here's how to create a striking, low-maintenance iris display that thrives year after year.
🌱 Step 1: Select and Prepare the Planting Site
Iris thrives in full sun to partial shade, with at least 6 hours of direct sunlight daily. Choose a location with well-draining soil—they rot quickly in soggy conditions. Test your soil's drainage by digging a 12-inch deep hole and filling it with water; if it drains within 2 hours, the site is suitable. If not, amend with 2-3 inches of coarse sand or gravel mixed into the top 12 inches of soil.
Iris roots spread horizontally, so space them 12-18 inches apart in rows 2 feet apart for optimal airflow. Avoid planting where water pools, even seasonally. A gentle slope ensures excess water flows away naturally. Mark planting spots with stakes to avoid crowding, as iris clumps expand over time.
🪴 Step 2: Plant Iris Rhizomes at the Right Depth
Plant iris rhizomes (the thick, fleshy stems) in late summer to early fall, allowing roots to establish before winter. Position them so the top third of the rhizome sits above soil level—burying them too deep suffocates the plant. Use a trowel to create a shallow trench 4-6 inches wide and 2 inches deep, then place the rhizome with its pointed end facing upward.
Spread the roots outward gently, ensuring they fan across the trench. Cover lightly with soil, leaving the top third exposed to sunlight. Press the soil firmly around the rhizome to eliminate air pockets. Water deeply immediately after planting to settle the soil and encourage root contact. Avoid overwatering; soggy soil at planting time invites rot.
☀️ Step 3: Mulch and Fertilize for Season-Long Growth
Apply a 2-inch layer of organic mulch (like shredded bark or pine needles) around each plant, keeping it 6 inches away from the rhizome to prevent moisture buildup. Mulch conserves soil moisture and regulates temperature, but too much smothers the rhizome. Replenish mulch annually in early spring before new growth emerges.
Fertilize lightly in early spring with a balanced, slow-release fertilizer (10-10-10) applied at half the recommended rate. Iris are not heavy feeders; over-fertilizing produces lush foliage but fewer blooms. Water deeply after fertilizing to help nutrients penetrate the soil. You’ll see strong, upright leaves by late spring—a sign the plant is thriving.
✂️ Step 4: Prune and Divide for Long-Term Health
After blooming, cut back the flower stalks to 6 inches above the rhizome once they turn brown. This redirect energy to next year’s blooms and prevents seed production, which weakens the plant. Leave the fan-shaped leaves intact; they photosynthesize until late summer, feeding the rhizome for winter.
Every 3-4 years, divide crowded clumps in early fall. Dig up the rhizome, separate the sections with a clean knife, and replant the healthiest divisions. Discard any rhizomes with soft spots or mushy roots—these show rot. Replant divisions immediately to minimize stress, and water deeply for the first 2 weeks to encourage root regrowth.
🌿 Step 5: Plan for Seasonal Interest Beyond Blooms
Pair iris with ornamental grasses (like fountain grass) and late-blooming perennials (such as Russian sage) to extend color. Grasses sway in the breeze, softening iris’s bold structure, while sage’s lavender spikes echo iris blooms’ vertical lines. Plant 12-18 inches away to avoid competition for nutrients.
Add spring bulbs like daffodils or tulips beneath iris clumps for early color. The bulbs bloom before iris foliage emerges, then fade by summer, leaving iris as the star. Mulch with gravel or small stones after bulbs finish blooming to suppress weeds and retain moisture without smothering iris roots.
Tips & tricks for perfect iris garden design
Between us, these small details make all the difference between a garden that thrives and one that struggles. Iris are finicky but forgiving once you understand their quirks.
Soil Drainage is Non-Negotiable: That 2-hour drainage test in Step 1 isn't just a suggestion—it's critical. I've seen iris rot within weeks in poorly draining soil, no matter how sunny the location. If your soil fails the test, don't just add sand; mix in 2-3 inches of perlite too for better aeration. The rhizomes need oxygen as much as they need water to flow away.
Rhizome Positioning Matters More Than You Think: In Step 2, when you're planting those rhizomes, resist the urge to bury them completely. The top third should always stay exposed—this prevents rot and encourages new growth. I learned this the hard way after losing three batches of rhizomes planted too deeply. Also, those pointed ends? Always face upward—they'll grow toward the light.
Mulch Placement is an Art: That 2-inch layer of mulch in Step 3 needs strategic placement. Keep it 6 inches away from the rhizome—too close and you'll smother the plant. I recommend using pine needles over bark; they acidify the soil slightly, which iris love. And here's a pro tip: refresh your mulch in early spring before new shoots appear. The old mulch will have broken down and lost its insulating properties.
Pruning Timing is Everything: In Step 4, when you're cutting back those flower stalks, don't rush it. Wait until they're completely brown and crispy—usually about 2-3 weeks after blooming. Cutting too soon removes nutrients the plant needs for next year's blooms. And here's what nobody tells you: those fan-shaped leaves? Leave them until they yellow naturally in late summer. They're working hard feeding the rhizome all season long.
Pro Tips for Iris In Garden
- Between us, these small details make all the difference between a garden that thrives and one that struggles.
- Soil Drainage is Non-Negotiable: That 2-hour drainage test in Step 1 isn't just a suggestion—it's critical.
- Rhizome Positioning Matters More Than You Think: In Step 2, when you're planting those rhizomes, resist the urge to bury them completely.
Frequently asked questions
Got questions about adding irises to your garden? Here are answers to the most common ones—so you can grow with confidence!
How do I choose the right iris for my garden?
Consider your climate and lighting. Bearded irises thrive in full sun and zones 3–9, while Siberian irises prefer cooler zones (3–8) and partial shade. For bold color, try German or Japanese irises—they’re showstoppers!
When is the best time to plant irises?
Plant in early fall (6–8 weeks before frost) or late winter (before new growth starts). Avoid spring planting—irises hate soggy roots! If buying bare-root, soak rhizomes for 24 hours first.
Can I grow irises in containers?
Yes! Use large pots (12"+ deep) with drainage holes and a mix of sandy loam and compost. Repot every 2–3 years to refresh soil. Dwarf varieties like Iris reticulata are perfect for containers.
Why aren’t my irises blooming?
Common culprits:
- Overcrowding—dig up and divide rhizomes every 3–4 years.
- Too much nitrogen—fertilize lightly with low-N, high-P (like 5-10-10).
- Improper sunlight—irises need 6+ hours of sun daily.
What are some low-maintenance iris alternatives?
Try these easy-care perennials for texture and color:
- Daylilies—tough, repeat-blooming, and drought-tolerant.
- Catmint—silvery foliage + lavender blooms (deer-resistant!).
- Russian Sage—drought-loving with fragrant spikes.
Wrapping up and next steps
Transforming your garden into a stunning iris display is easier than you think—and the rewards are endless seasonal color and texture! Whether you’re a seasoned gardener or just starting, these bold blooms bring drama and charm to any outdoor space. 🌸
Ready to dive in? Start small—pick a sunny spot, gather your materials, and let your creativity bloom! Plant a few irises this weekend, and soon you’ll have a garden that turns heads and fills the air with fragrance. Happy gardening!