Landscaping
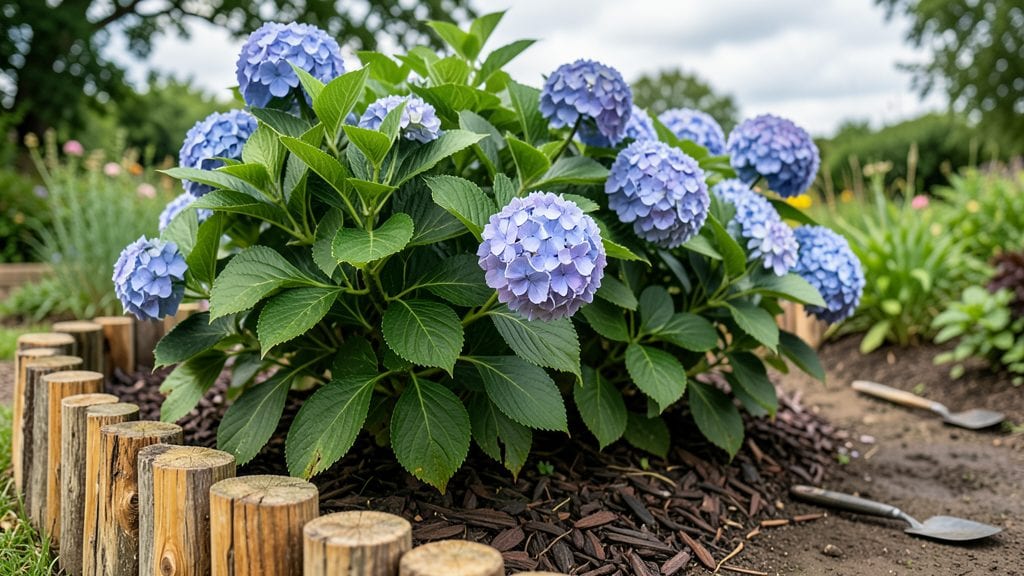
Landscaping garden beds that look stunning in every season starts with a bold vision and smart layering.
I learned the hard way that planting everything at once leaves you with a summer show and winter boredom—so I now design beds that evolve, from spring blooms to autumn color to winter structure.
The secret isn’t just picking pretty plants; it’s about how they stack up in height, texture, and bloom time to create drama all year.
You’ll need a few key supplies: a sturdy edging material (like metal or stone) to define your space, quality mulch to keep weeds at bay and moisture locked in, and a mix of perennials, shrubs, and ornamental grasses that play well together.
My go-to combo includes 3-foot-tall ornamental grasses for winter interest, mid-height shrubs for summer structure, and low-growing perennials that spill over edges for softness. This setup works in any yard size—even a small urban plot can handle layered beds with the right plant choices.
The payoff is a garden that never looks flat or forgotten. Imagine walking past in December and seeing frost-kissed seed heads swaying against evergreen foliage, or stepping into a June bed bursting with jewel-toned blooms and lush foliage.
The best part? These beds require less maintenance because the right plants naturally fill in gaps and support each other. You’ll spend less time weeding and more time admiring how everything comes together.
Whether you’re starting from scratch or refreshing an existing bed, the principles stay the same: think in layers, prioritize seasonal interest, and let plants do the heavy lifting. Let’s turn that blank space into a showstopper that works as hard as you do—year after year.
📚 In This Guide
- What you need
- Instructions
- Tips and common mistakes
- Wrapping up and next steps
What you need
- ● Topsoil or garden soil: 2–3 cubic yards (depending on bed size; aim for 6–12 inches deep). Use a high-quality blend with organic matter.
- ● Compost or aged manure: 1–2 bags (50–75 lbs each) to enrich soil fertility.
- ● Mulch: 2–3 bags (2–3 cubic feet each) of shredded bark, pine straw, or wood chips for weed suppression and moisture retention.
- ● Garden bed edging: Flexible metal, plastic, or stone edging (10–20 feet, depending on perimeter length).
- ● Plants for year-round interest: Perennials: 3–5 plants (e.g., hostas, coneflowers, Russian sage).
- ● Shrubs: 1–3 dwarf varieties (e.g., boxwood, dwarf lilac, or abelia).
- ● Evergreens: 1–2 (e.g., dwarf mugo pine or boxwood for structure).
- ● Seasonal accents: 2–3 annuals (e.g., pansies for winter, marigolds for summer).
- ● Garden shovel or spade: For digging and soil prep.
- ● Garden rake: To level and smooth soil.
- ● Wheelbarrow: For hauling soil, mulch, and plants.
- ● Measuring tape: To mark and measure bed dimensions.
- ● Pruning shears or loppers: For trimming plants.
- ● Gloves and knee pads: For comfort and protection.
- ● Landscape fabric: To suppress weeds (lay under mulch).
- ● Garden hose with spray nozzle: For watering during setup.
- ● String and stakes: To outline bed shape before digging.
- ● Decorative stones or pebbles: For borders or accents.
- ● Fertilizer (slow-release): To boost plant growth.
Instructions for designing year-round garden beds with texture and seasonal interest
Here’s how to create garden beds that stay visually exciting through every season—no matter your yard size.
Plan Your Layers for Height and Seasonal Flow
Start by sketching your bed layout with four distinct layers: backdrop, mid-height, filler, and foreground. The backdrop should be tall perennials or shrubs like 9-foot tall arborvitae or 6-foot shrub roses to frame the space. Place these along the back edge of your bed. For mid-height, use 3-foot ornamental grasses or 5-foot hydrangeas to add movement and structure. These should be spaced 18-24 inches apart to allow room for growth without crowding.
Next, fill the middle with 2-foot tall coneflowers or 3-foot black-eyed Susans for seasonal color. These plants will bridge the gap between tall and short elements while providing blooms from summer through fall. Finally, add low-growing ground covers like creeping thyme or ajuga in the foreground to soften edges and prevent weeds. This layering creates depth and ensures something’s always in bloom or providing texture.
Prepare the Soil for Drainage and Nutrient Retention
Before planting, remove any grass or weeds from the bed area, then loosen the soil to a depth of 12 inches using a garden fork. This breaks up compacted layers and encourages root growth. Mix in 3 cubic yards of compost evenly across the bed to improve fertility and moisture retention. If your soil drains poorly, add 1 inch of coarse sand to the bottom of the bed before backfilling with amended soil.
Test the soil’s moisture level by squeezing a handful—it should hold together but not feel soggy. If it’s too dry, water the bed thoroughly before planting. Avoid working the soil when it’s wet, as this can compact it further. Once prepped, the bed should feel light and crumbly, like a well-aerated cake batter.
Plant in Staggered Rows for Continuous Interest
Arrange plants in loose, staggered rows rather than tight clusters to create a natural, flowing look. Start with your tallest plants at the back, then step back every 2-3 feet to check your design from different angles. Adjust spacing as needed—some plants, like Russian sage, can handle 3 feet between stems, while others, like salvia, prefer 18 inches. Group plants with similar water needs together to simplify maintenance.
Dig holes twice as wide as the root ball but no deeper than the container’s drainage holes. Gently remove plants from their pots, loosen the roots if they’re circling, and place them in the holes so the top of the root ball sits ½ inch below soil level. This prevents stem rot while allowing roots to spread easily. Backfill with soil, firming it lightly around the base to eliminate air pockets.
Add Mulch and Seasonal Accents
Spread 3 inches of shredded bark mulch over the bed, keeping it 2 inches away from plant stems to prevent rot. Mulch helps retain moisture, suppress weeds, and regulate soil temperature. Choose a mulch color that complements your plants—dark browns for contrast or lighter tans for a natural look. Replenish mulch annually in early spring to maintain its thickness.
For seasonal drama, incorporate temporary accents like fall mums in autumn or spring bulbs like tulips in early spring. These add pops of color without long-term commitment. Place them in clusters of 3-5 near taller plants to create focal points. Water deeply after planting these accents to help them establish quickly in the bed’s existing soil.
Maintain with Seasonal Pruning and Refreshes
Prune back dead or overgrown branches in late winter or early spring before new growth starts. Cut just above a bud or joint to encourage healthy regrowth. For perennials, remove spent blooms throughout the season to redirect energy into new flowers. This keeps plants looking tidy and encourages longer bloom times. Fertilize lightly in early spring with a balanced 10-10-10 formula to support new growth.
Monitor the bed weekly for weeds, especially in the first few months. Pull them by hand when small to avoid disturbing plant roots. In fall, add a 1-inch layer of leaf mulch over the bed to protect roots during winter. This natural mulch breaks down slowly, enriching the soil as it does. Adjust watering as seasons change—deep and infrequent in summer, light and occasional in winter—to keep plants thriving year-round.
Tips & tricks for designing stunning year-round garden beds
A few key strategies will help you avoid common pitfalls and create garden beds that truly shine through every season.
Layering Secret: When planning your four layers in Step 1, think about seasonal progression. Place evergreens like arborvitae at the back for winter structure, then add spring bloomers like tulips in the foreground. This ensures visual interest even when some plants are dormant. I like to sketch my design on graph paper first, using different colored pencils for each season to visualize the flow.
Soil Prep Insight: The 12-inch soil loosening in Step 2 is crucial, but don't stop there. If your area gets heavy rainfall, consider adding a 2-inch layer of gravel at the bottom before the 1-inch coarse sand. This creates better drainage while still allowing roots to establish. I've seen gardens where poor drainage led to root rot in just one wet season—this simple adjustment prevents that completely.
Plant Spacing Pro: In Step 3, when arranging your Russian sage and salvia, remember mature size matters more than current size. I always check plant tags for mature height and width, then add an extra 6 inches to each measurement when spacing. This prevents future crowding that can lead to disease and competition for nutrients.
Mulch Maintenance: The 3-inch mulch application in Step 4 deserves special attention. After the first year, I recommend adding a 1-inch layer of compost mixed into the top layer of mulch annually. This refreshes nutrients without disturbing plant roots. The key is to keep mulch 2 inches away from stems—too close can cause rot, while too far can leave soil exposed to weeds.
Pro Tips for Landscaping Garden Beds
- A few key strategies will help you avoid common pitfalls and create garden beds that truly shine through every season.
- Layering Secret: When planning your four layers in Step 1, think about seasonal progression.
- Soil Prep Insight: The 12-inch soil loosening in Step 2 is crucial, but don't stop there.
Frequently asked questions
Got questions about transforming your garden beds into year-round showstoppers? You’re not alone! Here are answers to the most common queries to help you plan, execute, and maintain stunning landscapes with ease.
When is the best time to start landscaping garden beds?
The ideal time depends on your climate, but spring (after the last frost) and early fall are the sweet spots. These seasons offer mild weather, allowing plants to establish roots before extreme heat or cold. For tropical or warm climates, focus on late winter or early spring to avoid summer drought stress.
How can I save money on landscaping garden beds without sacrificing quality?
- DIY mulch: Use free or low-cost materials like wood chips, straw, or even shredded leaves to suppress weeds and retain moisture.
- Native plants: They thrive in your local climate, requiring less water, fertilizer, and maintenance.
- Thrift stores/plant swaps: Check local gardening groups or online marketplaces for discounted perennials and shrubs.
- Repurpose materials: Old bricks, stones, or even pallet wood can create borders or raised beds affordably.
What are the easiest low-maintenance plants for garden beds?
Opt for hardy perennials, ground covers, and drought-tolerant shrubs like:
- Lavender ( fragrant + pest-repellent)
- Sedum ( succulent, thrives in heat)
- Hostas ( shade-loving, lush foliage)
- Ornamental grasses ( textural, minimal pruning)
Pair them with mulch to cut down on weeding and watering!
How do I protect garden beds in winter?
Prevent frost damage and soil erosion with these tips:
- Mulch thickly: Apply 2–4 inches of straw, leaves, or shredded bark to insulate roots.
- Cover tender plants: Use frost cloth or burlap for delicate perennials and shrubs.
- Avoid heavy snow buildup: Gently brush off branches to prevent breakage.
- Water before freeze: Moist soil holds heat better than dry soil.
Why are my plants dying even though I’m following all the tips?
Common culprits include:
- Over/under-watering: Check soil moisture 1–2 inches deep—consistency is key!
- Poor drainage: Amend clay soil with compost or sand; raised beds help.
- Pests or disease: Inspect leaves for holes, spots, or webs. Treat early with neem oil or insecticidal soap.
- Sunlight mismatch: Move plants if they’re wilting or stretching (a sign of too much/little light).
Pro tip: Take photos of the problem area—post them in gardening forums for quick diagnoses!
Wrapping up and next steps
Transforming your garden beds into a year-round masterpiece is all about layering and intention—balancing textures, colors, and seasonal interest to keep your outdoor space vibrant.
Whether you’re a seasoned gardener or just starting, the key is to plan ahead, choose resilient plants, and embrace experimentation to create a dynamic, low-maintenance oasis. 🌿
Ready to take the next step? Start small—pick one bed or corner to revamp, gather your materials, and dive in! Your garden’s seasonal drama awaits—just a shovel and a dream away. Happy landscaping! ✨