
Tools
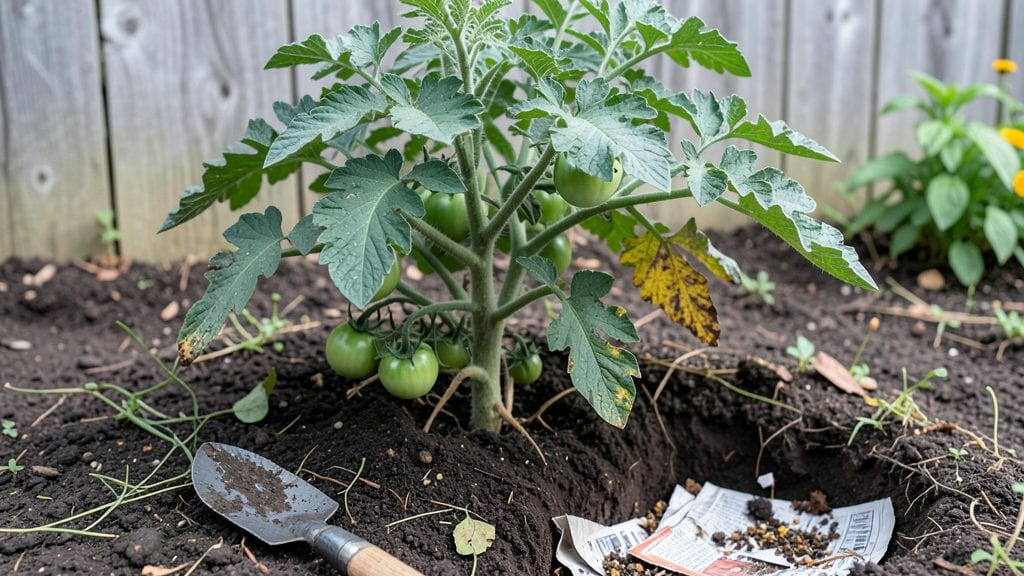
The lasagna gardening technique transforms poor soil into a thriving garden with just layers of organic materials. I’ve used it to grow tomatoes in rocky soil and herbs in urban planters—it works anywhere, anytime. The method mimics natural decomposition, building rich, fertile soil without tilling or heavy amendments.
You’ll need cardboard for weed suppression, compost or aged manure for nutrients, and mulch like straw or leaves to hold moisture. Start with a 2-inch layer of cardboard to smother weeds, then alternate 2-3 inches of compost with 1-2 inches of mulch until you reach 12-18 inches deep.
This setup retains moisture, suppresses weeds, and feeds plants over time.
By planting directly into the lasagna bed, you’ll see faster germination and healthier roots than in traditional soil. The layers break down slowly, feeding plants season after season, and the structure stays loose enough for roots to grow easily.
No more digging, no more amending—just layer, plant, and watch your garden flourish.
Perfect for raised beds, in-ground gardens, or even container growing, this technique adapts to any space. Whether you’re dealing with clay, sand, or urban dirt, lasagna gardening turns limitations into opportunities. Ready to try it in your next garden project?
📚 In This Guide
- What you need
- Instructions
- Tips and common mistakes
- Wrapping up and next steps
What you need
- ● Brown Layer: Dry leaves (shredded or whole) – 5-10 lbs (carbon source)
- ● Straw or hay – 3-5 bales (avoid seed-bearing hay!)
- ● Cardboard (unbleached, no tape/staples) – 2-3 sheets (weed barrier)
- ○ Newspaper (black-and-white only) – optional, 2-3 sheets
- ● Green Layer: Fresh grass clippings – 5-8 lbs (nitrogen source, use sparingly!)
- ● Compost (finished, dark, crumbly) – 3-5 gallons
- ● Manure (well-aged, cow/chicken) – 2-3 wheelbarrow loads
- ● Kitchen scraps (fruit/veggie peels, coffee grounds) – 1-2 gallons
- ● Soil & Mulch: Topsoil or existing garden soil – 2-3 inches (final layer)
- ● Mulch (straw, wood chips) – 1-2 inches (to retain moisture)
- ● Garden fork or pitchfork – for fluffing layers
- ● Shovel or spade – for spreading materials
- ● Gloves – to keep hands clean and protected
- ○ Wheelbarrow or large bin – for hauling materials (optional but helpful!)
- ● Measuring tape or ruler – to track layer thickness
- ● Watering can or hose – for moistening layers
- ● A designated garden bed (raised or in-ground, at least 12" deep)
- ● Sunny location (6+ hours of sunlight daily for most veggies)
- ● Patience! Lasagna beds take 4-6 weeks to decompose fully.
Instructions for building a thriving lasagna garden bed
This layered approach transforms poor soil into a nutrient-rich haven—ideal for vegetables, herbs, or flowers.
Choose and Clear Your Garden Site
Select a flat, sunlit area measuring 4 feet by 8 feet for your lasagna bed, as this size yields 4 healthy plants at maturity. Remove any grass, weeds, or debris using a garden fork or spade—this prevents competition for nutrients. I like to mark the bed’s perimeter with landscape fabric stapled to the ground; it suppresses weeds without chemicals and keeps layers contained.
If your soil is compacted, loosen the top 6 inches with a broadfork to improve drainage and root penetration. Avoid tilling, which disrupts soil structure. Instead, work the fork in and out vertically, breaking up hardpan without inverting layers. This mimics natural soil conditions and encourages deep root growth.
Layer Organic Materials for Soil Structure
Start with a 4-inch base layer of coarse material—I use cardboard flattened and cut to fit, followed by 2 inches of wood chips or straw for bulk and drainage. This prevents rot at the bottom while allowing excess water to escape. Next, alternate 2 inches of nitrogen-rich "greens" (like grass clippings or fresh plant trimmings) with 2 inches of carbon-rich "browns" (shredded leaves, straw, or newspaper).
End with a 2-inch top layer of compost or well-aged manure to feed microorganisms and provide immediate nutrients. Avoid meat, dairy, or oily foods—these attract pests and create anaerobic pockets. Water each layer lightly as you go to help materials settle and begin decomposing. The bed should feel moist like a wrung-out sponge but not soggy.
Plant and Mulch for Long-Term Success
Dig small holes in the top layer and plant your chosen vegetables, herbs, or flowers at the same depth they were growing before. Space them according to their mature size—12 inches apart for bush beans, 18 inches for tomatoes, and 24 inches for cabbage. Press soil gently around the roots to eliminate air pockets, then water deeply to encourage root expansion.
Top the bed with a 2-inch layer of straw or shredded leaves to retain moisture, suppress weeds, and regulate soil temperature. This mulch layer breaks down slowly, adding organic matter over time. Avoid synthetic mulches—they block air and water, suffocating roots. After planting, water again until moisture reaches 6 inches deep, checking with a trowel to ensure even saturation.
Maintain with Minimal Effort
Lasagna gardens thrive with weekly watering—apply 1 inch of water when the top 2 inches of soil feel dry. Use a soaker hose or drip irrigation to deliver water directly to the roots, reducing evaporation. Avoid overhead watering, which can spread disease and compact the surface. I schedule watering in the early morning to allow foliage to dry before evening, preventing fungal issues.
Add a 1-inch layer of fresh compost or mulch every 3-4 months to replenish nutrients and maintain structure. This is especially critical in the first year, as the bed settles and decomposes rapidly. Watch for signs of nutrient depletion—yellowing leaves or stunted growth—and respond by top-dressing with compost or a balanced organic fertilizer. With this approach, your lasagna bed will remain productive for 3-5 years with minimal maintenance.
Tips & tricks for perfect lasagna gardening
Building a lasagna garden is all about patience and layering—here’s how to maximize your soil’s potential while avoiding common pitfalls that can derail even the best-laid plans.
The Foundation Matters: When selecting your 4×8-foot site in Step 1, prioritize areas with at least 6 hours of direct sunlight daily. While the instructions mention compacted soil, I’ve found that even slightly sloped areas work if you build up the bed’s edges with extra cardboard and wood chips to prevent erosion. This creates a stable platform for your layers without requiring perfect flatness. The key is ensuring water drains properly—if your site has poor drainage, consider raising the bed further with additional cardboard layers at the bottom.
Layering Like a Pro: In Step 2, the alternating 2-inch layers of greens and browns create the perfect carbon-to-nitrogen ratio for decomposition. Here’s the secret: shred your browns (like newspaper or cardboard) into strips about 1-inch wide. This increases surface area for microbial activity, speeding up the breakdown process. For greens, avoid anything treated with herbicides—these chemicals can linger and harm your plants. I also like to add a handful of coffee grounds to the compost layer; they’re slightly acidic and provide micronutrients like nitrogen and phosphorus.
Planting Precision: Step 3’s spacing guidelines—12 inches for bush beans, 18 inches for tomatoes, and 24 inches for cabbage—are based on mature plant sizes, but don’t be afraid to adjust slightly. For example, if you’re growing bush beans in a small garden, you can space them 10 inches apart and trellis them vertically to save space. When pressing soil around roots, use your fingers to create small channels for roots to grow into, rather than compacting the soil further. This mimics natural root growth patterns and reduces transplant shock.
Long-Term Maintenance Wins: The weekly watering guideline in Step 4 is a great starting point, but I’ve found that mulching with straw or shredded leaves actually reduces watering frequency by up to 30%. The mulch acts like a sponge, releasing moisture slowly to the roots. If you notice yellowing leaves after 3-4 months, it’s not always a nutrient issue—sometimes it’s a sign of overwatering. Let the top 2 inches of soil dry completely between waterings, especially in clay-heavy soils, to prevent root rot.
Pro Tips for Lasagna Gardening Technique
- Building a lasagna garden is all about patience and layering—here’s how to maximize your soil’s potential while avoiding common pitfalls that can derail even the best-laid plans.
- The Foundation Matters: When selecting your 4×8-foot site in Step 1, prioritize areas with at least 6 hours of direct sunlight daily.
- Layering Like a Pro: In Step 2, the alternating 2-inch layers of greens and browns create the perfect carbon-to-nitrogen ratio for decomposition.
Frequently asked questions
Got questions about lasagna gardening? You’re not alone—this technique is game-changing but can feel a little mysterious at first. Here’s what you need to know to get started with confidence!
What’s the best time of year to start a lasagna garden?
Lasagna gardens thrive year-round, but the ideal time depends on your climate. In cooler regions, start in early spring (before planting) or late summer (for fall harvests). In warm areas, build layers anytime—just avoid peak heat when decomposition speeds up too fast. Pro tip: Cover with mulch to protect layers if building in winter!
Do I really need to use cardboard between layers?
Cardboard acts as a weed barrier and helps smother grass, but it’s not mandatory. If your soil is already weed-free, skip it! Alternatives include thick layers of newspaper (shiny side down) or even landscape fabric. Just ensure it’s untreated (no tape/staples) to avoid chemicals. For extra speed, soak cardboard in water first to speed decomposition.
How long does it take for a lasagna garden to be ready for planting?
Patience pays off! In 4–6 weeks, your lasagna bed will shrink by ~50% as materials break down. For faster results, chop ingredients (like grass clippings) into smaller pieces. Test readiness by poking the bed—if it feels spongy and crumbly (like a well-aged compost pile), it’s plant-ready! Root crops (like carrots) can go in first; leafy greens wait until the bed cools.
What if my lasagna garden smells bad or attracts pests?
A funky odor or pests (like flies) usually mean your layers are too wet or have too many fresh, nitrogen-rich materials (e.g., meat scraps). Fix it by:
- Adding dry carbon sources (straw, leaves, or shredded paper) to balance moisture.
- Mixing in compost or mature compost to jumpstart decomposition.
- Covering the bed with mulch or a tarp for 1–2 weeks to “cure” it.
Can I use lasagna gardening in containers or raised beds?
Lasagna gardening is perfect for containers or raised beds—just adjust the layers to fit your space. For example:
Layer
Container (6" deep)
Raised Bed (12"+ deep)
Base
Cardboard + 2" compost
Cardboard + 4" compost
Middle
2" grass clippings + 1" browns (leaves/straw)
4" greens + 2" browns (repeat)
Top
1" soil + mulch
2" soil + mulch
Wrapping up and next steps
Lasagna gardening is your secret weapon for transforming small spaces into thriving gardens with minimal effort!
By layering organic materials like grass clippings, leaves, and compost, you create nutrient-rich beds that require no tilling and zero digging—just patience and a little creativity. 🌱 Whether you're a beginner or a seasoned gardener, this technique proves that big harvests don’t need big yards.
Ready to dive in? Start small with a single bed, experiment with your layers, and watch your garden flourish! Once you’ve mastered the basics, try expanding to vertical lasagna gardens or adding companion plants for even better results. Happy gardening—your future harvests are waiting! 🌿