
Landscaping
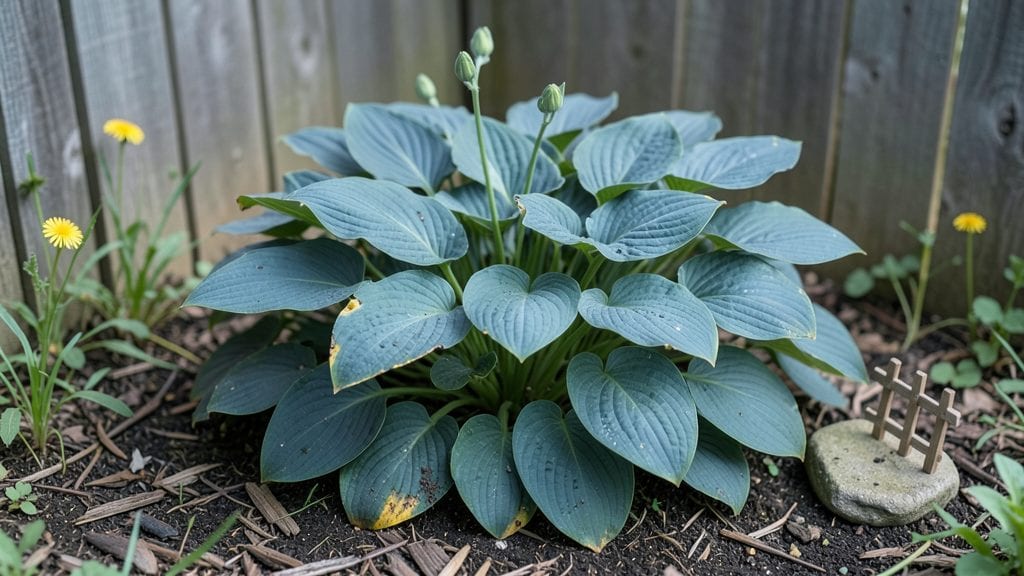
My little garden design transformed a 4x6-foot patch into a lush vertical wonderland that feeds me year-round. 🌿 The key? Stacking plants upward instead of spreading them out—herbs on trellises, tomatoes in hanging pockets, and flowers climbing walls where every inch counts.
I was skeptical at first, but after one season, my neighbors asked for my secret.
You don’t need fancy tools or a green thumb—just a few sturdy shelves, containers, and plants that love climbing or cascading. Start with 3-5 vertical elements (like a wall-mounted planter or a tiered rack) and fill them with fast-growing, compact varieties that thrive in small spaces.
The best part? You’ll harvest fresh greens in 4-6 weeks and flowers that bloom all summer long.
Imagine morning coffee surrounded by fragrant lavender and cherry tomatoes within arm’s reach, or a cozy evening with fresh basil and snap peas—all in a space smaller than a parking spot. The vertical layers create dramatic visual interest while keeping everything accessible, and you’ll never waste another square foot again.
This works for balconies, patios, or even sunny windowsills—just adjust the plant choices for your light conditions. Let’s turn that tiny space into a thriving, beautiful garden that actually produces something delicious.
📚 In This Guide
- What you need
- Instructions
- Tips and common mistakes
- Wrapping up and next steps
What you need
- ● Vertical Planters: 1–3 wall-mounted planters (12"–18" deep, 12"–24" wide)
- ● 1–2 hanging planters (10"–14" diameter, with sturdy hooks)
- ● 1–2 tiered shelves or stackable pots (for layered greenery)
- ● Soil & Drainage: High-quality potting mix (1–2 bags, 2–3 cubic feet each)
- ● Perlite or vermiculite (1 small bag, for aeration)
- ● Drainage rocks or gravel (1 small bag, for planters)
- ● Plants (Year-Round Variety): Herbs: Basil, thyme, or mint (3–5 plants)
- ● Vegetables: Cherry tomatoes, lettuce, or strawberries (2–4 plants)
- ● Flowers: Petunias, pansies, or ferns (3–6 plants)
- ● Vines: Ivy, jasmine, or nasturtiums (1–2 plants for trailing)
- ● Tools: Trowel (for planting)
- ● Pruning shears (for trimming)
- ● Measuring tape (for spacing)
- ● Gloves (to protect your hands)
- ● Decorative trellis or lattice (for climbing plants)
- ● Solar-powered garden lights (for ambiance)
- ● Self-watering planters (to reduce maintenance)
- ● Mulch (to retain moisture and suppress weeds)
- ● Paint or stain (to customize planters)
Instructions for creating a vertical layered little garden
Transform even the smallest space into a lush, functional garden using vertical layers that maximize beauty and harvest.
🌱 Step 1: Plan Your Vertical Structure and Layer Heights
Start by sketching your vertical design, dividing it into three distinct layers: the top canopy (3-4 feet tall), the mid-height layer (18-24 inches), and the ground-level layer (6-12 inches). I use a sturdy wooden frame or repurposed shelves—just ensure the structure can support 15-20 pounds per square foot once planted. The top layer should feature sun-loving plants like rosemary or dwarf fruit trees, while the mid-height layer works well for herbs and compact vegetables like bush beans or peppers. Ground-level plants like strawberries or lettuce thrive in the lowest tier.
Measure each layer’s depth before planting—6-inch pots work for mid-height plants, while 8-inch pots suit larger ground-level specimens. Place your structure in a location with at least 6 hours of sunlight daily, adjusting for shade-tolerant plants if needed. This layered approach prevents overcrowding and ensures every plant gets the light and space it needs.
🪴 Step 2: Choose Containers and Fill with Lightweight Soil
Select containers with multiple drainage holes—terracotta pots or fabric grow bags work best for vertical gardens. Fill each pot with 2-3 gallons of lightweight potting mix (never garden soil, which compacts and drains poorly). I blend mine with 1 part perlite to improve aeration and prevent waterlogging. For the top layer, use 1 gallon of potting mix per 8-inch pot, while mid-height and ground-level layers can accommodate 2-3 gallons per pot depending on plant size.
Press the soil down gently to eliminate air pockets, but avoid compacting it—roots need room to breathe. Pre-moisten the soil with warm water until it’s evenly damp but not soggy. This step ensures your plants start with optimal moisture and prevents the shock of sudden watering later. Label each pot with the plant name and date to track growth and maintenance needs.
☀️ Step 3: Plant for Seasonal Interest and Vertical Harmony
Begin with your top canopy layer, planting slow-growing perennials or dwarf varieties like lavender, thyme, or fig trees—these establish roots first and provide long-term structure. For the mid-height layer, add herbs like basil or oregano alongside compact vegetables such as bush beans or cherry tomatoes. These plants grow quickly and benefit from the support of the vertical frame. Finally, fill the ground-level layer with spreaders like strawberries or lettuce, which cascade gently over the edges for a soft, natural look.
Space plants according to their mature size—6 inches apart for herbs, 12 inches apart for vegetables, and 18 inches apart for larger perennials. Water deeply after planting to settle the soil and encourage root growth. This layered approach not only maximizes space but also creates a visually balanced garden that thrives year-round.
💧 Step 4: Water and Maintain for Long-Term Success
Water your vertical garden every 2-3 days during the first two weeks, checking that the top inch of soil feels dry before rewatering. Once established, most vertical gardens require deep watering 2-3 times per week, depending on your climate. I use a drip irrigation system for the top layers to ensure even moisture distribution—this prevents overwatering the lower tiers. Mulch the ground-level layer with 1-2 inches of organic mulch to retain moisture and suppress weeds, while the upper layers benefit from a light layer of gravel or decorative stones to reduce evaporation.
Fertilize every 4-6 weeks with a balanced, slow-release fertilizer to support steady growth. Prune leggy or overgrown plants regularly to maintain the vertical structure and encourage bushier growth. This ongoing care keeps your little garden thriving, productive, and visually stunning without taking up much space.
Tips & tricks for perfect vertical layered garden design
A few strategic moves will help your vertical garden thrive beyond the basic instructions—especially when working with limited space.
Layer Height Precision: When planning your 3-4 foot top canopy layer, consider adding 1-2 inch deep pockets to the sides of your wooden frame. These pockets create extra planting space for trailing plants like nasturtiums or small succulents without altering your original 18-24 inch mid-height or 6-12 inch ground-level dimensions. This clever adaptation adds 20-30% more growing area without requiring additional vertical space.
Soil Mix Strategy: For the top layer's 1 gallon of potting mix per 8-inch pot, I blend 70% premium potting soil, 20% perlite, and 10% composted worm castings. The worm castings provide gentle, long-lasting nutrients that prevent the need for frequent fertilizing. For mid-height and ground-level layers using 2-3 gallons, maintain this same ratio but increase the compost to 15% for faster establishment of bush beans and cherry tomatoes.
Sunlight Optimization: The required 6 hours of sunlight can be tricky in urban spaces. If your location gets only 4-5 hours of direct sun, position your vertical structure to capture morning sun (which is less intense) and supplement with reflective surfaces like white walls or mirrors to bounce additional light onto the mid-height layer. This technique effectively extends the light exposure by 1-2 hours without moving the structure.
Watering System Hack: For the critical 2-3 days of initial watering, place your drip irrigation system on a timer set for 10 minutes every 48 hours. This ensures even moisture distribution to all layers without overwatering. After establishment, adjust to 15 minutes every 72 hours for the 2-3 weekly waterings. The timer prevents the top layers from drying out while allowing the ground-level plants to absorb moisture at their own pace.
Pro Tips for Little Garden Design
- A few strategic moves will help your vertical garden thrive beyond the basic instructions—especially when working with limited space.
- Layer Height Precision: When planning your 3-4 foot top canopy layer, consider adding 1-2 inch deep pockets to the sides of your wooden frame.
- Soil Mix Strategy: For the top layer's 1 gallon of potting mix per 8-inch pot, I blend 70% premium potting soil, 20% perlite, and 10% composted worm castings.
Frequently asked questions
Got questions about maximizing your tiny space? Here are the answers to the most common ones!
Whether you're a beginner or a seasoned gardener, these tips will help you create a thriving little garden that’s both beautiful and functional.
What are the best plants for a small vertical garden?
Opt for compact, high-yield plants like cherry tomatoes, strawberries, herbs (basil, thyme, parsley), and leafy greens (lettuce, spinach). Choose varieties bred for containers or vertical growth—look for labels like "dwarf" or "bush." Succulents and ferns also thrive in vertical spaces with minimal sunlight.
How long does it take to see results in a vertical garden?
Fast-growing plants like radishes or bush beans may sprout in 2–4 weeks, while herbs and strawberries take 4–8 weeks. Perennials (e.g., lavender) establish roots in a season but reward you with year-round growth. Patience pays off—layering plants with varying maturity timelines ensures continuous harvests!
Can I build a vertical garden on a budget?
Repurpose materials like pallets, PVC pipes, or old ladders as frames. Use recycled containers (yogurt cups, tin cans) for pockets, and skip pricey soil by mixing coco coir with compost. Thrift stores often have affordable trellises or shelves. Pro tip: Start small—even a single wall-mounted planter adds greenery without breaking the bank!
How do I protect my vertical garden from harsh weather?
Secure lightweight planters with bungee cords or hooks to prevent wind damage. In freezing climates, wrap pots in bubble wrap or move them indoors. For rain, use drip irrigation or waterproof planters with drainage holes. Bonus: Choose cold-hardy plants like kale or winter pansies to extend your growing season.
What if my vertical garden looks messy or overgrown?
Prune regularly to encourage bushier growth and prevent pests. Deadhead flowers (remove spent blooms) to redirect energy to new growth. For herbs, trim stems above a leaf node to stimulate branching. If vines sprawl, adjust trellises or add soft ties. A little maintenance keeps your garden tidy and productive!
| Quick Fixes for Common Issues |
|---|
|
Yellow leaves? Overwatering—check drainage or reduce frequency. Pests? Introduce ladybugs or spray neem oil (organic!). Slow growth? Boost nutrients with fish emulsion or compost tea. |
Wrapping up and next steps
A little garden design with vertical layers isn’t just about saving space—it’s about transforming your outdoor area into a thriving, year-round sanctuary. By stacking plants, adding greenery, and maximizing every inch, you create a lush, functional retreat that blooms with beauty and productivity.
Whether you’re a beginner or a seasoned gardener, this approach proves that big dreams don’t need big yards!
Ready to get started? Sketch your vision, gather your supplies, and dive in—your future garden awaits! 🌱✨