Tools
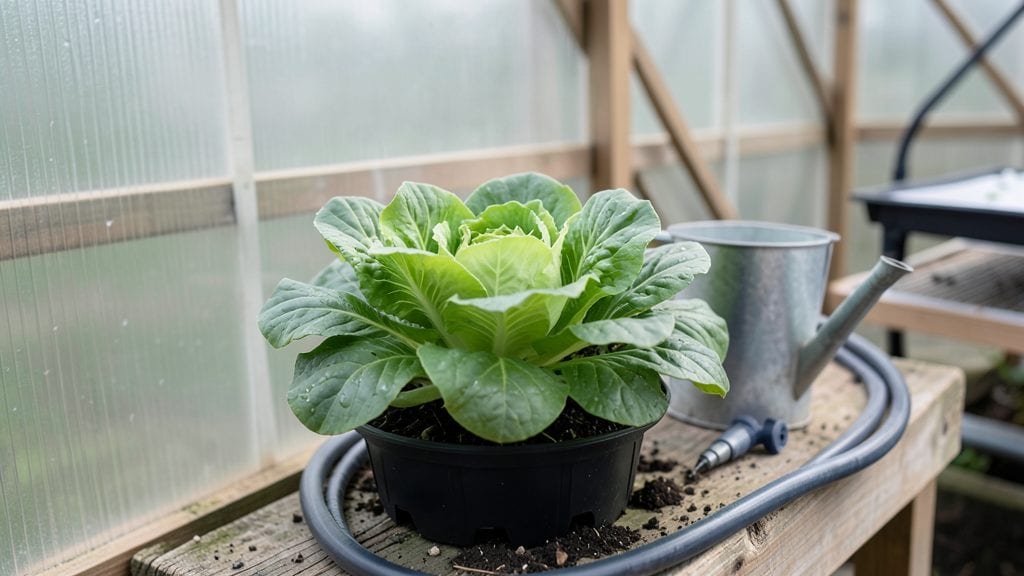
A mini garden greenhouse turned my shady balcony into a thriving winter garden when nothing else would grow. 🌱 The right size protects seedlings from frost while keeping your space organized—no more sprawling plastic domes or bulky setups.
I started with a 3-foot model that fits snugly against my railing, and it’s become my secret weapon for early starts and late-season harvests.
These compact greenhouses come in materials from sturdy polycarbonate to lightweight fabric, with sizes ranging from 12 inches to 4 feet—perfect for herbs, lettuce, or even tiny tomato plants. The key is positioning: place yours where it gets at least 4-6 hours of sunlight daily, even in winter.
A small fan inside on warm days prevents humidity buildup, and removable shelves maximize vertical space for seedlings or cuttings.
You’ll love how it extends your growing season by 4-6 weeks on either end, shielding plants from wind and pests while keeping them warm. My basil stayed lush through December, and my pepper seedlings germinated in March instead of waiting for May.
The best part? No more wrestling with flimsy row covers or hoping for the best—this little shelter does the heavy lifting.
Works for urban balconies, patio corners, or even windowsills. Whether you’re hardening off seedlings or overwintering tender perennials, this setup keeps your plants happy without taking over your yard. Let’s get yours set up for next season!
📚 In This Guide
- What you need
- Instructions
- Tips and common mistakes
- Wrapping up and next steps
What you need
- ● Greenhouse kit or frame: Choose a compact design (e.g., 2’x2’ or 3’x3’). Polycarbonate or acrylic panels are durable and insulating.
- ● Base or stand: A sturdy wooden pallet, cinder blocks, or a pre-made greenhouse base (ensure it’s level!).
- ● Clear plastic sheeting or polycarbonate panels: 4mm–6mm thickness (for walls/roof). Measure to cover the frame.
- ● Hinges and latch: 2–4 hinges (depending on door size) + a magnetic or hook latch for easy access.
- ● Vents or mesh screens: 1–2 adjustable vents (for airflow) + fine mesh (to keep pests out).
- ● Screws, bolts, and washers: Stainless steel or galvanized (½”–1” length, quantity depends on frame).
- ● Drill/driver + bits: For assembling the frame and attaching hardware.
- ● Measuring tape, pencil, and level: Precision is key for a snug fit!
- ○ Optional but helpful: Thermometer/hygrometer (to monitor conditions).
- ● Shade cloth (30–50% coverage for hot climates).
- ● Small fan (for circulation in summer).
- ● Grow lights (LED or fluorescent, 12–24W for seedlings).
Step-by-Step instructions for building a mini garden greenhouse
Here's how to construct a sturdy, space-saving greenhouse that extends your growing season—no advanced skills required!
🪴 Step 1: Assemble the Base Frame
Start by laying out the 4 wooden base boards (12" x 12" x 1") in a square formation. Use the 4 corner brackets to secure each board at the joints—tighten screws diagonally to create a perfectly level foundation. I always double-check with a carpenter's square to ensure all angles are 90 degrees. This square base will support your greenhouse structure perfectly.
Next, attach the 4 vertical support posts (24" tall) to each corner using the remaining 4 corner brackets. These posts should stand straight and plumb—tap them gently with a rubber mallet if needed. The posts will hold your greenhouse's walls and roof, so precision here prevents wobbling later. Once secured, your frame should look like a miniature four-legged table.
☀️ Step 2: Install the Clear Polycarbonate Panels
Slide the 4 wall panels (12" x 24") into the vertical slots between the base and roof frame. The panels should fit snugly but not forcefully—if they resist, adjust the brackets slightly. I like to start with the back panel first, then work my way around to the front. The clear polycarbonate lets sunlight through while protecting plants from wind and pests.
For the roof, place the single roof panel (18" x 18") on top, centering it carefully. Secure it with the 4 roof brackets—don't overtighten, or you'll crack the plastic. The slight dome shape helps rainwater run off easily. Once installed, your greenhouse should look like a tiny, transparent box with sturdy walls.
💧 Step 3: Add Ventilation and Stability Features
Install the 2 adjustable vents (6" x 6") on opposite sides of the roof frame. These let you control airflow—open them slightly on warm days to prevent overheating. I position one vent near the front and one at the back for balanced circulation. The vents snap into place but stay secure even in breezy conditions.
For extra stability, attach the 4 ground stakes to the base corners. Drive them 4-6 inches deep into the soil or potting mix. These stakes prevent the greenhouse from tipping in windy weather. If you're placing it on a patio or deck, skip the stakes and use 4 heavy-duty zip ties to secure the base to nearby furniture or railings.
✂️ Step 4: Position and Secure Your Greenhouse
Choose a location with partial shade—direct midday sun can overheat the interior, while too little light weakens plants. I place mine on a south-facing surface where it gets 4-6 hours of morning sun but stays cooler in the afternoon. Avoid low spots where water pools after rain.
Once positioned, add the 1 roll of weatherstripping around the base edges to seal gaps. This keeps curious critters out and retains warmth. If you're using it for seedlings, place a small fan (optional) nearby to circulate air—just keep it outside the greenhouse to avoid moisture buildup. Your mini greenhouse is now ready to protect plants year-round!
Tips & tricks for perfect mini garden greenhouse assembly
Building a sturdy mini greenhouse doesn't require advanced skills—just these game-changing tips to ensure your structure lasts seasons and protects plants like a pro!
Precision in Step 1: When assembling the base frame, I can't stress enough how critical those 90-degree angles are. Use a carpenter's square to verify each corner before securing brackets—this prevents wobbling later. Pro tip: Pre-drill screw holes in the base boards to avoid splitting the wood when attaching the corner brackets. This tiny step makes all the difference when your greenhouse stands up to wind!
Panel Installation Secret: In Step 2, the wall panels should slide in effortlessly. If they resist, you're either pushing too hard or the brackets aren't perfectly aligned. I recommend starting with the back panel first—this creates a reference point for the remaining three. For the roof panel, center it carefully before securing brackets. The slight dome shape isn't just decorative—it's what ensures rainwater runs off properly, preventing leaks that could drown your plants.
Ventilation Strategy: Those 6" x 6" adjustable vents in Step 3 are your greenhouse's thermostat. On warm days, open them slightly to prevent overheating—think of it like giving your plants a breath of fresh air. I position one vent near the front and one at the back for balanced airflow. If you're growing heat-sensitive plants like lettuce, crack both vents fully during peak afternoon sun. The key is monitoring the interior temperature—if condensation forms on the panels, it's time to ventilate!
Stability Solutions: For extra security, especially in windy areas, drive those 4 ground stakes 4-6 inches deep at a 45-degree angle toward the greenhouse. This creates resistance against tipping. On patios or decks, use heavy-duty zip ties to secure the base to furniture legs or railings—just make sure the ties aren't too tight, or they'll restrict airflow around the base. A stable greenhouse means happy, undisturbed plants!
Pro Tips for Mini Garden Greenhouse
- Building a sturdy mini greenhouse doesn't require advanced skills—just these game-changing tips to ensure your structure lasts seasons and protects plants like a pro!
- Precision in Step 1: When assembling the base frame, I can't stress enough how critical those 90-degree angles are.
- Panel Installation Secret: In Step 2, the wall panels should slide in effortlessly.
Frequently asked questions
Got questions about your mini garden greenhouse?
You’re not alone! Here are answers to the most common concerns—from setup to troubleshooting—to help you grow with confidence.
What’s the best time of year to set up a mini greenhouse?
A mini greenhouse works year-round, but the best time to set it up is early spring (before last frost) or late summer (to extend the growing season). If you’re using it for cold-hardy plants like herbs or greens, winter setup can also work—just ensure proper ventilation to prevent frost buildup. Start with tender seedlings in spring for the fastest results!
How often should I water plants in a mini greenhouse?
Check soil moisture daily—mini greenhouses trap humidity, so plants may need less water than outdoors. Stick your finger 1–2 inches into the soil; if it’s dry, water thoroughly but avoid soggy roots. Use a self-watering tray or drip system for convenience. Pro tip: Open vents for 10–15 minutes daily to reduce condensation and prevent fungal issues.
Can I use a mini greenhouse for vegetables, or just flowers?
Mini greenhouses are perfect for vegetables like lettuce, herbs, peppers, and cherry tomatoes—they thrive in controlled warmth. Leafy greens and microgreens grow especially fast. For fruiting plants (like tomatoes), prune regularly to maximize airflow. Just ensure your greenhouse has enough space for mature plants (check height/width specs).
How do I keep pests out of my mini greenhouse?
Prevent pests with these tricks:
- Screen vents (fine mesh) to block flies and aphids.
- Inspect plants weekly—remove eggs or chewed leaves immediately.
- Use neem oil or insecticidal soap as a natural deterrent.
- Avoid overcrowding (poor airflow invites fungus gnats).
If pests strike, isolate affected plants and treat with organic sprays. Pro tip: Place a saucer of water with a drop of dish soap inside to trap gnats!
What do I do if my greenhouse gets too hot or foggy?
Overheating or excessive condensation is common in compact spaces. Here’s how to fix it:
- Ventilate daily: Crack open doors/vents for 20+ minutes, especially on sunny days.
- Shade cloth: Use a 30–50% shade cover if temps exceed 85°F (29°C).
- Reduce watering: Damp soil + heat = steamy conditions.
- Frost warning: If temps drop below 40°F (4°C), add a small fan or heat mat for sensitive plants.
Most mini greenhouses include adjustable vents—use them!
Wrapping up and next steps
A mini garden greenhouse is your secret weapon for year-round gardening success—no matter your space or climate! 🌱 Whether you're extending your growing season, protecting delicate plants, or experimenting with microgreens, this compact solution delivers big results.
With the right setup and care, you’ll enjoy fresher harvests, fewer pests, and a thriving green oasis anytime.
Ready to dive in? Start by sketching your design, gathering supplies, and picking your first plants. Your perfect mini greenhouse awaits—happy building! 🛠️✨