Tools
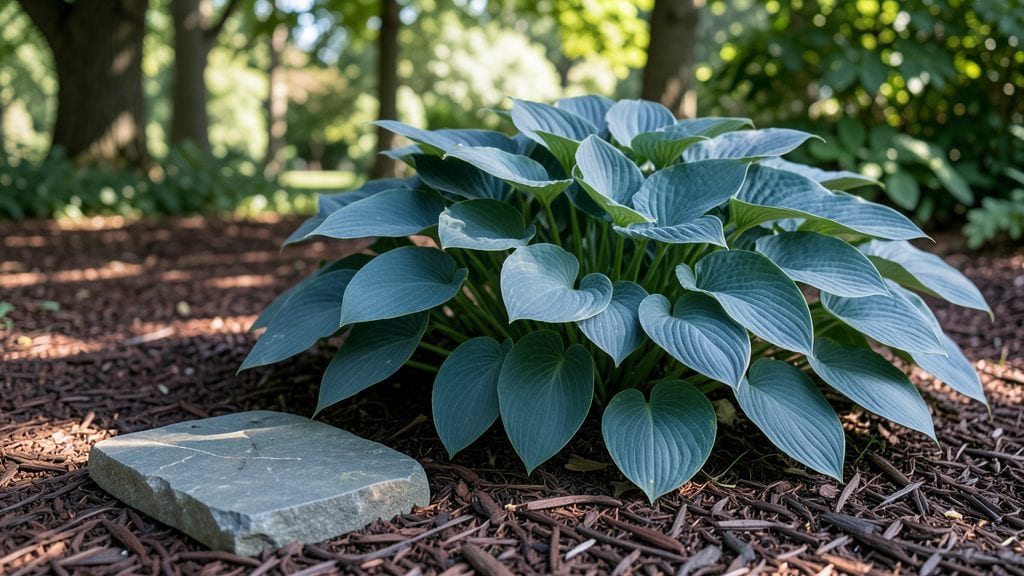
A mini hosta garden transforms even the shadiest corner into a lush, green sanctuary—no yard required. 🌿 I designed mine in a 3-foot-by-5-foot patch under a maple tree, where nothing else would grow, and now it’s the most vibrant spot in my garden.
The key? Choosing compact varieties like 'Blue Mouse Ears' or 'Halcyon' that stay under 12 inches tall while delivering maximum foliage impact.
Hostas thrive in shade, making them perfect for problem areas like under decks or along fences. Pair them with ferns or astilbes for texture, or add a few dwarf conifers for height contrast.
Containers work too—just use wide, shallow pots to mimic their natural ground-hugging habit. The best part? They multiply every year, giving you free plants to share or expand your garden.
By summer, your mini hosta garden will feel like a secret woodland retreat, complete with velvety leaves and subtle fragrance. The real magic happens in late spring when new growth emerges, and again in fall when foliage turns golden or burgundy. It’s privacy without the fuss—just foliage, shade, and serenity.
Works for balconies, courtyard planters, or even a single large container. The only rule? Don’t overcrowd—give each plant at least 12 inches of space to prevent mildew. Now let’s get planting!
📚 In This Guide
- What you need
- Instructions
- Tips and common mistakes
- Wrapping up and next steps
What you need
- ● Hosta plants: 3–5 small hosta varieties (e.g., Hosta 'Blue Angel' or Hosta 'Guacamole' for vibrant colors). Choose sizes 4"–6" pots for quick growth.
- ● Containers: 1–2 shallow pots (12"–16" diameter) or a raised planter (12" deep). Ensure drainage holes are present!
- ● Potting mix: 1 bag (1–2 cubic feet) of high-quality, well-draining soil (add perlite or compost for extra fluff).
- ● Mulch: 1–2 bags of organic mulch (e.g., shredded bark or pine needles) to retain moisture.
- ● Gloves & trowel: A sturdy pair of gardening gloves and a small trowel for planting.
- ● Watering can or hose: With a gentle spray nozzle for even moisture.
- ● Decorative stones or pebbles to line the base of your planter.
- ● Miniature garden stakes or labels for plant identification.
- ● Slow-release fertilizer (e.g., osmocote) for a nutrient boost.
- ● Fogger or misting bottle for humidity-loving hostas in hot climates.
Step-by-Step instructions for creating a mini hosta garden
Here's how to craft a lush, low-maintenance hosta garden that thrives in tight spaces.
🪴 Step 1: Choose and Prepare Your Planting Spots
Hostas love shade, so pick a location that gets no more than 4-6 hours of morning sun daily. A north-facing spot or under tall trees works perfectly. Clear the area of weeds and rocks, then loosen the soil with a garden fork to a depth of 6-8 inches. This helps roots spread easily.
For a 4-plant mini garden, mark planting spots 12-18 inches apart—closer spacing creates a dense, privacy-friendly curtain. Use a wooden stake or spray paint to outline each circle. If your soil drains poorly, mix in 2-3 inches of compost to improve aeration without overwhelming the plants.
🌱 Step 2: Dig Holes and Plant Hostas Carefully
Dig holes twice as wide as the hosta's root ball but only as deep as the container's base. This prevents burying the crown too deeply, which can cause rot. Gently remove each hosta from its pot and tease the roots apart if they're circling tightly—this encourages outward growth.
Place the plant in the hole so the top of the root ball sits just below soil level. Fill the hole with soil, pressing lightly to remove air pockets. Water each plant deeply until moisture seeps 2 inches below the surface. This settles the soil and helps roots establish quickly.
💧 Step 3: Mulch and Water for Long-Term Health
Spread 2-3 inches of mulch (like shredded bark or pine needles) over the soil surface, keeping it 2 inches away from plant stems to prevent rot. Mulch retains moisture, suppresses weeds, and keeps roots cool—hostas hate heat stress. Water once a week during the first growing season, aiming for 1 inch of water per week.
Check soil moisture by sticking your finger 1 inch deep; if it's dry, water again. Avoid overhead sprinklers—they can stain leaves and spread fungal diseases. Instead, use a soaker hose or drip irrigation to deliver water directly to the roots.
✂️ Step 4: Monitor and Maintain for Year-Round Growth
Hostas grow best with minimal intervention, but remove any yellowing or damaged leaves as they appear. In early spring, trim back any dead foliage to encourage fresh growth. If slugs become a problem (they love hostas!), set up beer traps or diatomaceous earth around the plants at dusk.
Fertilize lightly in early spring with a balanced, slow-release fertilizer (like 10-10-10) to support new growth. Over-fertilizing leads to weak stems and attracts pests. By late summer, reduce watering slightly—hostas go semi-dormant in heat, and soggy soil invites rot.
☀️ Step 5: Adjust Light and Care as Seasons Change
In fall, hostas prepare for dormancy. Reduce watering to every 10-14 days unless rainfall is heavy. If your garden gets more sun in winter, move potted hostas to a shadier spot—they’ll thank you with fewer browned leaves. Prune back any frost-damaged foliage in early spring before new shoots emerge.
Watch for pests like aphids or spider mites—they thrive in dry conditions. A gentle spray of water or neem oil usually clears them up. With proper care, your mini hosta garden will thicken over 2-3 years, creating a lush, evergreen privacy screen that needs almost no upkeep.
Tips & tricks for perfect mini hosta garden
A few simple tricks will help your hosta garden thrive and grow into that lush, evergreen privacy screen you're dreaming of.
The Light Factor: Hostas are shade lovers, but not all shade is equal. The 4-6 hours of morning sun mentioned in Step 1 is ideal because afternoon sun can scorch delicate leaves. If your garden gets late afternoon sun, consider adding a sheer fabric shade cloth during peak hours (around 1-4 PM) to protect your plants. This simple adjustment can make all the difference in leaf health and color.
Root Ball Prep: When you're teasing apart those circling roots in Step 2, take your time—this isn't just about loosening roots, it's about encouraging outward growth. I like to use my fingers to gently separate the roots while holding the plant at an angle. This creates more surface area for water and nutrient absorption right from the start. Think of it as giving your hostas a head start on establishing their root system.
Mulch Magic: That 2-3 inches of mulch in Step 3 isn't just decorative—it's working overtime to protect your hostas. I recommend using pine needles or cedar chips because they naturally repel slugs (which love hostas!) while maintaining that perfect moisture level. Just remember to keep it 2 inches away from stems to prevent rot. You'll notice fewer weeds popping up too, making maintenance even easier.
Seasonal Watering: The once-a-week watering in Step 3 is perfect for growing season, but don't forget to adjust as seasons change. In fall, when hostas prepare for dormancy, reduce watering to every 10-14 days. You'll know you're doing it right when the leaves start to yellow naturally—this is their way of telling you they're getting ready for winter. The key is to keep soil moist but not soggy throughout all seasons.
Pro Tips for Mini Hosta Garden
- A few simple tricks will help your hosta garden thrive and grow into that lush, evergreen privacy screen you're dreaming of.
- The Light Factor: Hostas are shade lovers, but not all shade is equal.
- Root Ball Prep: When you're teasing apart those circling roots in Step 2, take your time—this isn't just about loosening roots, it's about encouraging outward growth.
Frequently asked questions
Got questions about creating your dream mini hosta garden?
Here are answers to the most common ones—so you can dive in with confidence!
How much sunlight do hostas really need for a mini garden?
Hostas thrive in partial to full shade—think 3 to 6 hours of morning sun or dappled light. If your space gets intense afternoon sun, opt for blue or striped varieties (like 'Blue Angel' or 'Francee'), which tolerate slightly more light. Too much sun? Yellowing leaves signal stress—trim back or add shade cloth!
When is the best time to plant hostas in a small garden?
Spring (after the last frost) or early fall (4–6 weeks before frost) are ideal. Spring planting gives roots time to establish before summer heat, while fall planting lets them settle before winter dormancy. Avoid planting in extreme heat—hostas hate soggy roots in hot soil!
How often should I water a mini hosta garden?
Water deeply 1–2 times per week, aiming for 1 inch of water total. New plants need more (every 2–3 days) until established. Mulch with shredded bark (2–3 inches) to retain moisture and suppress weeds. Overwatering causes root rot—ensure containers or beds have drainage!
What’s the best way to keep pests away from my tiny hosta patch?
Slugs and snails are the biggest culprits! Handpick them at night (use a flashlight) or set out beer traps (bury a shallow dish filled with beer). For prevention, surround plants with diatomaceous earth or copper tape. Avoid chemical pesticides—they harm beneficial insects like ladybugs!
Can I grow hostas in containers instead of a ground garden?
Use 10–12 inch pots with drainage holes and a mix of peat moss, perlite, and compost. Dwarf varieties (like 'Pandora' or 'Blue Mouse Ears') are perfect for containers. Rotate pots seasonally to ensure even sunlight exposure, and repot every 2–3 years to refresh soil.
Do hostas survive winter in a small-space garden?
Most hostas are hardy to USDA zones 3–8—they’ll come back year after year! In cold climates, mulch heavily (4–6 inches) with straw or leaves to insulate roots. Tender varieties (like tropical hostas) may need winter protection or container overwintering in a garage. Prune dead foliage in early spring, before new growth appears!
Wrapping up and next steps
A mini hosta garden is the perfect way to bring lush, low-maintenance greenery to even the smallest of spaces—whether it’s a balcony, patio, or cozy corner.
With the right selection of hostas, a few simple tools, and a dash of creativity, you’ll enjoy year-round privacy and beauty without the hassle. 🌿
Ready to transform your space? Start by sketching your design, gathering your supplies, and planting with confidence. Before you know it, your mini oasis will be thriving—and you’ll be the envy of the neighborhood! Happy gardening! 🌱