Tools
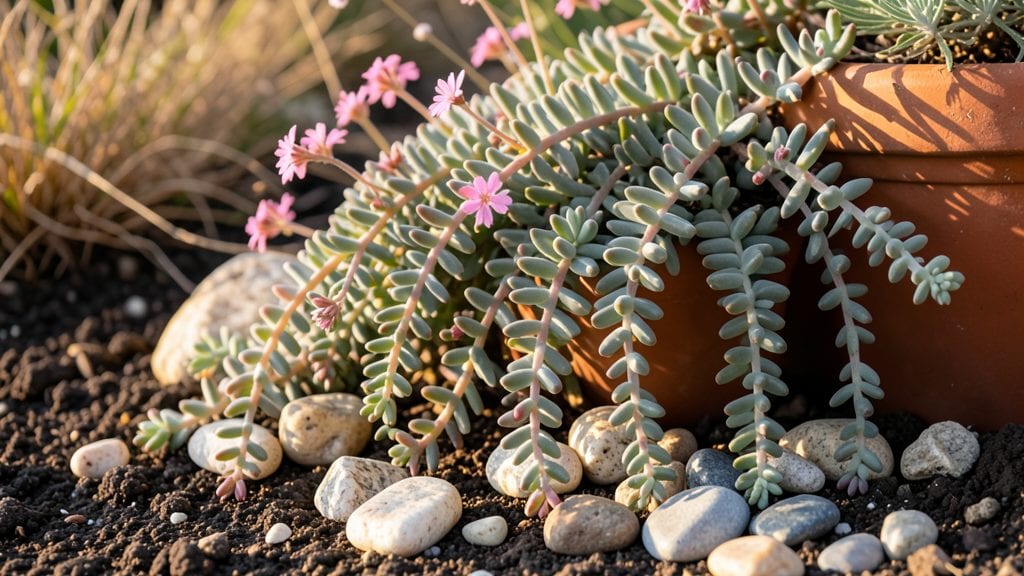
A mini rock garden transforms even a 1-square-foot patch into a miniature world of texture and charm. 🌿 I stumbled upon this idea after filling a shallow tray with pebbles, moss, and a single sedum plant—what started as a whim became my most satisfying garden project.
The key is playing with scale: tiny rocks, miniature plants, and just enough soil to keep roots happy without drowning them.
You don’t need fancy tools—just a container (or bare ground), some gravel, a few alpine plants, and a sprinkle of creativity. I use 3-inch-deep trays for drainage and fill the bottom with coarse river rocks, then add a thin layer of potting mix.
The magic happens when you mix in plants like hen-and-chicks, thyme, or creeping phlox—they thrive in shallow soil and cascade beautifully over edges.
By the time you’re done, you’ll have a self-contained ecosystem that looks like it belongs in a storybook. The moss stays lush, the rocks stay cool, and the plants spread just enough to feel alive without needing constant care.
Plus, it’s the perfect project for small spaces, balconies, or even windowsills.
Fairy gardens? Zen escapes? Mountain landscapes? The theme is yours—just keep the proportions small and the drainage fast. Here’s how to make yours come to life without the fuss.
📚 In This Guide
- What you need
- Instructions
- Tips and common mistakes
- Wrapping up and next steps
What you need
- ● Container: A shallow tray, ceramic pot, or wooden box (8"–12" wide, with drainage holes).
- ● Rocks & Stones: 1–2 larger feature rocks (3"–6" diameter) for focal points.
- ● 10–20 smaller pebbles/gravel (½"–1" size) for texture.
- ○ Optional: Moss or lichen (for a fairytale vibe).
- ● Soil: Cactus or succulent mix (well-draining, ~2–3 lbs).
- ● Mini Plants: 2–4 small succulents, ferns, or air plants (e.g., Haworthia or Sedum).
- ● Drainage Layer: Small gravel or perlite (~1 cup).
- ● Garden Trowel: Small hand trowel for planting.
- ● Spray Bottle: For misting plants (especially air plants).
- ○ Decorative Elements (Optional): Miniature figurines (fairies, mushrooms, or animals).
- ● Twine, pebbles, or sand for pathways.
- ● LED tea lights (for a magical glow).
Step-by-Step instructions for building your mini rock garden
Let's create a charming fairytale landscape using simple materials and a little creativity.
🪴 Step 1: Choose and Prepare Your Container
Pick a shallow container with drainage holes—think wide, flat trays or ceramic bowls that are at least 6 inches deep. I like to use vintage teacups or old baking dishes for a whimsical touch. Line the bottom with 1 inch of small gravel to ensure proper drainage and prevent root rot. This layer will keep your soil from becoming waterlogged while allowing excess moisture to escape.
Place your container in a spot that gets 4-6 hours of sunlight daily. A south-facing windowsill or patio works perfectly. If you're using a decorative container without drainage, place it on a saucer or tray to catch any excess water. The key here is balance—you want a container that's both functional and charming, so don't be afraid to mix practicality with personality.
🌱 Step 2: Layer Soil and Rocks for Structure
Fill the container about halfway with a mix of potting soil and coarse sand—about 2 parts soil to 1 part sand. This blend ensures good drainage while still providing nutrients for your plants. Press down lightly to create a firm base, but don't compact it too much. You want roots to have room to grow without struggling.
Next, arrange your rocks. Start with larger stones along the edges or in clusters to create natural-looking "boulders" or pathways. Smaller rocks can fill in gaps and mimic pebbled streams. I like to place a few flat stones horizontally to create little "tables" or seating areas for tiny plants. Arrange them organically—no need for perfect symmetry. This is your fairytale world, so let your creativity guide you!
💧 Step 3: Plant Your Miniature Flora
Choose small, slow-growing plants like succulents, miniature ferns, or tiny flowering plants like moss phlox or baby's tears. These thrive in shallow soil and add texture and color to your scene. Dig small holes just big enough to hold the roots of each plant, then gently place them in position. Press the soil around the base lightly to secure them without compacting.
Space plants about 2-3 inches apart to give them room to grow. If you're adding moss, sprinkle it lightly over the soil surface and mist it with water to help it take hold. Avoid overcrowding—this garden is all about creating a cozy, detailed landscape, not a packed jungle. Think of it like arranging a tiny forest: each plant should have its own little home.
☀️ Step 4: Add Finishing Touches and Maintain
Now for the fun part—adding whimsical details! Use pebbles to create tiny pathways, tiny figurines for fairytale characters, or even a miniature bridge or fence. I like to add a few tiny pinecones or acorns for natural texture. Water gently but thoroughly, ensuring the soil is moist but not soggy. Let excess water drain away completely before placing the container back in its spot.
Place your mini rock garden in its final location and give it a light misting every 2-3 days, or when the top inch of soil feels dry. Avoid overwatering—these tiny plants don't need much, and too much moisture can cause rot. Watch for signs of stress like wilting or yellowing leaves, and adjust your watering as needed. With a little care, your fairytale landscape will thrive and bring joy for months to come!
Tips & tricks for perfect mini rock garden
Creating your own fairytale landscape is all about the little details that bring it to life. Here are my go-to tips to help you craft a garden that feels magical and thrives for months.
Container Creativity: Don't limit yourself to just one container! You can create a multi-level garden by stacking shallow trays or bowls of different sizes. This adds depth and dimension to your scene, making it look like a real miniature landscape. Just make sure each container has proper drainage or sits on a saucer to catch excess water. I once used a vintage teacup collection for a tiered fairytale village, and it became the centerpiece of my living room!
Rock Arrangement Secrets: When placing your rocks in Step 2, think about how they'll tell a story. Create a winding path that leads to a "tiny house" (flat stone) or a little bridge (a curved piece of driftwood). I like to use a mix of smooth and rough rocks—smooth ones for pathways and rough ones for boulders—to add texture and interest. Place a few rocks slightly buried in the soil to mimic natural rock formations.
Plant Selection Tips: In Step 3, consider pairing plants with different heights and textures. A tall succulent can act as a tiny tree, while trailing plants like baby's tears can create waterfall effects over rocks. For extra color, add tiny wildflowers or miniature impatiens. Remember, these plants stay small, so you can get creative with their placement without worrying about overcrowding.
Maintenance Made Easy: To simplify watering in Step 4, place your garden on a saucer or tray and add a thin layer of pebbles. This creates a natural reservoir that keeps moisture consistent. I also recommend using a spray bottle for misting—it gives you more control over how much water each plant gets. Check the soil moisture by gently pressing your finger into the top inch; if it feels dry, it's time to water.
Pro Tips for Mini Rock Garden
- Creating your own fairytale landscape is all about the little details that bring it to life.
- Container Creativity: Don't limit yourself to just one container!
- Rock Arrangement Secrets: When placing your rocks in Step 2, think about how they'll tell a story.
Frequently asked questions
Got questions about creating your own mini rock garden?
You’re not alone! Here are some of the most common queries—plus quick, practical answers to help you bring your fairytale vision to life.
What’s the best time of year to start a mini rock garden?
A mini rock garden thrives year-round, but spring or early fall is ideal for planting. In warmer climates, you can start anytime! If using live plants, avoid extreme heat or frost. For non-living designs (like painted rocks or moss), timing doesn’t matter—just pick a day with mild weather for easier handling. Pro tip: If using succulents or alpine plants, wait until temps stabilize above 50°F (10°C).
How much does a mini rock garden cost to build?
Costs vary wildly! A budget-friendly setup (DIY rocks, thrifted containers, and basic tools) can run $10–$30. Fancy versions with rare stones, custom lighting, or live plants may hit $50–$200+. Check local rock shops, hardware stores, or even nature trails for free/cheap materials. Pro tip: Repurpose old dishes, terracotta pots, or even a shallow tray as a container to save cash!
How do I keep pests (like snails or ants) out of my mini rock garden?
Pests love moisture and organic matter. To deter them:
- Dry it out: Use gravel or sand as a base layer to reduce humidity.
- Natural barriers: Surround edges with diatomaceous earth or crushed eggshells.
- Avoid overwatering: Mini gardens dry faster—water only when the top inch feels dry.
- Plant smart: Include pest-repellent plants like lavender or rosemary.
Can I paint or decorate my rocks? How?
Use acrylic paint (non-toxic, outdoor-rated) or rock sealant for durability. Start with a light base coat, let dry, then add details with fine brushes or even a toothpick. For a magical touch, try:
- Gold/silver leaf for a fairytale glow.
- Glitter glue (outdoor-safe) for sparkle.
- Stencils for consistent designs.
What are some low-maintenance plants for a mini rock garden?
Skip high-maintenance plants! Opt for drought-tolerant, slow-growing options like:
- Sedum (Stonecrop): Succulent, thrives in cracks, and comes in fun colors.
- Moss: Adds texture and stays green with minimal water.
- Miniature lavender: Fragrant and pest-resistant.
- Alpine plants (e.g., Sempervivum): Hardy and compact.
What do I do if my mini rock garden starts looking messy?
Don’t stress—revival is easy! Try these fixes:
- Rake or brush: Gently remove debris or fallen leaves.
- Trim plants: Snip overgrown foliage with small scissors.
- Refresh mulch: Add a thin layer of sand or small pebbles.
- Re-pot if needed: If soil is compacted, transfer to a fresh container.
Wrapping up and next steps
A mini rock garden isn’t just a charming addition to your space—it’s a creative outlet that brings nature’s magic to your fingertips! Whether you’re crafting a whimsical fairytale scene or a serene Zen escape, these tiny landscapes offer endless possibilities for relaxation and joy. 🌿✨
Ready to dive in? Start small—gather your tools, pick your rocks, and let your imagination run wild. Your next project could be just a few pebbles away!